# ShopperQuiz documentation (full text)
> ShopperQuiz is a product recommendation quiz builder for Shopify and WooCommerce stores. Shoppers answer a quiz, every answer votes for products, and the top-voted products are recommended.
ShopperQuiz is a product recommendation quiz builder for Shopify and WooCommerce stores. Instead of making shoppers browse through hundreds of products hoping they'll find the right one, ShopperQuiz guides them through a short, personalized quiz — and recommends the exact products that match their needs.
The result: higher conversion rates, fewer returns, and shoppers who feel understood.
---
## How it works
ShopperQuiz uses a **voting engine** to match shoppers with products. Here's the flow:
1. A shopper opens your store and launches the quiz
2. They answer a series of questions you've designed — about their preferences, goals, skin type, budget, hair concerns, or anything relevant to your products
3. Behind the scenes, every answer they select **votes for specific products** in your catalog
4. When the quiz ends, the products with the most votes are recommended — ranked from best match to least
This is fundamentally different from decision-tree quizzes that use simple if/then branching. With ShopperQuiz, every answer contributes to the final result, so shoppers get recommendations that reflect their full profile — not just their last answer.
---
## Who it's for
ShopperQuiz is built for product-focused merchants who want to reduce decision fatigue for their shoppers. It works especially well for stores that sell:
- **Beauty and skincare** — match products to skin type, concerns, and routines
- **Hair care** — recommend by hair type, condition, and goals
- **Supplements and wellness** — guide shoppers based on health goals and lifestyle
- **Fashion and apparel** — match styles, fit preferences, and occasions
- **Pet products** — recommend by breed, age, and health needs
- **Home and lifestyle** — match by room type, aesthetic, and budget
If your store has more than a handful of products and shoppers often need help choosing, ShopperQuiz is a good fit.
---
## Key concepts
Before diving in, here are the core concepts you'll encounter throughout ShopperQuiz:
### Quizzes
A quiz is the top-level container. Each quiz has its own questions, welcome screen, results screen, and settings. You can have multiple quizzes on one store — for example, one for skincare and one for hair care.
### Questions and answers
Questions are what shoppers see and respond to. Each question has a set of answers to choose from. You control the question text, layout (list or grid), and how many answers a shopper can select (single or multiple).
### Vote assignment
Every answer you create can be assigned votes for specific products, collections, tags, or all products. When a shopper selects that answer, those votes are added to the running total. The products with the most accumulated votes at the end of the quiz become the recommendations.
### Filter questions
A filter question eliminates products that don't match a shopper's answer. For example, if a shopper says they want a vegan product, all non-vegan products are permanently removed from the results — regardless of how many votes they accumulate from other questions. Filters run before votes are counted.
### Results screen
The results screen is what shoppers see after completing the quiz. It shows their top recommended products with options to add to cart, buy now, or retake the quiz. You can configure the layout, number of products shown, button text, and fallback behavior when no products match.
### Widget
The quiz runs on your storefront as an embedded widget. On Shopify, it's added via a Theme App Extension. On WooCommerce, it's embedded using a shortcode or Gutenberg block. The widget is fully responsive and works on mobile, tablet, and desktop.
---
## Platforms supported
ShopperQuiz works with two e-commerce platforms:
**Shopify** — Install the ShopperQuiz app from the [Shopify App Store](https://apps.shopify.com/shopperquiz). Your products, collections, and tags are automatically synced. The quiz widget is added to your theme via a Theme App Extension.
**WooCommerce** — Install the ShopperQuiz plugin from your WordPress dashboard. Your products, categories, and tags are synced via the WooCommerce REST API. Embed the quiz anywhere using the `[shopperquiz]` shortcode or the Gutenberg block.
Each store connects to one platform only. If you run both a Shopify and a WooCommerce store, you'll need a separate ShopperQuiz account for each.
---
## The ShopperQuiz dashboard
Everything is managed from the ShopperQuiz dashboard at **app.shopper-quiz.com** — completely separate from your Shopify admin or WordPress dashboard. From here you can:
- Build and manage quizzes
- View responses and analytics
- Customize the widget's appearance
- Connect integrations like Klaviyo
- Manage your account and billing
---
## Next steps
- [Quick Start — Shopify](/getting-started/quickstart-shopify)
- [Quick Start — WooCommerce](/getting-started/quickstart-woocommerce)
Get ShopperQuiz running on your Shopify store in under 10 minutes.
## What you'll need
- A Shopify store (any plan)
- A ShopperQuiz account — sign up at **app.shopper-quiz.com**
## Step 1 — Connect your store
There are two ways to connect ShopperQuiz to your Shopify store:
**Option A — From the Shopify App Store**
1. Go to [apps.shopify.com/shopperquiz](https://apps.shopify.com/shopperquiz) and click **Install**
2. Approve the permissions in your Shopify admin and click **Install**
3. You'll be redirected to app.shopper-quiz.com to complete setup
**Option B — From the ShopperQuiz dashboard**
1. Sign up at **app.shopper-quiz.com**
2. Go to **Integrations** in the sidebar
3. Enter your store's default Shopify URL — the `.myshopify.com` URL assigned when you created your store (not a custom domain you may have added later). For example: `your-store.myshopify.com`
4. Click **Connect** — you'll be redirected to your Shopify admin to approve the installation
5. Once approved, you'll be brought back to your ShopperQuiz dashboard
ShopperQuiz is not an embedded app — it lives at app.shopper-quiz.com, separate from your Shopify admin, similar to how Klaviyo or Okendo operate.
## Step 2 — Your products sync automatically
Once connected, ShopperQuiz syncs your Shopify products, collections, and tags in the background. This usually takes less than a minute. You'll see your products appear in the Quiz Builder's right panel, ready to assign votes to.
Your catalog stays up to date automatically via webhooks — no manual imports needed.
## Step 3 — Build your first quiz
1. Click **Quizzes** in the sidebar, then **New quiz**
2. Give your quiz a name and you'll land in the **Quiz Builder**
From here:
- Edit the **Welcome Screen** — add a heading, description, and optional image
- Add questions using the + button in the left panel
- For each answer, assign votes to the products, collections, or tags that best match
- Configure the **Results Screen** — layout, button text, and how many products to show
If this is your first time, start with 3–5 questions. You can always add more later.
## Step 4 — Add the quiz to your storefront
ShopperQuiz works with any Shopify theme and embeds via a Theme App Extension block — no code required.
**First, get your Quiz ID**
Open your quiz in the Quiz Builder and click **Quiz Settings** — you'll find the Quiz ID there. You can also copy it directly from the URL in your browser while on the Quiz Builder page.
**Set up a page for your quiz**
We recommend placing your quiz on its own dedicated page. The ShopperQuiz widget expands to fill the page's content area, so adding it to an existing page will overlay content already there. A standalone page like `/pages/hair-quiz` or `/pages/find-my-products` works best.
1. In your Shopify admin, go to **Online Store → Pages** and create a new page
2. Give it a title and save it
3. To make it easier to find in the next step, add the page to your menu
**Add the quiz block in the theme editor**
1. Go to **Online Store → Themes** and click **Customize** (or **Edit theme** depending on your Shopify version)
2. In the top bar, use the page selector to switch to the page you just created — if you added it to your menu it will appear there
3. In the left panel, you'll see the page template broken into sections — look for the area between the header and footer (this is the page content area)
4. Click **Add section** in that area
5. Switch to the **Apps** tab — you'll see ShopperQuiz listed there
6. Select it, and a Quiz ID field will appear in the block settings
7. Paste your Quiz ID — the quiz will render immediately in the preview
8. Click **Save**
The quiz is now live on that page.
## Step 5 — Test it
Visit the page where you embedded the quiz and take it as a shopper would. Check that questions and answers display correctly, results show the products you expect, and the Add to cart and Buy now buttons work.
If the results aren't what you expect, revisit your vote assignments in the builder. The right panel shows each product's total accumulated votes across the entire quiz — use that to diagnose mismatches.
## You're live
As shoppers complete the quiz, their responses appear in **Analytics** and **Responses** in your ShopperQuiz dashboard.
## Next steps
- [Quiz Builder overview](/quiz-builder/overview) — learn how questions, answers, and votes work in depth
- [Shopify integration details](/integrations/shopify) — permissions, product sync, webhooks, and cart setup
- [Widget Styles](/widget-embedding/widget-styles) — customize the quiz to match your store's branding
Get ShopperQuiz running on your WooCommerce store in under 15 minutes.
## What you'll need
- A WordPress site with WooCommerce installed
- A ShopperQuiz account — sign up at **app.shopper-quiz.com**
- WooCommerce REST API keys (you'll generate these in step 1)
## Step 1 — Generate your WooCommerce API keys
ShopperQuiz connects to your WooCommerce store using REST API keys. To generate them:
1. In your WordPress admin, go to **WooCommerce → Settings → Advanced → REST API**
2. Click **Add key**
3. Give it a description (e.g. "ShopperQuiz"), set permissions to **Read/Write**, and click **Generate API key**
4. Copy the **Consumer Key** and **Consumer Secret** — you'll need both in the next step
Keep this page open or save the keys somewhere safe. The Consumer Secret is only shown once.
## Step 2 — Connect your store
1. Sign up or log in at **app.shopper-quiz.com**
2. Go to **Integrations** in the sidebar
3. In the WooCommerce card, enter:
- Your WordPress site URL (e.g. `https://yourstore.com`)
- Your Consumer Key (`ck_…`)
- Your Consumer Secret (`cs_…`)
4. Click **Connect WooCommerce**
ShopperQuiz will verify the credentials and connect your store. Your products, categories, and tags will start syncing in the background — this usually takes under a minute.
## Step 3 — Build your first quiz
1. Click **Quizzes** in the sidebar, then **New quiz**
2. Give your quiz a name and you'll land in the **Quiz Builder**
From here:
- Edit the **Welcome Screen** — heading, description, optional image
- Add questions using the + button in the left panel
- For each answer, assign votes to the products, categories, or tags that best match
- Configure the **Results Screen** — layout, button text, and how many products to show
If this is your first time, start with 3–5 questions. You can always add more later.
## Step 4 — Install the WordPress plugin
Install the ShopperQuiz plugin from the WordPress Plugin Directory:
1. In your WordPress admin, go to **Plugins → Add New Plugin**
2. Search for **ShopperQuiz**
3. Click **Install Now**, then **Activate Plugin**
You can also find it at [wordpress.org/plugins/shopperquiz](https://wordpress.org/plugins/shopperquiz/).
## Step 5 — Add the quiz to your store
**Get your Quiz ID**
Open your quiz in the Quiz Builder and click **Quiz Settings** — the Quiz ID is shown there. You can also copy it from the URL in your browser while on the Quiz Builder page.
**Embed using a shortcode**
Add the quiz to any page or post using the ShopperQuiz shortcode:
```
[shopperquiz id="your-quiz-id"]
```
Replace `your-quiz-id` with the ID you copied. The quiz will render wherever the shortcode is placed.
We recommend placing the quiz on its own dedicated page so it has the full content area to itself.
**Embed using the Gutenberg block**
If you use the WordPress block editor, search for the **ShopperQuiz** block, add it to your page, and enter your Quiz ID in the block settings.
## Step 6 — Test it
Visit the page where you embedded the quiz and take it as a shopper would. Check that questions and answers display correctly, results show the products you expect, and the Add to cart button works.
If results aren't what you expect, revisit your vote assignments in the builder. The right panel shows each product's total accumulated votes across the entire quiz.
## Step 7 — You're live
As shoppers complete the quiz, their responses appear in **Analytics** and **Responses** in your ShopperQuiz dashboard.
## Next steps
- [Quiz Builder overview](/quiz-builder/overview) — learn how questions, answers, and votes work in depth
- [WooCommerce integration details](/integrations/woocommerce) — API keys, product sync, webhooks, and cart setup
- [Widget Styles](/widget-embedding/widget-styles) — customize the quiz to match your store's branding
ShopperQuiz connects your quizzes to your store, your email and CRM tools, your ad platforms and analytics, and thousands of other apps. Every integration works the same on Shopify and WooCommerce. Manage them all under **Integrations** in the sidebar: each card opens a **Manage** drawer with its settings.
## All integrations
| Integration | What it does | Plan |
|---|---|---|
| [Shopify](https://docs.shopper-quiz.com/integrations/shopify) | Product sync, cart, and quiz revenue tracking | All plans |
| [WooCommerce](https://docs.shopper-quiz.com/integrations/woocommerce) | Product sync, cart, and quiz revenue tracking | All plans |
| [Klaviyo](https://docs.shopper-quiz.com/integrations/klaviyo) | Profiles with quiz answers, a Quiz Completed event for flows, list subscription | Starter+ |
| [Mailchimp](https://docs.shopper-quiz.com/integrations/mailchimp) | Contacts with answer tags, a quiz_completed event for journeys, audience subscription | Starter+ |
| [Resend](https://docs.shopper-quiz.com/integrations/resend) | Emails shoppers their recommendations, from your own domain | Starter+ |
| [Google Analytics 4](https://docs.shopper-quiz.com/integrations/google-analytics) | Quiz funnel, ecommerce and revenue events | Starter+ |
| [Meta Pixel](https://docs.shopper-quiz.com/integrations/meta-pixel) | Quiz events and purchases for Facebook and Instagram ads (Conversions API) | Starter+ |
| [TikTok Pixel](https://docs.shopper-quiz.com/integrations/tiktok-pixel) | Quiz events and purchases for TikTok ads (Events API) | Starter+ |
| [HubSpot](https://docs.shopper-quiz.com/integrations/hubspot) | Contacts with every answer as a filterable property, recommendations, quiz revenue, notes, lists, consent and optional deals | Starter+ |
| [Zapier](https://docs.shopper-quiz.com/integrations/zapier) | 5 instant triggers and 2 searches for 8,000+ apps | Starter+ |
| [Webhooks](https://docs.shopper-quiz.com/integrations/webhooks) | Signed quiz events to Make, n8n, Pabbly or your own server | Starter+ |
| [ShopperQuiz API](https://docs.shopper-quiz.com/integrations/shopperquiz-api) | Read quiz data from your own tools with an API key | Starter+ |
| [Subscriptions (Recharge)](https://docs.shopper-quiz.com/integrations/subscriptions) | Subscribe & save on quiz results with Recharge, Shopify Subscriptions, Skio, Loop and other subscription apps, or WooCommerce Subscriptions | Starter+ |
| [Product reviews](https://docs.shopper-quiz.com/integrations/product-reviews) | Star ratings, review counts and a Top rated badge on quiz results, from Judge.me, Yotpo, Loox, Okendo, Stamped or WooCommerce reviews | All plans |
## Shared concepts
### One newsletter checkbox for all email tools
The welcome screen's newsletter checkbox is the shopper's consent to marketing. If several email tools are connected (Klaviyo, Mailchimp, and HubSpot with a subscription type selected), a shopper who ticks it is subscribed in **all** of them. Shoppers who don't tick it are never subscribed, though their quiz answers can still sync as profile or contact data.
### Collecting an email
Klaviyo, Mailchimp, HubSpot, Resend, Lead events (Meta, TikTok, Zapier, webhooks) and email-based matching all need the shopper's email. Turn on **Collect email address** in the quiz's [welcome screen](https://docs.shopper-quiz.com/quiz-builder/welcome-screen) settings.
### Sync per quiz
The Klaviyo, Mailchimp, Google Analytics 4, Meta, TikTok, HubSpot, Zapier and Webhooks drawers have a **Sync per quiz** section. Expand it to turn the integration off for individual quizzes, for example test or internal quizzes. Quizzes are on by default, including new ones. (Resend is switched on per quiz in each quiz's [Results Screen](https://docs.shopper-quiz.com/quiz-builder/results-screen) settings instead.)
### Integration status
The Meta, TikTok, HubSpot, Zapier and Webhooks cards show **Needs attention** when recent sends started failing, for example after a token was revoked. Their drawers (and Google Analytics 4's) have a **Status** section showing when the last event was sent and the latest error. Google Analytics never reports errors back, so check its Realtime report to be sure events arrive.
### Quiz revenue
Purchases are linked to quizzes through your store's order notifications. See how it works for [Shopify](https://docs.shopper-quiz.com/integrations/shopify#order-tracking-and-revenue-attribution) and [WooCommerce](https://docs.shopper-quiz.com/integrations/woocommerce#order-tracking-and-revenue-attribution). The same linked purchase powers revenue in Analytics, the purchase events sent to GA4, Meta, TikTok, Zapier and webhooks, and quiz revenue on HubSpot contacts.
### Plans
Store integrations work on every plan. Every other integration is visible on the free plan, so you can see what it does, and needs **Starter or above** to connect. If a subscription lapses (free plan, past due, cancelled or an expired trial), connected integrations **pause**: nothing is sent, your settings are kept, and they resume automatically when the subscription is active again.
## Timing at a glance
| Integration | Data arrives |
|---|---|
| Meta, TikTok, Google Analytics 4 | Within seconds |
| Zapier, Webhooks, HubSpot | 15–30 seconds |
| Klaviyo, Mailchimp, Resend | About 30 seconds |
| Purchase events (all) | When the store reports the order as paid |
ShopperQuiz connects to Shopify via OAuth. When you connect your store, ShopperQuiz is authorised to read your products, collections, and tags, and to interact with your cart via the Storefront API. It does not require embedded app access or changes to your theme files — it operates entirely from app.shopper-quiz.com.
## One store per account
Each ShopperQuiz account connects to one store only — either Shopify or WooCommerce, never both simultaneously. If you run multiple Shopify stores, create a separate ShopperQuiz account for each one.
## Connecting your store
There are two ways to install and connect ShopperQuiz to your Shopify store:
**From the Shopify App Store** — install ShopperQuiz directly from [apps.shopify.com/shopperquiz](https://apps.shopify.com/shopperquiz). Click **Install**, approve the permissions in your Shopify admin, and you'll be redirected to app.shopper-quiz.com to complete setup.
**From the dashboard** — go to **Integrations** in the sidebar, enter your store's `.myshopify.com` domain (e.g. `your-store.myshopify.com`) in the Shopify card, and click **Connect Shopify**. You'll be redirected to your Shopify admin to approve the installation and then brought back to your dashboard.
Either way, once approved you'll land on the Integrations page with a connected status and your products syncing in the background.
## Product sync
Once connected, ShopperQuiz syncs your full product catalog — products, collections, and tags — into its own database. This cached copy is what powers the right panel in the Quiz Builder and the voting engine at runtime.
The initial sync runs automatically and usually completes within a minute. After that, your catalog stays up to date via Shopify webhooks — when you add, update, or remove products, collections, or tags in Shopify, the changes propagate to ShopperQuiz automatically.
If you ever need to force a full re-sync — for example after a bulk product import — click **Sync now** on the Shopify card in Integrations. The sync count (products, collections, tags) is shown on the card so you can verify everything came through.
## Permissions
ShopperQuiz asks Shopify for read-only access to your **products** and **inventory** (for the catalog and in-stock filtering) and your **orders** (to attribute quiz revenue). It never changes your products or orders.
## Order tracking and revenue attribution
ShopperQuiz measures which sales came from your quiz:
1. When a shopper adds a product with the quiz's **Add to cart** button, that cart line gets a hidden marker linking it to their quiz response.
2. When the order is **paid**, Shopify notifies ShopperQuiz.
3. If the order contains a product from the quiz, ShopperQuiz records the revenue, currency and purchased items on that quiz response.
This powers revenue in [Analytics](https://docs.shopper-quiz.com/analytics/overview) and [Responses](https://docs.shopper-quiz.com/analytics/responses), and the purchase events sent to Google Analytics 4, Meta, TikTok, Zapier and webhooks.
- Only orders containing at least one product added from the quiz results are attributed. Products added from normal store pages aren't linked to the quiz.
- Each quiz attempt is attributed to its **first** paid order.
- ShopperQuiz doesn't store customer details from Shopify orders.
## Managing your connection
Click **Manage** on the Shopify card to open a side drawer with:
- **Store details** — store name, domain, and last synced time
- **Synced data counts** — how many products, collections, and tags are cached
- **Open Shopify Admin** — a quick link to your Shopify admin
- **Disconnect store** — removes the OAuth connection. Your quizzes and all quiz data are kept intact. You can reconnect at any time.
- **Disconnect & delete all quiz data** — permanently removes the connection and deletes all your quizzes, questions, answers, and synced product data. This cannot be undone. You'll be asked to type DELETE to confirm.
Disconnecting only removes the store connection from ShopperQuiz — it does not uninstall the ShopperQuiz app from your Shopify admin. To fully remove the app, uninstall it from **Shopify Admin → Apps**.
ShopperQuiz connects to WooCommerce using REST API keys — a Consumer Key and Consumer Secret you generate in your WordPress admin. There is no OAuth redirect. Once connected, ShopperQuiz syncs your products, categories, and tags and keeps them up to date via webhooks.
## One store per account
Each ShopperQuiz account connects to one store only — either Shopify or WooCommerce, never both simultaneously. If you run multiple WooCommerce stores, create a separate ShopperQuiz account for each one.
## Generating API keys
ShopperQuiz needs Read/Write access to your WooCommerce store. To generate the keys:
1. In your WordPress admin, go to **WooCommerce → Settings → Advanced → REST API**
2. Click **Add key**
3. Set a description (e.g. "ShopperQuiz"), set permissions to **Read/Write**, and click **Generate API key**
4. Copy the **Consumer Key** (`ck_…`) and **Consumer Secret** (`cs_…`) — you'll need both in the next step
The Consumer Secret is only shown once. If you lose it, delete the key and generate a new one.
## Connecting your store
In your ShopperQuiz dashboard, go to **Integrations** in the sidebar. In the WooCommerce card, enter:
- Your WordPress site URL (e.g. `https://yourstore.com`)
- Your Consumer Key (`ck_…`)
- Your Consumer Secret (`cs_…`)
Click **Connect WooCommerce**. ShopperQuiz will verify the credentials and connect. Your products, categories, and tags will start syncing in the background — this usually takes under a minute.
## Product sync
Once connected, ShopperQuiz syncs your full product catalog — products, categories, and tags — into its own database. This cached copy powers the right panel in the Quiz Builder and the voting engine at runtime.
The initial sync runs automatically after connecting. After that, your catalog stays up to date via WooCommerce webhooks: when you add, update or remove products, the changes reach ShopperQuiz automatically, including each product's categories and tags. If you rename or delete categories or tags themselves, click **Sync now** to refresh them.
If you need to force a full re-sync, click **Sync now** on the WooCommerce card in Integrations. The sync counts are shown on the card so you can verify everything came through.
## Order tracking and revenue attribution
ShopperQuiz measures which sales came from your quiz. This needs the **ShopperQuiz plugin** installed and active on your WordPress site (the same plugin that provides the [quiz shortcode and block](https://docs.shopper-quiz.com/widget-embedding/woocommerce-shortcode)).
1. When a shopper goes to the cart or checkout from the quiz results, the plugin remembers their quiz response for **one hour** in their browser.
2. An order placed in that window is tagged with the quiz response. This works with classic checkout, block checkout and the Store API.
3. When the order reaches **Processing**, **Completed** or **On hold**, WooCommerce notifies ShopperQuiz, which records the revenue, currency and purchased items on that quiz response.
This powers revenue in [Analytics](https://docs.shopper-quiz.com/analytics/overview) and [Responses](https://docs.shopper-quiz.com/analytics/responses), and the purchase events sent to Google Analytics 4, Meta, TikTok, Zapier and webhooks.
- Each quiz attempt is attributed to its **first** paid order.
- ShopperQuiz registers the WooCommerce webhooks it needs automatically when you connect (products and orders), and re-checks them when you open the Integrations page.
## Managing your connection
Click **Manage** on the WooCommerce card to open a side drawer with:
- **Store details** — store name, URL, and last synced time
- **Synced data counts** — products, categories, and tags
- **Open WordPress Admin** — a quick link to your WP admin
- **Disconnect store** — removes the API key connection. Your quizzes and all quiz data are kept intact. You can reconnect at any time by entering new API keys.
- **Disconnect & delete all quiz data** — permanently removes the connection and deletes all your quizzes, questions, answers, and synced product data. This cannot be undone. You'll be asked to type DELETE to confirm.
Send every quiz shopper to Klaviyo with their answers, recommended products and a **Quiz Completed** event you can trigger flows from. Shoppers who tick your newsletter box are subscribed to the list you choose.
**Available on:** Starter plan and above · **Platforms:** Shopify and WooCommerce (identical)
## What gets synced
| Data | Where it appears in Klaviyo | When |
|---|---|---|
| Email and name | Profile | When the quiz is completed |
| **Each answer** | A profile property per question, named `SQ : `. For example, the property `SQ Hair Discovery: Hair type` has the value `Curly` | When the quiz is completed |
| Recommended products | Profile property `SQ : Recommended Products` (a list) | When the quiz is completed |
| **Quiz Completed** event | Metric on the profile, with *Quiz Name*, *Quiz ID*, *Recommended Products* and every answer as event properties | When the quiz is completed |
| List subscription | The list you choose, **only if the shopper ticked the newsletter box** | As soon as they continue past the welcome screen, so shoppers who leave the quiz early are still added |
Properties are named per quiz, so two quizzes never overwrite each other's answers on the same profile. Multi-select answers are saved as a list. If two questions in one quiz share the same text, the second becomes `… (2)`.
**Requirements:**
- The quiz must ask for an **email** on its [welcome screen](https://docs.shopper-quiz.com/quiz-builder/welcome-screen). Without an email, there's no profile to sync.
- To subscribe shoppers, turn on the **newsletter checkbox** on the welcome screen. That one checkbox is the shopper's consent for every connected email tool (Klaviyo, Mailchimp).
## Connect Klaviyo
1. Go to **Integrations → Klaviyo → Connect Klaviyo**.
2. Click **Connect with Klaviyo**, sign in to Klaviyo, choose your account and click **Allow**. You return to ShopperQuiz connected.
3. Under **Subscriber list**, pick an existing list or choose **Create a new list** and name it.
4. Review **What syncs** (all on by default) and close the drawer.
### Alternative: private API key
If you can't use **Connect with Klaviyo**, use a private API key instead:
1. In Klaviyo, go to **Settings → API keys → Create Private Key** and choose **Custom Key**.
2. Grant **Lists**, **Profiles**, **Subscriptions** and **Events**: Full Access, and **Accounts**: Read Access. Leave everything else at No Access.
3. Paste the key (`pk_…`) in the drawer and save.
## What syncs (settings)
| Toggle | What it controls |
|---|---|
| Sync quiz answers | Each answer as a profile property for segmenting |
| Sync recommended products | The recommended products property |
| Emit "Quiz Completed" event | The event that triggers flows |
| Subscribe to list | Adding opted-in shoppers to your list |
**Sync per quiz:** expand this section to turn Klaviyo off for individual quizzes (for example test quizzes). All quizzes sync by default.
## Use it in Klaviyo
**Welcome flow for quiz takers:** create a flow with the trigger **Metric → Quiz Completed**. In the email, use event properties with Klaviyo's `lookup` filter, for example `{{ event|lookup:'Recommended Products' }}` or a specific answer `{{ event|lookup:'SQ Hair Discovery: Hair type' }}`.
**Segments by answer:** create a segment with **Properties about someone → SQ Hair Discovery: Hair type → equals → Curly**.
**Split a flow by answer:** add a conditional split on the profile property, for example dry hair versus oily hair.
**One list per store:** the subscriber list applies to all quizzes. To tell quizzes apart, segment on the quiz properties or the event's *Quiz Name*.
## Timing and consent
- Data reaches Klaviyo about **30 seconds** after the shopper finishes.
- Subscriptions are added straight away, even if the list uses double opt-in, because the welcome-screen checkbox is the shopper's explicit consent. Shoppers who didn't tick it are never subscribed, but their answers and the Quiz Completed event still sync. That is quiz data the shopper gave you directly.
- New subscribers appear in the list within a minute (Klaviyo processes subscriptions in the background).
## Disconnect
**Integrations → Klaviyo → Manage → Disconnect Klaviyo** stops all syncing and removes the saved connection. Profiles and data already in Klaviyo are kept.
## Troubleshooting
| Problem | Fix |
|---|---|
| Nothing appears in Klaviyo | Check that the quiz asks for an email, that the shopper finished it, and that **Sync per quiz** is on for that quiz. Wait 30–60 seconds |
| Profile exists but isn't in the list | The shopper didn't tick the newsletter box, or **Subscribe to list** is off, or no list is selected. A brand-new subscription can take a minute to appear |
| "Create a new list" fails | Your Klaviyo connection is missing list permissions. Disconnect and connect again with **Connect with Klaviyo**, or give the private key **Lists: Full Access** |
| Answers overwrite each other | Two questions have identical text. Rename one, or rely on the automatic `(2)` suffix |
| Connection stops working | Klaviyo access was revoked. Reconnect from the drawer |
Add quiz shoppers to Mailchimp with every answer as a contact tag, the products they were recommended, and a **quiz_completed** event you can start Customer Journeys from. Shoppers who tick your newsletter box are subscribed to the audience you choose.
**Available on:** Starter plan and above · **Platforms:** Shopify and WooCommerce (identical)
## What gets synced
| Data | Where it appears in Mailchimp | When |
|---|---|---|
| Email and first name | Contact (first name in the **FNAME** field) | When the quiz is completed |
| **Each answer** | A tag per answer: `SQ : = `, for example `SQ Hair Discovery: Hair type = Curly` | When the quiz is completed |
| Recommended products | A tag per product: `SQ : Recommended = ` | When the quiz is completed |
| **quiz_completed** event | Contact activity, with `quiz_name`, `quiz_id` and `recommended_products` | When the quiz is completed |
| Audience subscription | Status **Subscribed**, **only if the shopper ticked the newsletter box** | As soon as they continue past the welcome screen |
Multi-select questions create one tag per selected answer. Tags are limited to 100 characters, so very long questions or answers are shortened.
Shoppers who **didn't** tick the newsletter box are still added to the audience with their answers, but as **non-subscribed (transactional)** contacts. They won't receive marketing campaigns.
**Requirements:**
- The quiz must ask for an **email** on its [welcome screen](https://docs.shopper-quiz.com/quiz-builder/welcome-screen).
- To subscribe shoppers, turn on the **newsletter checkbox** on the welcome screen. That one checkbox is the shopper's consent for every connected email tool (Klaviyo, Mailchimp).
## Connect Mailchimp
1. Go to **Integrations → Mailchimp → Connect Mailchimp**.
2. Click **Connect with Mailchimp**, sign in, and click **Allow**. You return to ShopperQuiz connected.
3. Under **Audience**, pick an existing audience.
4. Review **What syncs** (all on by default) and close the drawer.
### Alternative: API key
In Mailchimp, go to **Account & billing → Extras → API keys → Create A Key**, then paste the key (it ends in a suffix such as `-us14`) in the drawer and save.
### Creating an audience from ShopperQuiz
You can create a new audience from the drawer. Mailchimp requires a name, from-name, from-email, a permission reminder, and your organisation's postal address (shown in email footers by anti-spam law).
**Free Mailchimp plans:**
Mailchimp's free plan allows only one audience and blocks creating audiences through apps. If creating fails, create the audience in Mailchimp (**Audience → All contacts → Create Audience**), then pick it from the dropdown.
## What syncs (settings)
| Toggle | What it controls |
|---|---|
| Sync quiz answers | Answer tags |
| Sync recommended products | Recommended-product tags |
| Emit "quiz_completed" event | The event that starts Customer Journeys |
| Subscribe to audience | Subscribing opted-in shoppers |
**Sync per quiz:** turn Mailchimp off for individual quizzes. All quizzes sync by default.
## Use it in Mailchimp
- **Segments by answer:** **Audience → Segments → New segment → Tags → contact is tagged → SQ Hair Discovery: Hair type = Curly**.
- **Journey for quiz takers:** create a Customer Journey with the starting point **API event** and the event name `quiz_completed`.
- **Recommendations in an email:** add a journey step that branches on the recommended-product tags, or reference them in segments for targeted campaigns.
## Timing and consent
- Data reaches Mailchimp about **30 seconds** after the shopper finishes.
- Opted-in shoppers are written as **Subscribed** directly, even if the audience uses double opt-in, because the welcome-screen checkbox is their consent.
- If your audience has **GDPR fields** (marketing permissions) enabled, Mailchimp may require you to set those permissions on contacts yourself.
## Disconnect
**Integrations → Mailchimp → Manage → Disconnect Mailchimp** stops syncing and removes the saved connection. Contacts already in Mailchimp are kept.
## Troubleshooting
| Problem | Fix |
|---|---|
| Nothing appears | Check that the quiz asks for an email, that the shopper finished, that an audience is selected, and that **Sync per quiz** is on. Wait 30–60 seconds |
| Contact appears but isn't subscribed | The shopper didn't tick the newsletter box, or **Subscribe to audience** is off |
| "Your Mailchimp plan doesn't allow creating audiences from here" | Create the audience in Mailchimp, then select it |
| Tags look cut off | Mailchimp tags have a length limit; shorten very long question or answer text |
The Resend integration lets you send personalised product recommendation emails to shoppers after they complete a quiz. Each merchant connects their own Resend account — emails are sent from your domain, using your API key, and appear as coming directly from your store. Available on the Starter plan and above.
## How it works
1. A shopper completes your quiz and provides their email address on the welcome screen.
2. ShopperQuiz queues an email containing their top recommended products.
3. Within 30 seconds, the email is sent via your connected Resend account — from your verified sender address, using the template you configured.
The shopper receives a branded email with product images, names, prices, and a direct link to each product on your store.
## Requirements
- A [Resend](https://resend.com) account (free tier covers up to 3,000 emails/month)
- A verified sending domain in Resend
- A Starter plan or above on ShopperQuiz
- **Collect email address** enabled on the quiz welcome screen
- **Send results to shopper's email** enabled in the Results Screen settings of your quiz
## Setting up Resend
### 1. Verify your sending domain in Resend
Before you can send emails, Resend requires you to verify a domain you own (e.g. `yourbrand.com`).
1. In Resend, go to **Domains → Add domain**
2. Enter your domain and follow the DNS verification steps
3. Once verified, your domain status will show as **Active**
You don't need a full domain — Resend also supports subdomains like `mail.yourbrand.com`.
### 2. Create an API key
1. In Resend, go to **API Keys → Create API key**
2. Give it a name (e.g. "ShopperQuiz")
3. Set permission to **Sending access** — ShopperQuiz only sends emails, it never reads them
4. Copy the key (you'll only see it once)
### 3. Connect in ShopperQuiz
1. Go to **Integrations** in the ShopperQuiz sidebar
2. On the **Resend** card, click **Connect Resend** to open the drawer
3. Enter your **API key** (`re_…`)
4. Enter a **From name**: the display name shoppers see, e.g. `ARTINIQ`
5. Enter your **From email**: the address emails are sent from. It must be on your verified domain, e.g. `hello@yourbrand.com`
6. Click **Connect Resend**
Once connected, the drawer shows how many emails were **sent this month**. Click **Manage** on the card to change these details later.
ShopperQuiz validates the API key by sending a test email to a Resend sink address before saving. If validation fails, double-check that the key has sending permissions and your domain is verified.
## Enabling email results per quiz
Connecting Resend enables the feature globally, but you control it per quiz. To start sending result emails for a quiz:
1. Open the quiz in the **Quiz Builder**
2. Click **Results Screen** at the bottom of the question list
3. Scroll to the **Email results** card
4. Toggle on **Send results to shopper's email**
5. Optionally customise the **Email subject line** (default: "Your personalised recommendations")
6. Click **Save changes**
Emails are only sent when both conditions are met: Resend is connected and the toggle is enabled on the quiz.
## Configuring the email template
The email template controls the visual appearance and content of every results email sent from your store. Go to **Email Template** in the sidebar to configure it.
See [Email Template](https://docs.shopper-quiz.com/quiz-builder/email-template) for a full walkthrough of all settings.
## Email analytics
Track how many emails have been sent, failed, and delivered via the **Email Analytics** page in the sidebar.
See [Email Analytics](https://docs.shopper-quiz.com/analytics/email-analytics) for details.
## Free plan
The Resend integration is not available on the free plan. If you are on free, the **Email results** toggle in the Results Screen editor will show a locked state. Upgrade to Starter or above to unlock it.
If you downgrade from a paid plan to free, your Resend credentials remain saved but emails will no longer be sent. They will resume automatically if you upgrade again.
## Disconnecting
Go to **Integrations → Resend → Manage** and choose **Disconnect**, then confirm. Result emails stop sending.
This removes your API key and sender details from ShopperQuiz. Emails that were already queued at that moment may still be attempted. Nothing is deleted from your Resend account.
## Troubleshooting
**"Invalid API key" on validation**
Make sure the key has **Sending access** permission (not read-only). Also confirm your domain is verified in Resend — unverified domains can cause key validation to fail.
**Emails not arriving**
- Check that **Send results to shopper's email** is enabled in the quiz's Results Screen settings
- Check that the shopper entered their email on the welcome screen
- Check **Email Analytics** for failed rows and their error reason
- Check your Resend dashboard logs for delivery events
**"Domain not verified" error in Email Analytics**
The From email address must be on a domain you've verified in Resend. Update the From email in the Integrations page to match a verified domain.
**Shopper got the same email twice**
This can happen if the shopper completed the quiz in two browser tabs simultaneously — each completion inserts a separate email into the queue. It is not a sending bug.
Send your whole quiz funnel to Google Analytics 4: quiz starts, every answer, completions, recommendations, add to cart, checkout, and **purchases with revenue** attributed to the quiz. Events are sent from ShopperQuiz's servers, so ad blockers and browser privacy settings don't stop them.
**Available on:** Starter plan and above · **Platforms:** Shopify and WooCommerce (identical)
## Events sent to GA4
Every event includes `sq_quiz_id` and `sq_quiz_name`.
| Event | When | Extra parameters |
|---|---|---|
| `sq_quiz_start` | The shopper starts the quiz | |
| `sq_question_answered` | Each question is answered | `sq_question_id`, `sq_question_text`, `sq_question_position`, `sq_answers` |
| `sq_quiz_complete` | The results page is reached | `sq_filters_matched`, `sq_filters_total`, `sq_recommended_count` |
| `view_item_list` | Recommendations are shown | Standard ecommerce `items` (the recommended products) |
| `add_to_cart` | Recommended products are added to the cart from the results | `currency`, `value`, `items` |
| `begin_checkout` | The shopper clicks checkout in the quiz | `currency`, `value`, `items` |
| `purchase` | The order is paid (sent by our server from your store's order notification) | `transaction_id`, `currency`, `value`, `items` |
`view_item_list`, `add_to_cart`, `begin_checkout` and `purchase` use GA4's standard ecommerce format, so they appear in GA4's **Monetization** reports and flow to linked Google Ads accounts.
## Connect GA4
You need two values from GA4:
1. **Measurement ID:** in GA4, go to **Admin → Data streams →** your web stream. Copy the ID that starts with `G-`.
2. **API secret:** on the same data stream page, open **Measurement Protocol API secrets → Create**, name it `ShopperQuiz`, and copy the secret value.
Then in ShopperQuiz, go to **Integrations → Google Analytics 4 → Connect Google Analytics**, paste both values and save. ShopperQuiz checks the values before saving.
The API secret is **required**: every quiz event is sent through GA4's Measurement Protocol.
## What gets tracked (settings)
| Toggle | Events |
|---|---|
| Funnel events | `sq_quiz_start`, `sq_quiz_complete` |
| Commerce & revenue | `view_item_list`, `add_to_cart`, `begin_checkout`, `purchase` |
| Per-question events | `sq_question_answered` (one per question) |
**Sync per quiz:** turn GA4 off for individual quizzes. All quizzes are tracked by default.
## Check that events arrive
1. Open GA4 → **Reports → Realtime**.
2. Take your quiz on your storefront.
3. Within about a minute you should see `sq_quiz_start`, `sq_question_answered` and the other events under **Event count by Event name**.
**GA4 never reports a wrong API secret:**
GA4 accepts events even when the API secret is wrong or deleted, and silently discards them. If **only** `purchase` appears, or nothing appears, create a new API secret on the **same** data stream as the Measurement ID, then save it in ShopperQuiz again.
## Get the most out of the data
**Mark the quiz as a conversion:** in GA4, go to **Admin → Events** and turn on **Mark as key event** for `sq_quiz_complete`. `purchase` is a key event by default.
**Make quiz parameters reportable:** GA4 only shows custom parameters in reports after you register them. Go to **Admin → Custom definitions → Create custom dimension** (scope: **Event**) for `sq_quiz_name`, `sq_question_text`, `sq_answers` and `sq_question_position`.
**Useful reports:**
| Question | How to answer it in GA4 |
|---|---|
| How much revenue did the quiz drive? | **Reports → Monetization → Ecommerce purchases**, or an Exploration with the `purchase` event filtered by `sq_quiz_name` |
| Where do shoppers drop off? | **Explore → Funnel exploration**: `sq_quiz_start` → `sq_question_answered` (by `sq_question_position`) → `sq_quiz_complete` → `add_to_cart` → `purchase` |
| What do shoppers answer? | **Explore → Free form** on `sq_question_answered`, with rows `sq_question_text` and `sq_answers` |
| Do quiz takers buy more? | Compare segments of users with and without `sq_quiz_complete` |
**Same shopper, same session:** if your store already runs GA4, ShopperQuiz reuses the shopper's existing GA4 visitor ID, so quiz events join the rest of their visit. Otherwise ShopperQuiz uses its own visitor ID.
## Notes
- `add_to_cart` fires when the shopper adds recommended products and opens the cart from the quiz. If they go straight to checkout, you'll see `begin_checkout` instead.
- `purchase` needs the order to be linked to the quiz. On Shopify, that means a product added from the quiz results. On WooCommerce, it means an order placed within an hour of going to the cart or checkout from the quiz. It fires once per quiz attempt.
- Standard GA4 reports can take 24–48 hours to show new events. **Realtime** shows them within a minute.
## Disconnect
**Integrations → Google Analytics 4 → Manage → Disconnect Google Analytics** stops all tracking. Data already in GA4 is kept.
## Troubleshooting
| Problem | Fix |
|---|---|
| Nothing in Realtime | Check the API secret belongs to the same data stream as the Measurement ID; create a new one if unsure. Check **Sync per quiz** is on |
| Only `purchase` appears | The API secret is wrong or stale. See the caution above |
| No `add_to_cart` | The shopper went straight to checkout. This is expected |
| No `purchase` | The order wasn't linked to the quiz, or wasn't paid. See Notes |
| Custom parameters missing in reports | Register them as custom dimensions. They only appear for events after registration |
Send quiz events to Meta (Facebook and Instagram ads) so you can build audiences of quiz takers, measure quiz-driven sales, and optimise campaigns. ShopperQuiz sends events through Meta's **Conversions API** from its servers, so ad blockers and iOS privacy settings don't stop them, and purchases are reported with real revenue.
**Available on:** Starter plan and above · **Platforms:** Shopify and WooCommerce (identical)
## Events sent to Meta
| Event | When | Type |
|---|---|---|
| `SQ_QuizStart` | The shopper starts the quiz | Custom |
| `Lead` | The shopper enters their email | Standard |
| `SQ_QuestionAnswered` | Each question is answered (includes question and answers) | Custom |
| `SQ_QuizComplete` | The results page is reached | Custom |
| `ViewContent` | Recommendations are shown (product IDs, value) | Standard |
| `SQ_AddToCart` or `AddToCart` | Recommended products are added to the cart from the results | See below |
| `SQ_InitiateCheckout` or `InitiateCheckout` | The shopper clicks checkout in the quiz | See below |
| `SQ_Purchase` or `Purchase` | The order is paid (sent from your store's order notification, with revenue and the order's real items) | See below |
All events carry `sq_quiz_id` and `sq_quiz_name`. Products are identified by your **store's product IDs**, with `content_type: product_group`, so they match a Shopify catalog synced through Meta's Facebook & Instagram app.
### Cart, checkout and purchase event names
The drawer lets you choose:
| Option | Names | Use when |
|---|---|---|
| **Quiz-specific (default)** | `SQ_AddToCart`, `SQ_InitiateCheckout`, `SQ_Purchase` | Your store already sends Meta its own purchase events, for example through Shopify's Facebook & Instagram app. Keeps conversions from being counted twice, and lets you build quiz-ROAS custom conversions |
| **Standard** | `AddToCart`, `InitiateCheckout`, `Purchase` | No other Meta pixel tracks your store's purchases |
## Match quality
To help Meta match events to people, ShopperQuiz sends (hashed where Meta requires it):
- the shopper's email (SHA-256 hashed)
- a hashed shopper ID
- the shopper's IP address and browser user agent
- Meta's `_fbp` browser cookie and `_fbc` ad-click ID, when your storefront has them (for example, if you also use Meta's pixel, or the shopper arrived from a Meta ad)
The IP address and user agent are deleted from ShopperQuiz after 30 days.
## Connect Meta
You need your **Pixel ID** (Meta also calls it a *dataset*) and a **Conversions API access token**.
1. In **Meta Events Manager**, open **Data sources** and select your pixel. Copy the **Pixel ID** (a long number).
2. On the pixel, open **Settings → Conversions API → Generate access token** (under *Set up direct integration*). Copy the token.
3. In ShopperQuiz, go to **Integrations → Meta Pixel → Connect Meta**, paste both values and save. ShopperQuiz checks them with Meta and shows your pixel's name.
**If token generation fails:**
If Meta's setup wizard shows "access token failed to generate", use the **Settings → Conversions API → Generate access token** route on the pixel instead.
## What gets tracked (settings)
| Toggle | Events |
|---|---|
| Funnel events | `SQ_QuizStart`, `SQ_QuizComplete` |
| Per-question events | `SQ_QuestionAnswered` |
| Leads | `Lead` |
| Commerce & revenue | `ViewContent`, add to cart, checkout and purchase |
**Sync per quiz:** turn Meta off for individual quizzes. All quizzes are tracked by default.
## Test your setup
1. In Events Manager, open your pixel → **Test events** and copy the **test code**, for example `TEST12345`.
2. Paste it in the drawer under **Test events**.
3. **Send test event** sends one `SQ_ConnectionTest` event. It appears in Test events within seconds.
4. **Test a full quiz run** turns on test mode for 2 hours. Every event from your next quiz runs, including the purchase, shows in Test events. Take your quiz, add a product, check out and complete a test order.
Events sent in test mode **also count** in your reports. The Overview can take 30 minutes or more to update (longer for a new pixel), and its default date range may not include today.
## Use it in Meta
- **Audiences:** **Audiences → Create a Custom Audience → Website** with event `SQ_QuizComplete` (everyone who finished the quiz) or `Lead`.
- **Quiz ROAS:** **Events Manager → Custom conversions → Create** based on `SQ_Purchase`, then add it as a column in Ads Manager.
- **Optimise campaigns** on `Lead`, or on standard `Purchase` if you chose standard names.
## Disconnect
**Integrations → Meta Pixel → Manage → Disconnect Meta** stops sending events and deletes the saved access token. Data already in Meta is kept.
## Troubleshooting
| Problem | Fix |
|---|---|
| Can't save (invalid token or Pixel ID) | Check the Pixel ID is the dataset's number, and generate a new token on that same pixel |
| Events don't show in Overview | Use **Test events** for live checking. The Overview updates later and its date range may exclude today |
| No `InitiateCheckout` | It only fires when the shopper uses the checkout button **inside** the quiz, not the store's cart page |
| No purchase | The order must be linked to the quiz and paid (see [Shopify](https://docs.shopper-quiz.com/integrations/shopify#order-tracking-and-revenue-attribution) / [WooCommerce](https://docs.shopper-quiz.com/integrations/woocommerce#order-tracking-and-revenue-attribution)) |
| Purchases counted twice | Switch commerce names to **Quiz-specific** |
| Card says "Needs attention" | Meta rejected recent events, usually because the token was revoked. Generate a new token and save it |
Send quiz events to TikTok Ads so you can build audiences of quiz takers, optimise campaigns on quiz leads, and measure quiz-driven sales. ShopperQuiz sends events through TikTok's **Events API** from its servers, so ad blockers and iOS privacy settings don't stop them, and purchases are reported with real revenue.
**Available on:** Starter plan and above · **Platforms:** Shopify and WooCommerce (identical)
## Events sent to TikTok
| Event | When | Type |
|---|---|---|
| `SQ_QuizStart` | The shopper starts the quiz | Custom |
| `Lead` | The shopper enters their email | Standard |
| `SQ_QuestionAnswered` | Each question is answered (includes question and answers) | Custom |
| `SQ_QuizComplete` | The results page is reached | Custom |
| `ViewContent` | Recommendations are shown | Standard |
| `SQ_AddToCart` or `AddToCart` | Recommended products are added to the cart from the results | See below |
| `SQ_InitiateCheckout` or `InitiateCheckout` | The shopper clicks checkout in the quiz | See below |
| `SQ_Purchase` or `Purchase` | The order is paid (sent from your store's order notification, with revenue, order ID and the order's real items) | See below |
All events carry `sq_quiz_id` and `sq_quiz_name`. Products are identified by your **store's product IDs**, with `content_type: product_group`, so they match catalogs synced by the TikTok app for Shopify.
### Cart, checkout and purchase event names
| Option | Names | Use when |
|---|---|---|
| **Quiz-specific (default)** | `SQ_AddToCart`, `SQ_InitiateCheckout`, `SQ_Purchase` | Your store already sends TikTok its own purchase events, for example through the TikTok app for Shopify. Avoids counting conversions twice |
| **Standard** | `AddToCart`, `InitiateCheckout`, `Purchase` | No other TikTok pixel tracks your purchases, **and** you want to optimise campaigns on these events |
**Optimising campaigns:**
TikTok can only optimise campaigns on **standard** events. Quiz-specific events work for reporting and audiences. You can always optimise on quiz leads, because `Lead` is standard.
## Match quality
ShopperQuiz sends, hashed where TikTok requires it:
- the shopper's email (SHA-256 hashed)
- a hashed shopper ID
- the shopper's IP address and browser user agent
- TikTok's `_ttp` browser cookie and `ttclid` ad-click ID, when available (for example, if the shopper arrived from a TikTok ad)
The IP address and user agent are deleted from ShopperQuiz after 30 days.
## Connect TikTok
You need your **Pixel Code** and an **Events API access token**.
1. In **TikTok Ads Manager**, go to **Tools → Events → Web events** and open your pixel. Copy the **Pixel Code** shown under the pixel name. It's about 20 capital letters and numbers, for example `C4ABCDEFGH1234567890`.
2. On the pixel, open **Settings → Events API → Generate Access Token**. Copy the token.
3. In ShopperQuiz, go to **Integrations → TikTok Pixel → Connect TikTok**, paste both values and save. ShopperQuiz checks them with TikTok before saving.
**Unused tokens expire:**
TikTok automatically expires access tokens that aren't used for about 90 days. If ShopperQuiz reports an invalid or expired token, generate a new one and save it in the drawer.
## What gets tracked (settings)
| Toggle | Events |
|---|---|
| Funnel events | `SQ_QuizStart`, `SQ_QuizComplete` |
| Per-question events | `SQ_QuestionAnswered` |
| Leads | `Lead` |
| Commerce & revenue | `ViewContent`, add to cart, checkout and purchase |
**Sync per quiz:** turn TikTok off for individual quizzes. All quizzes are tracked by default.
## Test your setup
1. In TikTok Events Manager, open your pixel → **Test events** and copy the **test event code**.
2. Paste it in the drawer under **Test events**.
3. **Send test event** sends one `SQ_ConnectionTest` event, which appears in Test events within seconds.
4. **Test a full quiz run** turns on test mode for 2 hours. Every event from your next quiz runs, including the purchase, shows in Test events.
Unlike Meta, TikTok **excludes** test events from your real data. They appear only on the Test events page. Turn test mode off (or let it expire) before you rely on reports.
## Use it in TikTok
- **Audiences:** **Assets → Audiences → Create → Custom audience → Website traffic** with event `SQ_QuizComplete` or `Lead`.
- **Lead campaigns:** optimise on the `Lead` event.
- **Sales campaigns:** choose **Standard** commerce names to optimise on `Purchase` (only if no other TikTok pixel reports your purchases).
## Disconnect
**Integrations → TikTok Pixel → Manage → Disconnect TikTok** stops sending events and deletes the saved access token. Data already in TikTok is kept.
## Troubleshooting
| Problem | Fix |
|---|---|
| Can't save (invalid token) | Generate a new token on the same pixel. Make sure the Pixel Code, not the pixel name, was pasted |
| Test events show, but reports are empty | Turn off test mode; TikTok doesn't count test events |
| No `InitiateCheckout` | It only fires from the checkout button **inside** the quiz |
| No purchase | The order must be linked to the quiz and paid (see [Shopify](https://docs.shopper-quiz.com/integrations/shopify#order-tracking-and-revenue-attribution) / [WooCommerce](https://docs.shopper-quiz.com/integrations/woocommerce#order-tracking-and-revenue-attribution)) |
| Card says "Needs attention" | TikTok rejected recent events, usually an expired or revoked token. Generate a new one and save it |
Turn every quiz taker into a HubSpot contact with their answers, recommended products, cart and quiz-attributed revenue. Each answer is a **dropdown or checkbox property with your real answer options**, so you can build segments, workflows and reports on what shoppers told you, without typing values by hand.
**Available on:** Starter plan and above · **HubSpot plans:** all, including free · **Platforms:** Shopify and WooCommerce (identical) · **Related:** [Zapier](https://docs.shopper-quiz.com/integrations/zapier) · [Webhooks](https://docs.shopper-quiz.com/integrations/webhooks)
## What syncs
| What | When | Where it appears in HubSpot |
|---|---|---|
| **Contact** (email, first and last name) | A shopper enters their email in a quiz | Created, or updated if the email already exists |
| **Quiz answers** | The shopper reaches the results page | One property per question, in a group named after the quiz |
| **Recommended products** | The shopper reaches the results page | Latest recommendations, top product and its link |
| **Cart and checkout** | The shopper adds recommendations to the cart, or starts checkout, from the results | *SQ Last quiz cart products / value*, *SQ Last checkout started* |
| **Quiz-attributed orders and revenue** | A linked order is paid | *SQ Quiz-attributed orders*, *SQ Quiz-attributed revenue*, last order details |
| **Activity notes** | Quiz completed, and quiz-attributed order | A note on the contact's timeline with the answers, recommendations or order |
| **Newsletter consent** (optional) | The shopper ticked the newsletter box | Subscribed to the email subscription type you choose |
| **List membership** (optional) | With the contact | Added to the static list you choose |
| **Deals** (optional, off by default) | A linked order is paid | A deal with line items, in the pipeline and stage you choose |
Each event syncs once per quiz attempt. Counts and revenue are always recalculated from your ShopperQuiz data, so they stay correct even if a sync is retried.
**What your quizzes need:**
- **An email.** HubSpot contacts are matched by email. Turn on **Collect email address** in the quiz's [welcome screen](https://docs.shopper-quiz.com/quiz-builder/welcome-screen). Shoppers who don't give an email are not sent to HubSpot.
- **Orders** must be linked to the quiz. See how it works for [Shopify](https://docs.shopper-quiz.com/integrations/shopify#order-tracking-and-revenue-attribution) and [WooCommerce](https://docs.shopper-quiz.com/integrations/woocommerce#order-tracking-and-revenue-attribution). Only paid orders count: Shopify orders when they are paid, WooCommerce orders in *Processing*, *Completed* or *On hold*.
## Connect HubSpot
1. In ShopperQuiz, go to **Integrations → HubSpot → Set up HubSpot** and click **Connect HubSpot**.
2. Sign in to HubSpot if asked, and pick the HubSpot account to connect.
3. Review the permissions and click **Connect app**. You return to ShopperQuiz with the HubSpot drawer open.
4. Choose what syncs (all core data is on by default), and optionally a subscription type, a list and deals.
5. Click **Send test** to see a sample in HubSpot (see [Send a test](https://docs.shopper-quiz.com/integrations/hubspot#send-a-test)).
ShopperQuiz immediately creates a **ShopperQuiz** property group in HubSpot. Each quiz's properties are created the first time someone takes that quiz, or when you send a test.
**Installed from HubSpot's side?:**
If you started the install from a HubSpot link instead of the Connect button, sign in to ShopperQuiz when you land on it. The connection is completed for your store automatically. Install links expire after 30 minutes; if yours did, click **Connect HubSpot** again.
### Permissions ShopperQuiz asks for
| Permission | Used for |
|---|---|
| Contacts (read and write) | Creating and updating quiz takers, and adding notes to them |
| Contact property settings (read and write) | Creating the ShopperQuiz properties and keeping their options up to date |
| Lists (read and write) | Showing your lists, creating one, and adding quiz takers to it |
| Communication preferences (read and write) | Showing your subscription types and subscribing shoppers who opted in |
| Deals, deal property settings and line items | Optional deals for quiz-attributed orders, and showing your pipelines |
ShopperQuiz only writes quiz data. It never reads, changes or deletes your other HubSpot records.
## Contact properties
Find them in HubSpot under **Settings → Properties → Contact properties**, filtered by group.
### The ShopperQuiz group (every quiz)
| Property | Type | What it holds |
|---|---|---|
| SQ Store | Text | The store the shopper took a quiz on |
| SQ Newsletter opt-in | Checkbox | *Yes* if the shopper ever ticked the newsletter box in a quiz |
| SQ First quiz date | Date and time | When they first started a quiz |
| SQ Quiz completions | Number | How many quizzes they've completed |
| SQ Last quiz | Text | The most recent quiz they completed |
| SQ Last quiz completed | Date and time | When they last completed a quiz |
| SQ Last recommended products | Multi-line text | Products recommended in that quiz |
| SQ Last top recommendation | Text | The #1 recommended product |
| SQ Last top recommendation URL | Text | Link to that product |
| SQ Last quiz cart products, SQ Last quiz cart value | Text, Number | What they added to the cart from the quiz |
| SQ Last added to cart | Date and time | When they did |
| SQ Last checkout started | Date and time | When they last started checkout from a quiz |
| SQ Quiz-attributed orders | Number | Paid orders linked to quizzes |
| SQ Quiz-attributed revenue | Number | Total of those orders, in your store currency |
| SQ Last quiz order total, products, number, date | Number, Text, Text, Date and time | The most recent quiz-attributed order |
### One group per quiz: *ShopperQuiz: your quiz name*
| Property | Type | What it holds |
|---|---|---|
| **SQ *Quiz*: *your question*** | Dropdown (single-select questions) or Multiple checkboxes (multiple-select questions) | The shopper's answer, using your real answer options |
| SQ *Quiz*: Recommended products | Multi-line text | Products recommended in their latest attempt at this quiz |
| SQ *Quiz*: Completed | Date and time | When they last completed this quiz |
Answers always reflect the shopper's **latest** attempt at that quiz. A question they skipped is left empty.
**Editing a quiz is safe.** Properties are tied to the question, not its position or wording. Rename a question and the property's label updates; add an answer and it appears as a new option; delete an answer and its option is hidden (contacts who chose it keep their value). A new question becomes a new property.
## Activity notes
When **Activity notes** is on, the contact's timeline gets a note when they complete a quiz (every answer, plus the recommended products with links) and when they place a quiz-attributed order (order number, total and items). Notes are visible on every HubSpot plan.
## Newsletter consent
The welcome screen's newsletter checkbox is the shopper's consent to marketing, and it's shared by all your email tools.
- Choose an **email subscription type** in the drawer, for example *Marketing Information*. Shoppers who **tick** the box are subscribed to it, recorded with the legal basis *Consent with notice* and a note saying which quiz and store they opted in on.
- Shoppers who don't tick it are **never** subscribed. ShopperQuiz **never unsubscribes** anyone.
- If a contact previously unsubscribed in HubSpot, HubSpot keeps them unsubscribed, which is correct. The delivery shows a note saying so.
- Leave the setting on **Don't subscribe anyone** to only record the *SQ Newsletter opt-in* property and handle subscriptions with your own workflows.
**Marketing contact status:**
HubSpot doesn't let apps set a contact's *marketing contact* status. To make quiz opt-ins marketing contacts automatically, create a contact-based workflow: **Enrollment trigger:** *SQ Newsletter opt-in* is *Yes* → **Action:** *Set marketing contact status* → *Set as marketing*. (Workflows need a HubSpot plan that includes them.) You can also set it in bulk from a filtered contacts view.
## Add quiz takers to a list
Pick a **static list** in the drawer, or click **New list** to create one (for example *ShopperQuiz quiz takers*). Then choose who's added: **All quiz takers** or **Newsletter opt-ins only**.
For segments that update themselves, create an **active list** in HubSpot instead, filtered on ShopperQuiz properties. See the examples below.
## Deals for quiz orders
Off by default. Turn on **Deals for quiz orders** to create a deal for each quiz-attributed order:
- Named *Quiz order #1042 · Hair Discovery Quiz*, with the order total as the amount, in the pipeline and stage you pick (default: your default pipeline's *Closed won* stage).
- Associated with the contact, with a line item for each product, plus *SQ Quiz*, *SQ Order number* and *SQ Order key* properties.
- Never duplicated: retries reuse the same deal.
**Avoid counting orders twice:**
If you already sync your store's orders into HubSpot (HubSpot's Shopify Data Sync, a WooCommerce sync app, or another integration that creates deals or orders), leave this off. Those orders are already in HubSpot, and quiz revenue is still on the contact as *SQ Quiz-attributed revenue*. ShopperQuiz never creates HubSpot **Orders**, only optional deals.
The deal amount is in your store's currency. If your HubSpot account uses a different currency, keep that in mind in revenue reports.
## Using quiz data in HubSpot
### Segments (active lists)
| Segment | Filters |
|---|---|
| Everyone who took a quiz | *SQ Quiz completions* is greater than 0 |
| Curly-hair shoppers | *SQ Hair Discovery Quiz: What's your hair type?* is any of *Curly* |
| Opted in, no purchase yet | *SQ Newsletter opt-in* is *Yes* AND *SQ Quiz-attributed orders* is 0 |
| Quiz cart abandoners | *SQ Last added to cart* is known AND *SQ Last quiz order date* is unknown |
| Quiz buyers | *SQ Quiz-attributed revenue* is greater than 0 |
### Workflows
- **Welcome series by result:** enrollment trigger *SQ Last quiz completed* is known. Branch on an answer property, then send a different email per branch.
- **Recommendation email:** in a marketing email, insert personalization tokens for *SQ Last top recommendation* and *SQ Last top recommendation URL*.
- **Cart follow-up:** enroll when *SQ Last added to cart* is known, delay 1 day, then continue only if *SQ Last quiz order date* is unknown.
- **Lead scoring:** add points for *SQ Quiz completions* and *SQ Quiz-attributed revenue*.
- **Re-enroll on retakes:** turn on re-enrollment for *SQ Last quiz completed*, so a retake starts the workflow again.
### Reports
Build a custom report on contacts using *SQ Quiz-attributed revenue*, *SQ Last quiz* or any answer property, for example revenue by hair type.
## Sync past quiz takers
The drawer's **Past quiz takers → Sync past quiz takers** sends shoppers who completed a quiz with an email in the **last 90 days**, from before you connected. It sends the latest attempt per shopper and quiz, up to 5,000 in total.
- Properties and list membership only. No notes or deals are created for history.
- Only shoppers who ticked the newsletter box are subscribed.
- It runs in the background at a steady pace (about 40 per minute) to stay within HubSpot's limits. Progress shows in **Recent deliveries**.
- You can run it again an hour later. Running it twice is harmless: contacts are updated, not duplicated.
## Manage HubSpot in ShopperQuiz
Open **Integrations → HubSpot → Manage**:
- **Status:** when the last sync succeeded, or the latest error.
- **Connection:** the connected HubSpot account and its ID, who connected it, and **Open HubSpot**.
- **What syncs:** switch answers, recommendations, cart and revenue, notes and deals on or off.
- **Newsletter consent**, **Add to a list**, and the deal pipeline and stage.
- **How it appears in HubSpot:** the exact properties ShopperQuiz creates, per quiz, with answer options.
- **Send a test** (see below).
- **Past quiz takers.**
- **Recent deliveries:** every sync with its status. Click a row for details, **View contact** / **View deal** in HubSpot, or **Retry now**.
- **Sync per quiz:** turn HubSpot off for individual quizzes, such as test quizzes. All quizzes are on by default.
- **Disconnect HubSpot.**
### Send a test
Enter an email (yours by default) and pick an event: **Quiz completed**, **Quiz-attributed order** or **New lead**. ShopperQuiz writes sample data to that contact using your latest quiz's real questions (each with its first answer) and real products, and marks notes and deals as *[Test]*. Tests never change the contact's name and never subscribe it to anything. If a list is selected, the test contact is added to it. Click **View contact** to see the result.
### Delivery statuses
| Status | Meaning |
|---|---|
| Delivered | HubSpot accepted everything |
| Queued / Sending | Waiting for the next sync cycle (a few seconds) |
| Retrying | HubSpot was busy or unavailable. ShopperQuiz retries after 1 minute, 5 minutes, 30 minutes, 2 hours, 6 hours and 12 hours. Rate-limit pauses don't count as retries |
| Failed | HubSpot rejected the data (see the error) or every retry failed. Use **Retry now** after fixing the cause |
| Stopped | No email yet, HubSpot was disconnected, or your plan no longer includes HubSpot |
## Timing
Contacts and properties appear in HubSpot about **15 to 30 seconds** after the shopper acts. The first sync for a new quiz takes a few seconds longer while its properties are created.
## Plans and limits
- Starter plan or above. During a free trial everything works. If a subscription lapses, syncing pauses and nothing is sent; it resumes when the subscription is active again. Your settings are kept.
- Works on every HubSpot plan, including the free CRM.
- Each quiz question uses one HubSpot contact property, plus two per quiz. HubSpot limits custom properties per object (generous on every plan), so very large numbers of quizzes may reach it.
- One HubSpot account per ShopperQuiz store. Several stores can connect to the same HubSpot account; *SQ Store* shows which store each contact came from.
- Delivery history is kept for 30 days.
## Disconnect and privacy
**Disconnect HubSpot** stops syncing and uninstalls ShopperQuiz from your HubSpot account. Contacts, properties, notes and deals already in HubSpot are kept; delete them in HubSpot if you want them gone. Uninstalling the app from HubSpot's side also stops syncing; the drawer then shows **Reconnect needed**.
HubSpot receives the shopper data your quiz collects (name, email, answers, recommendations, cart and order details). ShopperQuiz never shares your Shopify or WooCommerce credentials, and your HubSpot access is stored only on ShopperQuiz's servers. Use **Sync per quiz** to keep any quiz out of HubSpot.
## Troubleshooting
Start with **Integrations → HubSpot → Manage → Recent deliveries**.
| Problem | What to check |
|---|---|
| No delivery row at all | Wait 30 seconds. The quiz must collect an email, and **Sync per quiz** must be on for it. The shopper must reach the results page for answers to sync |
| Delivery **Stopped**: "No email address yet" | The shopper didn't give an email. If they give one later in the same attempt, the contact syncs then |
| **Reconnect needed** | The app was uninstalled in HubSpot, or access was revoked. Click **Reconnect HubSpot**. Syncs from the last day retry automatically once reconnected; use **Retry now** for older failed rows |
| "Missing permission" | Click **Reconnect HubSpot** and approve all permissions |
| A contact wasn't subscribed | The shopper didn't tick the newsletter box, no subscription type is selected, or the contact had unsubscribed in HubSpot before. Click the delivery row to see which |
| "Could not add to the list" | The list was deleted or is an active list. Pick a static list, or create one with **New list** |
| Answer property is empty | The shopper skipped that question, or the latest attempt at that quiz didn't include it |
| An answer property shows old options | Options update the next time someone takes the quiz or you send a test. Removed answers stay as hidden options so existing values keep working |
| Deal not created | **Deals for quiz orders** is off, or the order isn't linked to the quiz or isn't paid yet |
| Revenue looks doubled in HubSpot reports | Another app also syncs your store's orders. Turn off **Deals for quiz orders** and use *SQ Quiz-attributed revenue* on contacts instead |
| "ShopperQuiz is pacing requests to HubSpot" | Normal during big syncs (such as past quiz takers). It continues automatically |
Still stuck? Email **support@shopper-quiz.com** with the time of the quiz run and, if you have it, the delivery ID from **Recent deliveries**.
Connect ShopperQuiz to more than 8,000 apps (Google Sheets, HubSpot, Slack, Gmail, Airtable, Salesforce, Notion and more) without writing code. Every quiz event reaches Zapier within seconds (instant triggers), and every quiz answer arrives as its own field you can map.
**Available on:** Starter plan and above · **Platforms:** Shopify and WooCommerce (identical) · **Related:** [Webhooks](https://docs.shopper-quiz.com/integrations/webhooks) · [ShopperQuiz API](https://docs.shopper-quiz.com/integrations/shopperquiz-api) · [Troubleshooting](https://docs.shopper-quiz.com/integrations/automation-troubleshooting)
## What you can automate
| Trigger | Fires when | Fires how often |
|---|---|---|
| **New Lead** | A shopper enters their email on a quiz | Once per quiz attempt |
| **New Quiz Completion** | A shopper reaches the results page | Once per quiz attempt |
| **New Add to Cart From Quiz** | A shopper adds recommended products to their cart from the results | Once per quiz attempt (the first time) |
| **New Checkout From Quiz** | A shopper starts checkout from the results | Once per quiz attempt (the first time) |
| **New Quiz-Attributed Order** | A shopper who took the quiz pays for an order linked to the quiz | Once per quiz attempt (the first paid order) |
| Search | What it does |
|---|---|
| **Find Response** | Finds a shopper's most recent quiz response by email or response ID, with all answers and recommendations |
| **Find Quiz** | Finds a quiz by name |
Every trigger has an optional **Quiz** filter: leave it empty for all quizzes, or pick one.
**When each trigger needs your quiz set up a certain way:**
- **New Lead** only fires if the quiz asks for an email on the [welcome screen](https://docs.shopper-quiz.com/quiz-builder/welcome-screen).
- **Add to Cart** and **Checkout** fire from the quiz's own buttons on the results page.
- **Order** needs the order to be linked to the quiz. On Shopify, the order contains a product added with the quiz's **Add to cart** button. On WooCommerce, the order is placed within an hour of going to the cart or checkout from the quiz. See [Shopify](https://docs.shopper-quiz.com/integrations/shopify#order-tracking-and-revenue-attribution) · [WooCommerce](https://docs.shopper-quiz.com/integrations/woocommerce#order-tracking-and-revenue-attribution).
- **Order** fires on paid orders only: Shopify orders when they are paid, WooCommerce orders in *Processing*, *Completed* or *On hold*.
## Connect ShopperQuiz to Zapier
1. In ShopperQuiz, go to **Integrations → Zapier → Set up Zapier** and click **Open ShopperQuiz on Zapier**. Accept the invite if Zapier asks.
2. In Zapier, click **Create → Zaps**. For the trigger, search for **ShopperQuiz** and pick an event, for example **New Quiz Completion**.
3. Under **Account**, click **Sign in**. A window opens on ShopperQuiz. Sign in if asked, check that the store name is right, and click **Allow access**. The connection is labelled with your store name.
4. Click **Continue**. Optionally pick a **Quiz**. Picking one also gives each answer a friendly label such as *Answer: What's your hair type?*.
5. Click **Test trigger**. Zapier shows your most recent real data, or realistic sample data if your store has none yet.
6. Add an action, map the fields, click **Test step**, and then **Publish**.
**Publish the Zap:**
A Zap only receives quiz events after it is **published**. Edits you make later are saved as a draft and only take effect when you publish again. Zapier always runs the published version.
The Zap then appears in ShopperQuiz under **Integrations → Zapier → Manage → Zaps**.
## Example Zaps
| Goal | Trigger | Action | Notes |
|---|---|---|---|
| Log every quiz in a spreadsheet | New Quiz Completion | Google Sheets → Create Spreadsheet Row | Map *Shopper Email*, *Quiz Name*, each *Answer: …* field and *Recommended Product Names* to columns |
| Add leads to your CRM | New Lead | HubSpot → Create or Update Contact | Use *Shopper Email*, *Shopper First Name*, *Shopper Last Name*. Add the quiz name as a property |
| Email shoppers their results | New Quiz Completion | Gmail → Send Email | **To** = *Shopper Email*. Put *Recommended Product Names* and *Top Recommended Product URL* in the body |
| Celebrate quiz sales in Slack | New Quiz-Attributed Order | Slack → Send Channel Message | "Quiz sale *Order Number*: *Order Total* *Currency* from *Quiz Name*" |
| Follow up on abandoned carts | New Add to Cart From Quiz | Delay by Zapier (24 hours) → Find Response → Filter → Email | Use Find Response and a filter to skip shoppers who already ordered |
**Who receives the email?:**
ShopperQuiz only sends data. **You** decide who receives it. For alerts to yourself or your team, type your own address in the action's **To** field. To email the shopper, map **Shopper Email** into **To**.
## Fields you can map
All dates are ISO 8601 in UTC (for example `2026-10-06T09:44:02.000Z`). Booleans are `true` or `false`.
### On every trigger
| Field | Example | Notes |
|---|---|---|
| Event ID | `0f8c2d6e-3b1a-…` | Unique per event. Identical on retries |
| Event Type | `quiz.completed` | `lead.created`, `quiz.completed`, `cart.added`, `checkout.started` or `order.created` |
| Event Name | `Quiz Completed` | Readable version of the event type |
| Occurred At | `2026-10-06T09:44:02.000Z` | When the event happened |
| Is Test Event | `false` | `true` for test events sent from the dashboard |
| Response ID | `7d1e4f2a-…` | The shopper's quiz attempt |
| Quiz ID, Quiz Name | `Hair Discovery Quiz` | |
| Store Name, Store URL, Platform | `shopify` | Platform is `shopify` or `woocommerce` |
| Currency | `AUD` | Store currency. On orders, the order's currency |
| Shopper Email | `jane@example.com` | Empty if the quiz didn't ask for it |
| Shopper First Name, Last Name, Full Name | `Jane`, `Cooper` | Split from the name the shopper entered |
| Newsletter Opt-in | `true` | The shopper ticked the newsletter box on the welcome screen |
| Quiz Started At | `2026-10-06T09:41:12.000Z` | |
### On completion, cart, checkout and order
| Field | Notes |
|---|---|
| **Answer: *your question*** | One field per question. Multiple answers are comma-separated. Empty if the question was skipped |
| All Answers (Text) | Every question and answer, one per line, ready to paste into an email or note |
| Answers (line items) | Question ID, Question, Answer for each answered question |
| Answered Question Count | |
| Recommended Products (line items) | Product ID (your store's ID), Name, Price, Image URL, Product URL |
| Recommended Product Names | Comma-separated |
| Recommended Product Count | |
| Top Recommended Product Name / URL | The first recommendation |
| Filters Matched / Filters Total | How many [filter questions](https://docs.shopper-quiz.com/quiz-builder/filter-questions) the shopper's results satisfied |
Answer fields are keyed by question ID, not position. Reordering questions never breaks a Zap. A **new** question appears as a new field you can map.
### Cart and checkout also include
Cart Items (line items: Product ID, Name, Price, Quantity, Image URL, URL), Cart Value, Cart Item Count, Cart Product Names.
### Orders also include
Order ID, Order Number (for example `#1042`), Order Total, Order Items (line items: Product ID, Name, Price, Quantity), Order Item Count, Order Product Names, and **Includes a Recommended Product**. That last field is `true` when the shopper bought something the quiz recommended.
## Using the searches
**Find Response** looks up quiz data for a shopper in the middle of a Zap, for example when a new customer appears in your CRM.
- Fill in **either** Shopper Email **or** Response, not both. If you fill in both, a response must match **both**. If you picked a fixed response from the dropdown, nothing else will ever match.
- With an email, it returns that shopper's **most recent** response. Add **Quiz** to limit the search to one quiz.
- **Successful if no search results are found?** By default, Zapier stops the Zap ("Safely halted") when nothing is found, and later steps are skipped. Set it to **True** to continue anyway.
**Find Quiz** finds a quiz by full or partial name and returns its ID, name, status and creation date.
## Manage your Zaps in ShopperQuiz
Open **Integrations → Zapier → Manage**:
- **Status:** when the last event was delivered, or the latest error.
- **Connection:** each Zapier account connected to your store, with when it was last used. **Revoke** disconnects it immediately.
- **Zaps:** every Zap using a ShopperQuiz trigger, with its event, quiz filter and last delivery. **Stop sending** stops events to that Zap; also turn it off in Zapier. **Open Zap history** takes you to Zapier's run log.
- **Send a test event:** sends realistic sample data to every active Zap using that event (see below).
- **Recent deliveries:** every event sent to Zapier with its status. Click a row for details or **Retry now**.
- **Sync per quiz:** turn Zapier off for individual quizzes, such as test quizzes. All quizzes are on by default.
- **Disconnect Zapier:** revokes every Zapier connection at once. API keys on the Developers page are not affected.
API keys for Make, n8n or your own code are on the **Developers** page. See [ShopperQuiz API](https://docs.shopper-quiz.com/integrations/shopperquiz-api).
### Test events
**Send test** builds a realistic event from **your** store: your quiz's real questions (each with its first answer), real products from your catalog, and a sample shopper, *Jane Cooper*. It is marked **Is Test Event = true**. To make a Zap ignore test events, add a **Filter by Zapier** step: *Is Test Event* (Boolean) is false.
### Delivery statuses
| Status | Meaning |
|---|---|
| Delivered | Zapier accepted the event |
| Queued / Sending | Waiting for the next send cycle (a few seconds) |
| Retrying | Zapier didn't accept it. ShopperQuiz retries after 1 minute, 5 minutes, 30 minutes, 2 hours, 6 hours and 12 hours |
| Failed | Every retry failed. Use **Retry now** after fixing the cause |
| Stopped | The Zap was turned off or removed, or your plan no longer includes Zapier |
"Delivered" means Zapier **received** the event. What the Zap does next (and whether a step halts) is shown in **Zap history** in Zapier.
## Timing
Events reach Zapier about **15 to 30 seconds** after they happen. ShopperQuiz waits briefly so the data (such as cart items) is complete before sending.
## Plans and limits
- Starter plan or above. During a free trial everything works. If a subscription lapses, events stop until you upgrade; nothing is sent in the meantime.
- Up to 200 active Zaps per store.
- Delivery history is kept for 30 days.
- Zapier's own plan limits (tasks per month, Zap steps) apply in your Zapier account.
## Privacy
Zapier receives the shopper data your quiz collects (name, email, answers, recommendations, cart and order details) for the events you choose. ShopperQuiz never shares your Shopify or WooCommerce credentials. Use **Sync per quiz** to keep any quiz out of Zapier, and **Revoke** to cut off access instantly.
## Under the hood (for developers)
The Zapier integration uses OAuth 2.0 (authorization code grant) and REST hooks:
- **Authorize:** `https://app.shopper-quiz.com/oauth/authorize`
- **Token:** `POST https://api.shopper-quiz.com/zapier/oauth/token` with `grant_type` set to `authorization_code` or `refresh_token`. Access tokens last 7 days and refresh automatically.
- **Subscribe and unsubscribe:** `POST /zapier/hooks` and `DELETE /zapier/hooks/{id}`. If a target responds with `410 Gone`, the subscription is removed.
The full API is documented in [ShopperQuiz API](https://docs.shopper-quiz.com/integrations/shopperquiz-api).
Webhooks send your quiz events to any URL as signed JSON, within seconds of them happening. Use them with **Make**, **n8n**, **Pabbly Connect**, **Pipedream**, or your own server. They carry the same events and data as the [Zapier integration](https://docs.shopper-quiz.com/integrations/zapier).
**Available on:** Starter plan and above · **Platforms:** Shopify and WooCommerce (identical)
| | Webhooks | [ShopperQuiz API](https://docs.shopper-quiz.com/integrations/shopperquiz-api) |
|---|---|---|
| Direction | ShopperQuiz **pushes** events to you | Your tool **asks** ShopperQuiz for data |
| Use it for | "When a quiz is completed, do X" | "Look up this shopper's quiz answers" |
| Setup | Paste your URL into ShopperQuiz | Paste an API key into your tool |
## Events
| Event | Fires when | How often |
|---|---|---|
| `lead.created` | A shopper enters their email on a quiz | Once per quiz attempt |
| `quiz.completed` | A shopper reaches the results page | Once per quiz attempt |
| `cart.added` | A shopper adds recommended products to their cart from the results | Once per quiz attempt (the first time) |
| `checkout.started` | A shopper starts checkout from the results | Once per quiz attempt (the first time) |
| `order.created` | A shopper who took the quiz pays for an order linked to the quiz | Once per quiz attempt (the first paid order) |
`lead.created` needs the quiz to ask for an email on the welcome screen. `cart.added` and `checkout.started` fire from the quiz's own buttons on the results page. For how orders are linked to a quiz, see [Shopify](https://docs.shopper-quiz.com/integrations/shopify#order-tracking-and-revenue-attribution) · [WooCommerce](https://docs.shopper-quiz.com/integrations/woocommerce#order-tracking-and-revenue-attribution).
## Add an endpoint
1. Get a URL from the tool that will receive the events (see the guides below).
2. In ShopperQuiz, go to **Integrations → Webhooks → Add endpoint**.
3. Paste the URL. It must start with `https://` and be reachable from the internet.
4. Tick the events to send. Optionally pick a single **Quiz**; the default is all quizzes.
5. Click **Add endpoint** and copy the **signing secret**. It is shown only once. You only need it if your own code verifies requests (see below).
6. Click **Send test**. Your tool receives a realistic sample event within a second.
You can add up to 20 endpoints. Each one can be paused or resumed with its toggle, edited, tested, given a new secret (**Rotate secret**), or deleted.
## Guides for popular tools
### Make
1. Create a scenario and add **Webhooks → Custom webhook**. Click **Add**, name it, and copy the URL.
2. Add that URL as an endpoint in ShopperQuiz.
3. In Make, click **Run once**, then click **Send test** in ShopperQuiz. Make learns the data structure from the test.
4. Add your next modules (Google Sheets, HubSpot and so on) and map fields from `data`, for example `data.shopper_email` or `data.recommended_product_names`.
5. Turn the scenario on.
### n8n
1. Add a **Webhook** node. Set **HTTP Method** to `POST` and copy the **Production URL**.
2. Add the URL as an endpoint in ShopperQuiz, then activate the workflow.
3. Click **Send test** in ShopperQuiz. The event appears in the workflow's executions.
4. Optional: verify the signature with a **Crypto** node (HMAC, SHA256) using your signing secret. See [Verify the signature](https://docs.shopper-quiz.com/integrations/webhooks#verify-the-signature).
### Pabbly Connect
1. Create a workflow with the trigger **Webhook by Pabbly** and copy the webhook URL.
2. Add it as an endpoint in ShopperQuiz and click **Send test**.
3. Pabbly captures the response; map its fields in your actions.
### Quick test with webhook.site
Open [webhook.site](https://webhook.site), copy your unique URL, add it as an endpoint, and click **Send test**. You'll see the full request (headers and JSON body) instantly. Remove the endpoint when you're done.
## Request format
Every event is an HTTPS `POST` with `Content-Type: application/json`:
```json
{
"id": "0f8c2d6e-3b1a-4c7e-9f21-5a6b7c8d9e01",
"type": "quiz.completed",
"created_at": "2026-10-06T09:44:02.000Z",
"test": false,
"data": { … }
}
```
| Field | Description |
|---|---|
| `id` | Unique event ID. The same on every retry, so use it to ignore duplicates |
| `type` | One of the five event names |
| `created_at` | When the event happened (ISO 8601, UTC) |
| `test` | `true` for events sent with **Send test** |
| `data` | The event's fields (below) |
### Headers
| Header | Value |
|---|---|
| `X-ShopperQuiz-Event` | The event type, for example `quiz.completed` |
| `X-ShopperQuiz-Event-Id` | Same as `id` in the body |
| `X-ShopperQuiz-Delivery-Id` | This delivery attempt's ID |
| `X-ShopperQuiz-Signature` | `t=,v1=` |
| `User-Agent` | `ShopperQuiz-Webhooks/1.0 (+https://shopper-quiz.com)` |
## Data fields
### In every event
| Field | Type | Description |
|---|---|---|
| `response_id` | string | The shopper's quiz attempt |
| `quiz_id`, `quiz_name` | string | |
| `store_name`, `store_url` | string | |
| `platform` | string | `shopify` or `woocommerce` |
| `currency` | string | Store currency. On orders, the order's currency |
| `shopper_email` | string | Empty if the quiz didn't ask for it |
| `shopper_first_name`, `shopper_last_name`, `shopper_full_name` | string | |
| `newsletter_opt_in` | boolean | The shopper ticked the newsletter box |
| `started_at` | string | When the quiz was started (ISO 8601) |
### Added from `quiz.completed` onwards
| Field | Type | Description |
|---|---|---|
| `answer_` | string | One per question (hyphens in the ID become underscores). Multiple answers are comma-separated; empty if skipped |
| `answers` | array | `{ question_id, question, answer }` for each answered question |
| `answers_text` | string | `Question: Answer`, one per line |
| `answered_question_count` | number | |
| `recommended_products` | array | `{ product_id, name, price, image_url, url }` |
| `recommended_product_names` | string | Comma-separated |
| `recommended_product_count` | number | |
| `top_recommended_product_name`, `top_recommended_product_url` | string | |
| `filters_matched`, `filters_total` | number | |
`product_id` is your store's product ID (Shopify or WooCommerce).
### Added on `cart.added` and `checkout.started`
| Field | Type | Description |
|---|---|---|
| `cart_items` | array | `{ product_id, name, price, quantity, image_url, url, subscription, variant }`: `subscription` is the plan name for an item the shopper chose to [subscribe](https://docs.shopper-quiz.com/integrations/subscriptions) to, otherwise empty. `variant` is the chosen option (e.g. `Red / M`) for a product with several options, otherwise empty. A shopper can add several options of one product, so the same `product_id` can appear on more than one line |
| `cart_value` | number | Sum of price × quantity |
| `cart_item_count` | number | Total quantity |
| `cart_product_names` | string | Comma-separated |
| `cart_has_subscription` | boolean | At least one item is a subscription |
### Added on `order.created`
| Field | Type | Description |
|---|---|---|
| `order_id` | string | Shopify or WooCommerce order ID |
| `order_number` | string | For example `#1042` |
| `order_total` | number | |
| `order_items` | array | `{ product_id, name, price, quantity, subscription }` — `subscription` is the plan name for a line bought on a [subscription](https://docs.shopper-quiz.com/integrations/subscriptions), otherwise empty |
| `order_item_count` | number | |
| `order_product_names` | string | |
| `includes_recommended_product` | boolean | The shopper bought something the quiz recommended |
| `order_has_subscription` | boolean | At least one line was bought on a subscription |
### Full example: `order.created`
```json
{
"id": "c73f72e4-fbb5-47ae-96f7-6d7ef2403584",
"type": "order.created",
"created_at": "2026-10-06T07:16:23.000Z",
"test": false,
"data": {
"response_id": "7d1e4f2a-9c3b-4e8d-a6f5-1b2c3d4e5f60",
"quiz_id": "3a9b8c7d-6e5f-4a3b-9c2d-1e0f9a8b7c6d",
"quiz_name": "Hair Discovery Quiz",
"store_name": "ARTINIQ",
"store_url": "https://artiniq.myshopify.com",
"platform": "shopify",
"currency": "AUD",
"shopper_email": "jane.cooper@example.com",
"shopper_first_name": "Jane",
"shopper_last_name": "Cooper",
"shopper_full_name": "Jane Cooper",
"newsletter_opt_in": true,
"started_at": "2026-10-06T07:09:12.000Z",
"answer_b1c2d3e4_0000_4000_8000_000000000001": "Curly",
"answer_b1c2d3e4_0000_4000_8000_000000000002": "Dry, Frizzy",
"answers": [
{ "question_id": "b1c2d3e4-0000-4000-8000-000000000001", "question": "What's your hair type?", "answer": "Curly" },
{ "question_id": "b1c2d3e4-0000-4000-8000-000000000002", "question": "What's your hair condition?", "answer": "Dry, Frizzy" }
],
"answers_text": "What's your hair type?: Curly\nWhat's your hair condition?: Dry, Frizzy",
"answered_question_count": 2,
"recommended_products": [
{ "product_id": "8012345678901", "name": "Amla Powder", "price": 40, "image_url": "https://cdn.shopify.com/…/amla-powder.jpg", "url": "https://artiniq.myshopify.com/products/amla-powder" },
{ "product_id": "8012345678902", "name": "Jamun Seed Oil", "price": 42, "image_url": "https://cdn.shopify.com/…/jamun-seed-oil.jpg", "url": "https://artiniq.myshopify.com/products/jamun-seed-oil" }
],
"recommended_product_names": "Amla Powder, Jamun Seed Oil",
"recommended_product_count": 2,
"top_recommended_product_name": "Amla Powder",
"top_recommended_product_url": "https://artiniq.myshopify.com/products/amla-powder",
"filters_matched": 1,
"filters_total": 1,
"order_id": "5123456789012",
"order_number": "#1042",
"order_total": 82,
"order_items": [
{ "product_id": "8012345678901", "name": "Amla Powder", "price": 40, "quantity": 1, "subscription": "" },
{ "product_id": "8012345678902", "name": "Jamun Seed Oil", "price": 42, "quantity": 1, "subscription": "" }
],
"order_item_count": 2,
"order_product_names": "Amla Powder, Jamun Seed Oil",
"includes_recommended_product": true,
"order_has_subscription": false
}
}
```
A `lead.created` event contains only the fields listed under [In every event](https://docs.shopper-quiz.com/integrations/webhooks#in-every-event).
## Verify the signature
If your own code receives webhooks, verify each request with the endpoint's signing secret:
1. Read `t` and `v1` from the `X-ShopperQuiz-Signature` header.
2. Compute HMAC-SHA256 of `t + "." + ` with your signing secret, as lowercase hex.
3. Compare it to `v1` with a constant-time comparison.
4. Reject requests where `t` is more than 5 minutes from now.
Always use the **raw** body bytes, before any JSON parsing.
**Node.js**
```js
const crypto = require('crypto')
function verifyShopperQuiz(rawBody, header, secret) {
const parts = Object.fromEntries(header.split(',').map(p => p.split('=')))
if (Math.abs(Date.now() / 1000 - Number(parts.t)) > 300) return false
const expected = crypto.createHmac('sha256', secret).update(parts.t + '.' + rawBody).digest('hex')
return parts.v1.length === expected.length &&
crypto.timingSafeEqual(Buffer.from(parts.v1), Buffer.from(expected))
}
```
**Python**
```python
import hmac, hashlib, time
def verify_shopperquiz(raw_body: bytes, header: str, secret: str) -> bool:
parts = dict(p.split("=", 1) for p in header.split(","))
if abs(time.time() - int(parts["t"])) > 300:
return False
expected = hmac.new(secret.encode(), parts["t"].encode() + b"." + raw_body, hashlib.sha256).hexdigest()
return hmac.compare_digest(expected, parts["v1"])
```
**PHP**
```php
function verify_shopperquiz(string $rawBody, string $header, string $secret): bool {
parse_str(str_replace(',', '&', $header), $parts);
if (abs(time() - (int) $parts['t']) > 300) return false;
$expected = hash_hmac('sha256', $parts['t'] . '.' . $rawBody, $secret);
return hash_equals($expected, $parts['v1']);
}
```
To change a secret, click **Rotate secret**. The old secret stops working immediately, so update your code at the same time.
## Responding, retries and duplicates
- Respond with any **2xx** status within **10 seconds**. Do slow work after responding.
- Any other status, a timeout or a connection error is retried after **1 minute, 5 minutes, 30 minutes, 2 hours, 6 hours and 12 hours**, then marked **Failed**. You can **Retry now** from **Recent deliveries**.
- Respond **410 Gone** to turn the endpoint off permanently.
- After **50 failed deliveries in a row**, the endpoint is paused automatically and a notice appears in the drawer. Fix it, then switch it back on.
- Redirects are not followed. Use the final URL.
- Events can arrive more than once (for example, when a retry follows a slow response) and not always in order. Use `id` to ignore duplicates, and `created_at` to order them.
## Timing and limits
- Events are sent about **15 to 30 seconds** after they happen.
- Up to 20 endpoints per store. Delivery history is kept for 30 days.
- Requests come from ShopperQuiz's servers. There is no fixed IP address to allowlist; verify the signature instead.
## Security
- Endpoints must use HTTPS and point to a public address. Private, local and cloud-metadata addresses are refused.
- Each endpoint has its own signing secret. It is kept server-side, never readable from the dashboard, and shown only once when created or rotated.
- Use **Sync per quiz** in the drawer to keep any quiz out of webhooks.
Let shoppers **subscribe to their recommended products straight from the quiz results page**. Each recommended product that has a subscription plan gets a **One-time / Subscribe & save** choice with your delivery frequencies and the subscription price, and the cart is built with the plan already applied.
It works with **Recharge** and **every other subscription app built on Shopify's subscription system** (Shopify Subscriptions, Skio, Loop, Stay AI, Smartrr, Appstle, Seal and more), and with **WooCommerce Subscriptions** on WooCommerce. There is nothing to connect: no API key, no theme code, no extra app.
**Available on:** Starter plan and above · **Platforms:** Shopify and WooCommerce · **Off by default** — turn it on per quiz.
## What shoppers see
On the results page, for each recommended product with a subscription plan:
- **One-time purchase** and **Subscribe & save** options, with both prices and a savings badge (for example *Save 10%*).
- A **delivery frequency** picker using your plans (for example *Deliver every month*, *Every 2 months*). Up to three frequencies show as buttons; more show as a dropdown.
- **Subscription-only** products show only the subscribe option, with a short note.
- The **order summary** shows the chosen frequency under the product and uses the subscription price in the subtotal.
- **View cart** and **Checkout** add every product with the shopper's choice: subscribed products on their plan, the rest as one-time. Subscriptions and one-time products can be bought in the same checkout.
Products **without** a subscription plan look and work exactly as before. If a product has a plan on only some of its variants (for example only the *Red* option), the other variants are sold one-time.
## How it works
On Shopify, every subscription app creates its plans with Shopify's own subscription system (selling plans), and your storefront shows those plans for every product. When the results page loads, the quiz reads the recommended products' plans from your storefront. Because it reads them live, new plans, price changes and removed plans show up immediately. Checkout is your normal Shopify checkout, and the subscription is created by your subscription app as usual.
On WooCommerce, the ShopperQuiz plugin reads your WooCommerce Subscriptions plans and adds products to the cart with the chosen plan. Checkout is your normal WooCommerce checkout.
## Set up on Shopify
1. **Create a subscription plan in your subscription app** and add the products you recommend in quizzes (see your app below).
2. In ShopperQuiz, open **Quiz Builder → Results Screen → Subscriptions** and turn on **Offer subscribe & save on results**. (You can also switch quizzes on and off under **Integrations → Recharge & subscription apps → Manage**.)
3. Choose which option is selected by default (*Subscribe & save* is recommended), and adjust the labels if you like.
4. Click **Save**, then open **Preview** or take your live quiz to check it.
### Your subscription app
| App | What to do |
|---|---|
| **Shopify Subscriptions** (free, by Shopify) | In the app, create a subscription plan (delivery frequencies and discount) and add products. To make a product subscription-only, open the product in Shopify and tick **Only sell this product with these purchase options**. |
| **Recharge** | Recharge stores on the Shopify Checkout Integration (the standard Recharge setup) work out of the box. Create your subscription plans in Recharge as usual; Recharge publishes them to Shopify. No Recharge API key or storefront script is needed. |
| **Skio, Loop, Stay AI, Smartrr, Appstle, Seal** and other subscription apps | Create your subscription plans (sometimes called *selling plans*, *subscription groups* or *purchase options*) in the app and add products. Any app that shows a subscribe option on your Shopify product pages works. |
**Check a product:**
If a product shows a subscribe option on its own product page in your store, it will show one in the quiz results too.
## Set up on WooCommerce
1. Install and activate **WooCommerce Subscriptions** (version 9.0 or later recommended).
2. Update the **ShopperQuiz** plugin to **version 1.1.0 or later** (Plugins → Installed Plugins).
3. Give products a subscription option. Either:
- **Subscription plans on regular products** — in WooCommerce Subscriptions 9.0+ (or with the *All Products for WooCommerce Subscriptions* extension on older versions), add storewide or product subscription plans so shoppers can *buy once or subscribe*; or
- **Subscription products** — products of type *Simple subscription* or *Variable subscription*. These are subscription-only.
4. In ShopperQuiz, turn on **Quiz Builder → Results Screen → Subscriptions** for your quiz and save.
With plugin 1.0.0 the results page works as before; subscription products can still be added to the cart, but shoppers don't see the subscribe & save choice. The **Integrations → WooCommerce Subscriptions → Manage** drawer tells you if the plugin needs updating.
## Settings
All in **Quiz Builder → Results Screen → Subscriptions**, per quiz:
| Setting | Default | What it does |
|---|---|---|
| Offer subscribe & save on results | Off | Turns the feature on for this quiz |
| Selected by default | Subscribe & save | Which option is pre-selected. Subscription-only products are always set to subscribe |
| Show savings badge | On | Shows a badge with the subscription discount |
| One-time option label | One-time purchase | |
| Subscribe option label | Subscribe & save | |
| Frequency label | Delivery frequency | Heading above the frequency picker |
| Savings badge text | Save `{percent}`% | `{percent}` is replaced with the discount |
| Subscription-only note | Subscription only | Shown under subscription-only products. Leave blank to hide it |
The options use your quiz's [widget styles](https://docs.shopper-quiz.com/quiz-builder/quiz-settings) (accent color, borders, corners), and they are built for mobile, with large tap targets.
## The Manage drawer
**Integrations → Recharge & subscription apps** (on WooCommerce: **WooCommerce Subscriptions**) **→ Manage** shows:
- **On your store** — how many products have a subscription plan, how many are subscription-only, and which subscription app was detected.
- **Turn on per quiz** — a switch for each quiz.
- **Works with** — the supported apps, and a link back to this guide.
## Preview
When subscriptions are on, the Quiz Builder **Preview** shows your real plans. If they can't be read (for example, a store with a storefront password, or recommendations that have no plan yet), the preview shows **sample plans** with a note above the preview, so you can still check the design. Shoppers always see your real plans.
## Revenue and analytics
Orders placed from a quiz are already linked to it (see [Shopify](https://docs.shopper-quiz.com/integrations/shopify#order-tracking-and-revenue-attribution) and [WooCommerce](https://docs.shopper-quiz.com/integrations/woocommerce#order-tracking-and-revenue-attribution)). For quizzes with subscriptions on, ShopperQuiz also records which order lines were bought on a subscription:
- **Analytics → Subscriptions** (Pro plan): subscription orders, subscription revenue, share of quiz revenue, subscribe rate (how many carted items shoppers chose to subscribe to), top subscribed products and the frequencies chosen.
- **Responses:** subscribed items show a *Subscription* tag with the frequency, in both *Added to Cart* and *Purchased*.
- **Integrations** get the subscription detail too:
| Integration | Field |
|---|---|
| Google Analytics 4 | `sq_subscription` = `yes` on the purchase event, when the order includes a subscription |
| Meta Pixel, TikTok Pixel | `sq_subscription` = `yes` on the Purchase event, when the order includes a subscription |
| Zapier, Webhooks | `subscription` on each cart and order item (plan name, or empty), plus `cart_has_subscription` and `order_has_subscription` |
| HubSpot | Subscribed products read *Product (Subscription: Deliver every month)* in the last cart and last order properties |
Subscription revenue is the **first order**. Renewal orders are created later by your subscription app and are not counted as quiz revenue.
## Troubleshooting
**No subscribe option on the results page**
- Check that **Offer subscribe & save on results** is on for this quiz and saved.
- Subscriptions need the **Starter plan or above**.
- Check that the product has a subscription plan: it should show a subscribe option on its own product page. If the plan is on only some variants, the other variants are one-time.
- On WooCommerce, update the ShopperQuiz plugin to 1.1.0 or later.
**A product shows only "Subscribe & save"**
It is subscription-only in your subscription app (Shopify: *Only sell this product with these purchase options*; WooCommerce: a subscription product type, or *force subscription*).
**The cart shows a product as one-time although the shopper chose subscribe**
The plan was changed or removed after the results page loaded, so the product was added one-time instead of being dropped. Check the plan in your subscription app.
**Prices look different at checkout**
The results page shows prices in your store currency. If you sell in several currencies (Shopify Markets), checkout shows the shopper's local price; the subscription discount is the same.
**Preview shows sample plans**
Your storefront is password-protected, or the recommended products have no plan yet. See [Preview](https://docs.shopper-quiz.com/integrations/subscriptions#preview).
## FAQ
**Do I need a Recharge account or API key?** No. ShopperQuiz uses the subscription plans your app already publishes to your store.
**Does this change my product pages or theme?** No. It only changes the quiz results page, and only for quizzes where you turn it on.
**Can shoppers mix subscriptions and one-time products?** Yes, in the same cart and checkout.
**Does it work with Add to cart for all recommendations?** Yes. *View cart* and *Checkout* add every product in the order summary with the shopper's choice for each.
Show **star ratings and review counts on every recommended product** on the quiz results page, so shoppers see what other customers think before they add to cart. Optionally highlight the best-rated recommendation with a **Top rated** badge, and use ratings to **break ties** between equally matched products.
It works with **Judge.me, Yotpo, Loox, Okendo, Stamped** and other reviews apps on Shopify, and with **WooCommerce product reviews** on WooCommerce. There is nothing to connect: no API key, no theme code and no settings to change in your reviews app.
**Available on:** all plans · **Platforms:** Shopify and WooCommerce · **Off by default** — turn it on per quiz.
## What shoppers see
On the results page, for each recommended product that has reviews:
- **Stars** filled to the exact rating (a 4.6 shows four stars and most of the fifth), the **average rating** (for example *4.6*) and the **number of reviews** (for example *(128)* or *128 reviews*).
- A **Top rated** badge on the image of the best-rated recommendation, if you turn it on.
- Tapping the rating opens the product page (on WooCommerce, straight to its *Reviews* tab).
Products **without** reviews show nothing extra, unless you choose to show empty stars with a short note such as *No reviews yet*. Screen readers hear the full rating, for example *Rated 4.6 out of 5 from 128 reviews*.
## How it works
**Shopify:** reviews apps save each product's average rating and review count on the product in Shopify. ShopperQuiz reads them through its existing access to your products, so no extra permission or setup is needed. It reads Shopify's standard rating fields first (written by Judge.me, Okendo, Loox and others), and otherwise the app's own fields (Judge.me, Loox, Yotpo, Stamped).
**WooCommerce:** ShopperQuiz reads each product's average rating and review count from WooCommerce. Review plugins that save reviews as WooCommerce product reviews work the same way.
**When ratings update:** when your products sync, when a product changes in your store (for example when a new review is published or approved), and automatically every few hours. You can also click **Sync ratings now** at any time.
## Set up
1. **Collect reviews.** On Shopify, install a reviews app (for example Judge.me) and publish some reviews. On WooCommerce, turn on **Enable product reviews** and **Enable star rating on reviews** in **WooCommerce → Settings → Products**, then approve some reviews.
2. In ShopperQuiz, open **Quiz Builder → Results Screen → Product reviews** and turn on **Show star ratings on results**. (You can also switch quizzes on and off under **Integrations → Product reviews → Manage**.)
3. The status line shows how many of your products have ratings. If it says ratings have not been synced yet, click **Sync now**.
4. Choose the review count style, position, Top rated badge and tie-break options, then click **Save** and open **Preview** or take your live quiz to check it.
### Your reviews app
| App | What to do |
|---|---|
| **Judge.me** | Nothing — ratings are read automatically. |
| **Okendo, Loox** | Nothing — ratings are read automatically. |
| **Yotpo, Stamped** | Ratings are read from the app's product fields. If the status line shows no ratings after you sync, check in the app that its product rating fields (sometimes called *rich snippets* or *SEO* data) are turned on. |
| **Other reviews apps** | Any app that saves Shopify's standard product rating fields works. Most do, because Google Shopping and search results use them. |
| **WooCommerce** | Native product reviews, and plugins that save reviews as WooCommerce product reviews (for example Judge.me for WooCommerce, Customer Reviews for WooCommerce, YITH WooCommerce Advanced Reviews). |
## Settings
All in **Quiz Builder → Results Screen → Product reviews**, per quiz:
| Setting | Default | What it does |
|---|---|---|
| Show star ratings on results | Off | Turns the feature on for this quiz |
| Show average rating | On | The number next to the stars, for example *4.6* |
| Review count | In brackets | *(128)*, *128 reviews* (with your own wording for one and several reviews; `{count}` is replaced with the number), or hidden |
| Position on the product card | Below the product name | Below the name, above the name, or below the tags and price |
| Minimum reviews to show stars | 1 | Products with fewer reviews are treated as not reviewed yet |
| Show products without reviews | Off | Shows empty stars with a short note (default *No reviews yet*) |
| Top rated badge | On | A badge on the best-rated recommendation, with your own text (default *Top rated*) |
| Minimum reviews (badge) | 3 | How many reviews a product needs to earn the badge |
| Break ties by rating | Off | See [Tie-break by rating](https://docs.shopper-quiz.com/integrations/product-reviews#tie-break-by-rating) |
### Top rated badge
The badge goes to **one** product: the recommendation with the best rating, weighted by its number of reviews, among products rated **4.0 or higher** with at least the minimum number of reviews. It only appears when at least two products are recommended. Weighting means a product with 4.8 stars from 300 reviews beats a product with a single 5-star review.
### Tie-break by rating
Your quiz's answers and votes always decide the recommendations. When two or more products end up with **exactly the same votes**, this setting shows the better-rated one first, using the same weighted rating as the badge. Products without reviews sit between well-rated and poorly-rated products. Products with different votes are never reordered, and products pinned by an answer stay pinned.
Because ties are decided before the list is cut to your maximum number of products, the tie-break can also decide which of the tied products make the list.
## Reviews style
When reviews are on, **Quiz Builder → Results Screen → Reviews style** lets you restyle everything. Every field is optional: empty fields follow your quiz theme (filled stars in your accent colour, empty stars in a light tint of your text colour, your theme font).
- **Stars:** size (desktop and mobile), filled star colour, empty star colour.
- **Rating text:** font family, weight, size (desktop and mobile), colour.
- **Top rated badge:** background and text colour.
Click **Use theme** next to a colour, or **Reset to theme** for the whole card, to go back to your theme.
## The Manage drawer
**Integrations → Product reviews** (on WooCommerce: **WooCommerce reviews**) **→ Manage** shows:
- **On your store** — how many products have ratings, which reviews app they come from, and when ratings were last synced, with a **Sync ratings now** button.
- **Turn on per quiz** — a switch for each quiz.
- **Works with** — the supported apps, and a link back to this guide.
## Preview
When reviews are on, the Quiz Builder **Preview** shows your real ratings. If none of your products has a rating yet, the preview shows **sample ratings** with a note above the preview, so you can still check the design. Shoppers always see your real ratings.
## Troubleshooting
**No stars on the results page**
- Check that **Show star ratings on results** is on for this quiz and saved.
- Check the status line in **Results Screen → Product reviews**: if no products have ratings, click **Sync now**.
- Check **Minimum reviews to show stars**: products with fewer reviews show no stars.
- On WooCommerce, check that reviews and star ratings are turned on in **WooCommerce → Settings → Products** and that the reviews are approved.
**A new review isn't showing yet**
Ratings update when the product changes in your store and every few hours. Click **Sync ratings now** to update immediately. Some reviews apps hold new reviews for approval first.
**The rating differs from my product page**
Your reviews app may round differently, or count only published reviews. ShopperQuiz shows the average and count your reviews app saves for the product.
## FAQ
**Do I need an API key or a paid reviews plan?** No. ShopperQuiz reads the ratings your reviews app already saves in your store, including on free plans such as Judge.me Free.
**Does this change my product pages or theme?** No. It only changes the quiz results page, and only for quizzes where you turn it on.
**Do ratings change which products are recommended?** Only if you turn on **Break ties by rating**, and then only the order of products with exactly the same votes.
**Can I show review text?** Not yet. The results page shows the star rating, average and count.
The ShopperQuiz API lets your own tools **read** quiz data: look up a shopper's answers and recommendations, list quizzes, fetch recent events, or subscribe a URL to real-time events. Use it from anything that can make an HTTPS request with an API key:
- **Automation tools:** the HTTP step in Make, n8n, Pabbly Connect or Pipedream
- **Your own code:** a backend, script or scheduled job (Node, Python, PHP, Google Apps Script and so on)
- **Internal tools:** Retool, Appsmith or your own dashboards
- **CRMs and helpdesks** with custom-code or HTTP steps, for example to show a customer's quiz answers next to their profile
Create keys and see a quick start on the **Developers** page in your dashboard.
**Available on:** Starter plan and above · **Platforms:** Shopify and WooCommerce (identical)
**Do you need the API?:**
To **receive** events when something happens, [Webhooks](https://docs.shopper-quiz.com/integrations/webhooks) are simpler. Use the API when a workflow that started elsewhere needs quiz data, for example "when a customer is created in my CRM, fetch their quiz answers".
## Create an API key
1. Go to **Developers** in the sidebar (under Settings).
2. Name the key after where you'll use it, for example `Make`, and click **Create API key**.
3. Copy the key (it starts with `sq_key_`). It is shown **once**.
Each key appears on the Developers page with when it was created and last used. **Revoke** stops it immediately. You can have up to 10 active keys. Treat keys like passwords: anyone with a key can read your store's quiz responses, including shopper emails.
## Authentication
Send the key in the `Authorization` header on every request:
```
Authorization: Bearer sq_key_…
```
**Base URL:** `https://api.shopper-quiz.com`
## Use it in Make or n8n
**Make:** add an **HTTP → Make a request** module.
- **URL:** for example `https://api.shopper-quiz.com/v1/search/responses`
- **Method:** GET
- **Headers:** `Authorization` = `Bearer sq_key_…`
- **Query string:** `email` = the shopper's email (map it from an earlier module)
- **Parse response:** Yes
**n8n:** add an **HTTP Request** node with the same URL, method, header and query parameter. Under **Authentication**, you can use **Generic Credential Type → Header Auth** with the name `Authorization` and the value `Bearer sq_key_…`.
The response is a JSON array. Map fields such as `[0].answers_text` or `[0].recommended_product_names`.
## Endpoints
All responses are JSON. Searches return an array, which is empty when nothing matches.
### Get the connected store
`GET /v1/me`
```json
{ "id": "…", "store_name": "ARTINIQ", "store_url": "artiniq.myshopify.com", "platform": "shopify", "currency": "AUD", "plan": "growth", "connection_type": "api_key" }
```
### List quizzes
`GET /v1/quizzes` returns up to 200 quizzes, newest first.
```json
[{ "id": "3a9b8c7d-…", "name": "Hair Discovery Quiz", "status": "live", "created_at": "2026-09-01T08:00:00.000Z" }]
```
### Find quizzes by name
`GET /v1/search/quizzes?name=hair` returns up to 5 quizzes whose name contains the text (case-insensitive), in the same shape.
### Find a shopper's responses
`GET /v1/search/responses`
| Parameter | Required | Description |
|---|---|---|
| `email` | One of `email` / `response_id` | Shopper email (case-insensitive) |
| `response_id` | One of `email` / `response_id` | A specific response |
| `quiz_id` | No | Limit to one quiz |
Returns up to 5 responses, newest first. Each has the same fields as a [`quiz.completed` event](https://docs.shopper-quiz.com/integrations/webhooks#data-fields): shopper, every answer (`answer_`, `answers`, `answers_text`) and recommended products. If you pass both `email` and `response_id`, a response must match both.
### List recent responses
`GET /v1/responses` returns the 50 most recent responses as `{ id, label, created_at }`, where `label` is "email · quiz · date". It's useful for dropdowns.
### Answer fields for a quiz
`GET /v1/quizzes/{quiz_id}/answer-fields`
```json
[{ "key": "answer_b1c2d3e4_0000_4000_8000_000000000001", "label": "Answer: What's your hair type?" }]
```
### Recent events
`GET /v1/events/{event}/samples?quiz_id=…`
Returns up to 3 recent real events of that type (`lead.created`, `quiz.completed`, `cart.added`, `checkout.started` or `order.created`), with the same fields as a [webhook event](https://docs.shopper-quiz.com/integrations/webhooks#data-fields), flattened into one object. If there are none yet, it returns one realistic sample. `quiz_id` is optional.
### Subscribe a URL to events
`POST /v1/hooks` with a JSON body:
```json
{ "target_url": "https://example.com/shopperquiz", "event": "quiz.completed", "quiz_id": null }
```
It responds `201` with `{ "id": "…", "event": "…", "quiz_id": null, "target_url": "…", "created_at": "…", "signing_secret": "sq_whsec_…" }`. Events are then delivered to `target_url` in the [webhook format](https://docs.shopper-quiz.com/integrations/webhooks#request-format), signed with the returned `signing_secret`. Subscriptions created this way are tied to the key: revoking the key removes them.
### Unsubscribe
`DELETE /v1/hooks/{id}` responds `200 { "id": "…", "deleted": true }`. It is safe to call more than once.
## Errors
| Status | Meaning |
|---|---|
| `400` | Invalid input. The `error` message says what to fix |
| `401` | Missing, invalid, revoked or expired key or token |
| `403` | The store's plan doesn't include integrations (Starter or above required) |
| `429` | Rate limit reached. Wait for the number of seconds in `Retry-After` |
| `500` | Something went wrong on our side. Retry shortly |
Error bodies look like `{ "error": "Enter a shopper email or a response ID to search for." }`.
## Limits
- 240 requests per minute per key.
- 200 active subscriptions per store.
- Use the `/v1/` paths. The same endpoints also answer under `/zapier/…` for compatibility with the official Zapier app.
## OAuth (official Zapier app only)
Your own tools use API keys. Only the official [Zapier integration](https://docs.shopper-quiz.com/integrations/zapier) signs in with OAuth 2.0 instead. Authorize at `https://app.shopper-quiz.com/oauth/authorize`; exchange and refresh tokens at `POST /zapier/oauth/token`. OAuth is reserved for the official Zapier integration.
Start with **Integrations → Zapier (or Webhooks) → Manage → Recent deliveries**. It answers the most important question: **did ShopperQuiz send the event?**
- **Delivered:** ShopperQuiz's part worked. The receiving tool accepted the event. If nothing happened after that, look in the tool itself (in Zapier: **Zap history**).
- **No row at all:** the event wasn't created or wasn't sent. See [No delivery appears](https://docs.shopper-quiz.com/integrations/automation-troubleshooting#no-delivery-appears).
- **Retrying or Failed:** the receiving tool rejected it. Click the row to see the HTTP status and error.
For HubSpot, see [HubSpot → Troubleshooting](https://docs.shopper-quiz.com/integrations/hubspot#troubleshooting).
## No delivery appears
| Check | Why |
|---|---|
| Wait 30 seconds | Events are sent 15–30 seconds after they happen |
| The Zap is **published** (or the endpoint is switched on) | Unpublished Zaps and paused endpoints receive nothing. Events from before publishing are not sent later |
| The Zap or endpoint uses the right **quiz** | A Zap filtered to Quiz A ignores Quiz B |
| **Sync per quiz** is on for that quiz | Turned-off quizzes send nothing |
| **New Lead:** the quiz asks for an email on the welcome screen | No email, no lead |
| **Completion:** the shopper reached the results page | Leaving midway isn't a completion |
| **Cart, checkout:** the shopper used the buttons on the quiz results page | Actions on regular store pages aren't linked to the quiz |
| **Order:** the order is linked to the quiz | Shopify: it contains a product added from the quiz results. WooCommerce: it was placed within an hour of going to the cart or checkout from the quiz, with the ShopperQuiz plugin active |
| **Order:** the order is **paid** | Shopify: paid orders. WooCommerce: *Processing*, *Completed* or *On hold* |
| Your plan is Starter or above and the subscription is active | Events pause while a subscription is past due or cancelled |
Each event fires **once per quiz attempt**. For example, adding a second product to the cart doesn't send another `cart.added`.
## Zapier
### The run says "Safely halted"
A step deliberately stopped the Zap. Open the run in **Zap history** and look at the step with the clock icon:
- **Find Response: "nothing was found"**: see the next question.
- **Filter by Zapier**: the filter's conditions weren't met, which is expected.
- The steps after a halted step show **Skipped**.
### Find Response finds nothing
- Fill in **only one** of *Shopper Email* or *Response*. With both, a response must match both. A response **picked from the dropdown** is fixed, so it will never match other shoppers.
- Map *Shopper Email* from the trigger, rather than typing an address.
- To keep the Zap running when nothing is found, set **Successful if no search results are found?** to **True**.
- *"Enter a Shopper Email or a Response ID to search for"* means both fields were empty.
### I changed the Zap but it still behaves the old way
Zapier runs the **published** version. Edits stay in a draft until you click **Publish**. When **Publish** is greyed out, the draft has no unpublished changes.
### Emails from "Email by Zapier" don't arrive
- **Test step** emails go to **your Zapier account's address**, not the **To** field, on Zapier plans below Team. Live runs use the **To** field.
- Email by Zapier is limited (about 10 emails per hour per account). Heavy testing can hit this; use **Gmail → Send Email** for higher volumes.
- Check **Promotions** and **Spam**.
- Check who is in **To**: *Shopper Email* sends to the shopper, while your typed address sends to you.
### Zapier asks me to reconnect
The connection was revoked in ShopperQuiz (**Revoke** or **Disconnect Zapier**), or the store's plan no longer includes Zapier. Reconnect from the Zap's **Account** field.
### "Your ShopperQuiz plan does not include Zapier"
Zapier and Webhooks need the Starter plan or above. Upgrade in **Settings → Plan & billing**, then retry the Zap run.
### The answer fields show IDs instead of question text
Pick a **Quiz** in the trigger. The fields are then labelled *Answer: your question*. Without a quiz filter, Zapier can't know which quiz's questions to show.
## Webhooks
### "Retrying" or "Failed"
Click the delivery to see the response:
| Error | Fix |
|---|---|
| HTTP 401 / 403 | Your endpoint is rejecting the request. Check its own authentication, or your signature verification |
| HTTP 404 | The URL is wrong, or the Make/n8n webhook was deleted. Copy the URL again |
| HTTP 5xx | Your endpoint crashed. Check its logs |
| Timed out after 10s | Respond with 2xx first, then do slow work |
| Blocked: private or reserved address | The URL points to a local or private network. Use a public HTTPS URL |
After fixing it, click **Retry now** on failed deliveries.
### The endpoint was paused
ShopperQuiz pauses an endpoint after 50 failures in a row, or when it responds **410 Gone**. Fix the endpoint, then switch it back on in the drawer.
### My signature check fails
- Use the **raw** request body, before JSON parsing or re-serialising.
- Sign `t + "." + body`, not the body alone.
- After **Rotate secret**, update the secret in your code.
- See [Verify the signature](https://docs.shopper-quiz.com/integrations/webhooks#verify-the-signature) for working code.
### I received the same event twice
Retries can deliver an event again. Use the `id` field or the `X-ShopperQuiz-Event-Id` header to ignore duplicates.
## Still stuck?
Email **support@shopper-quiz.com** with the time of the quiz run and, if you have it, the delivery or event ID from **Recent deliveries**.
The Quiz Builder is the heart of ShopperQuiz. It's where you design every question, assign votes to products, and control exactly how shoppers experience your quiz. Everything — from the welcome screen to the final results — is configured here.
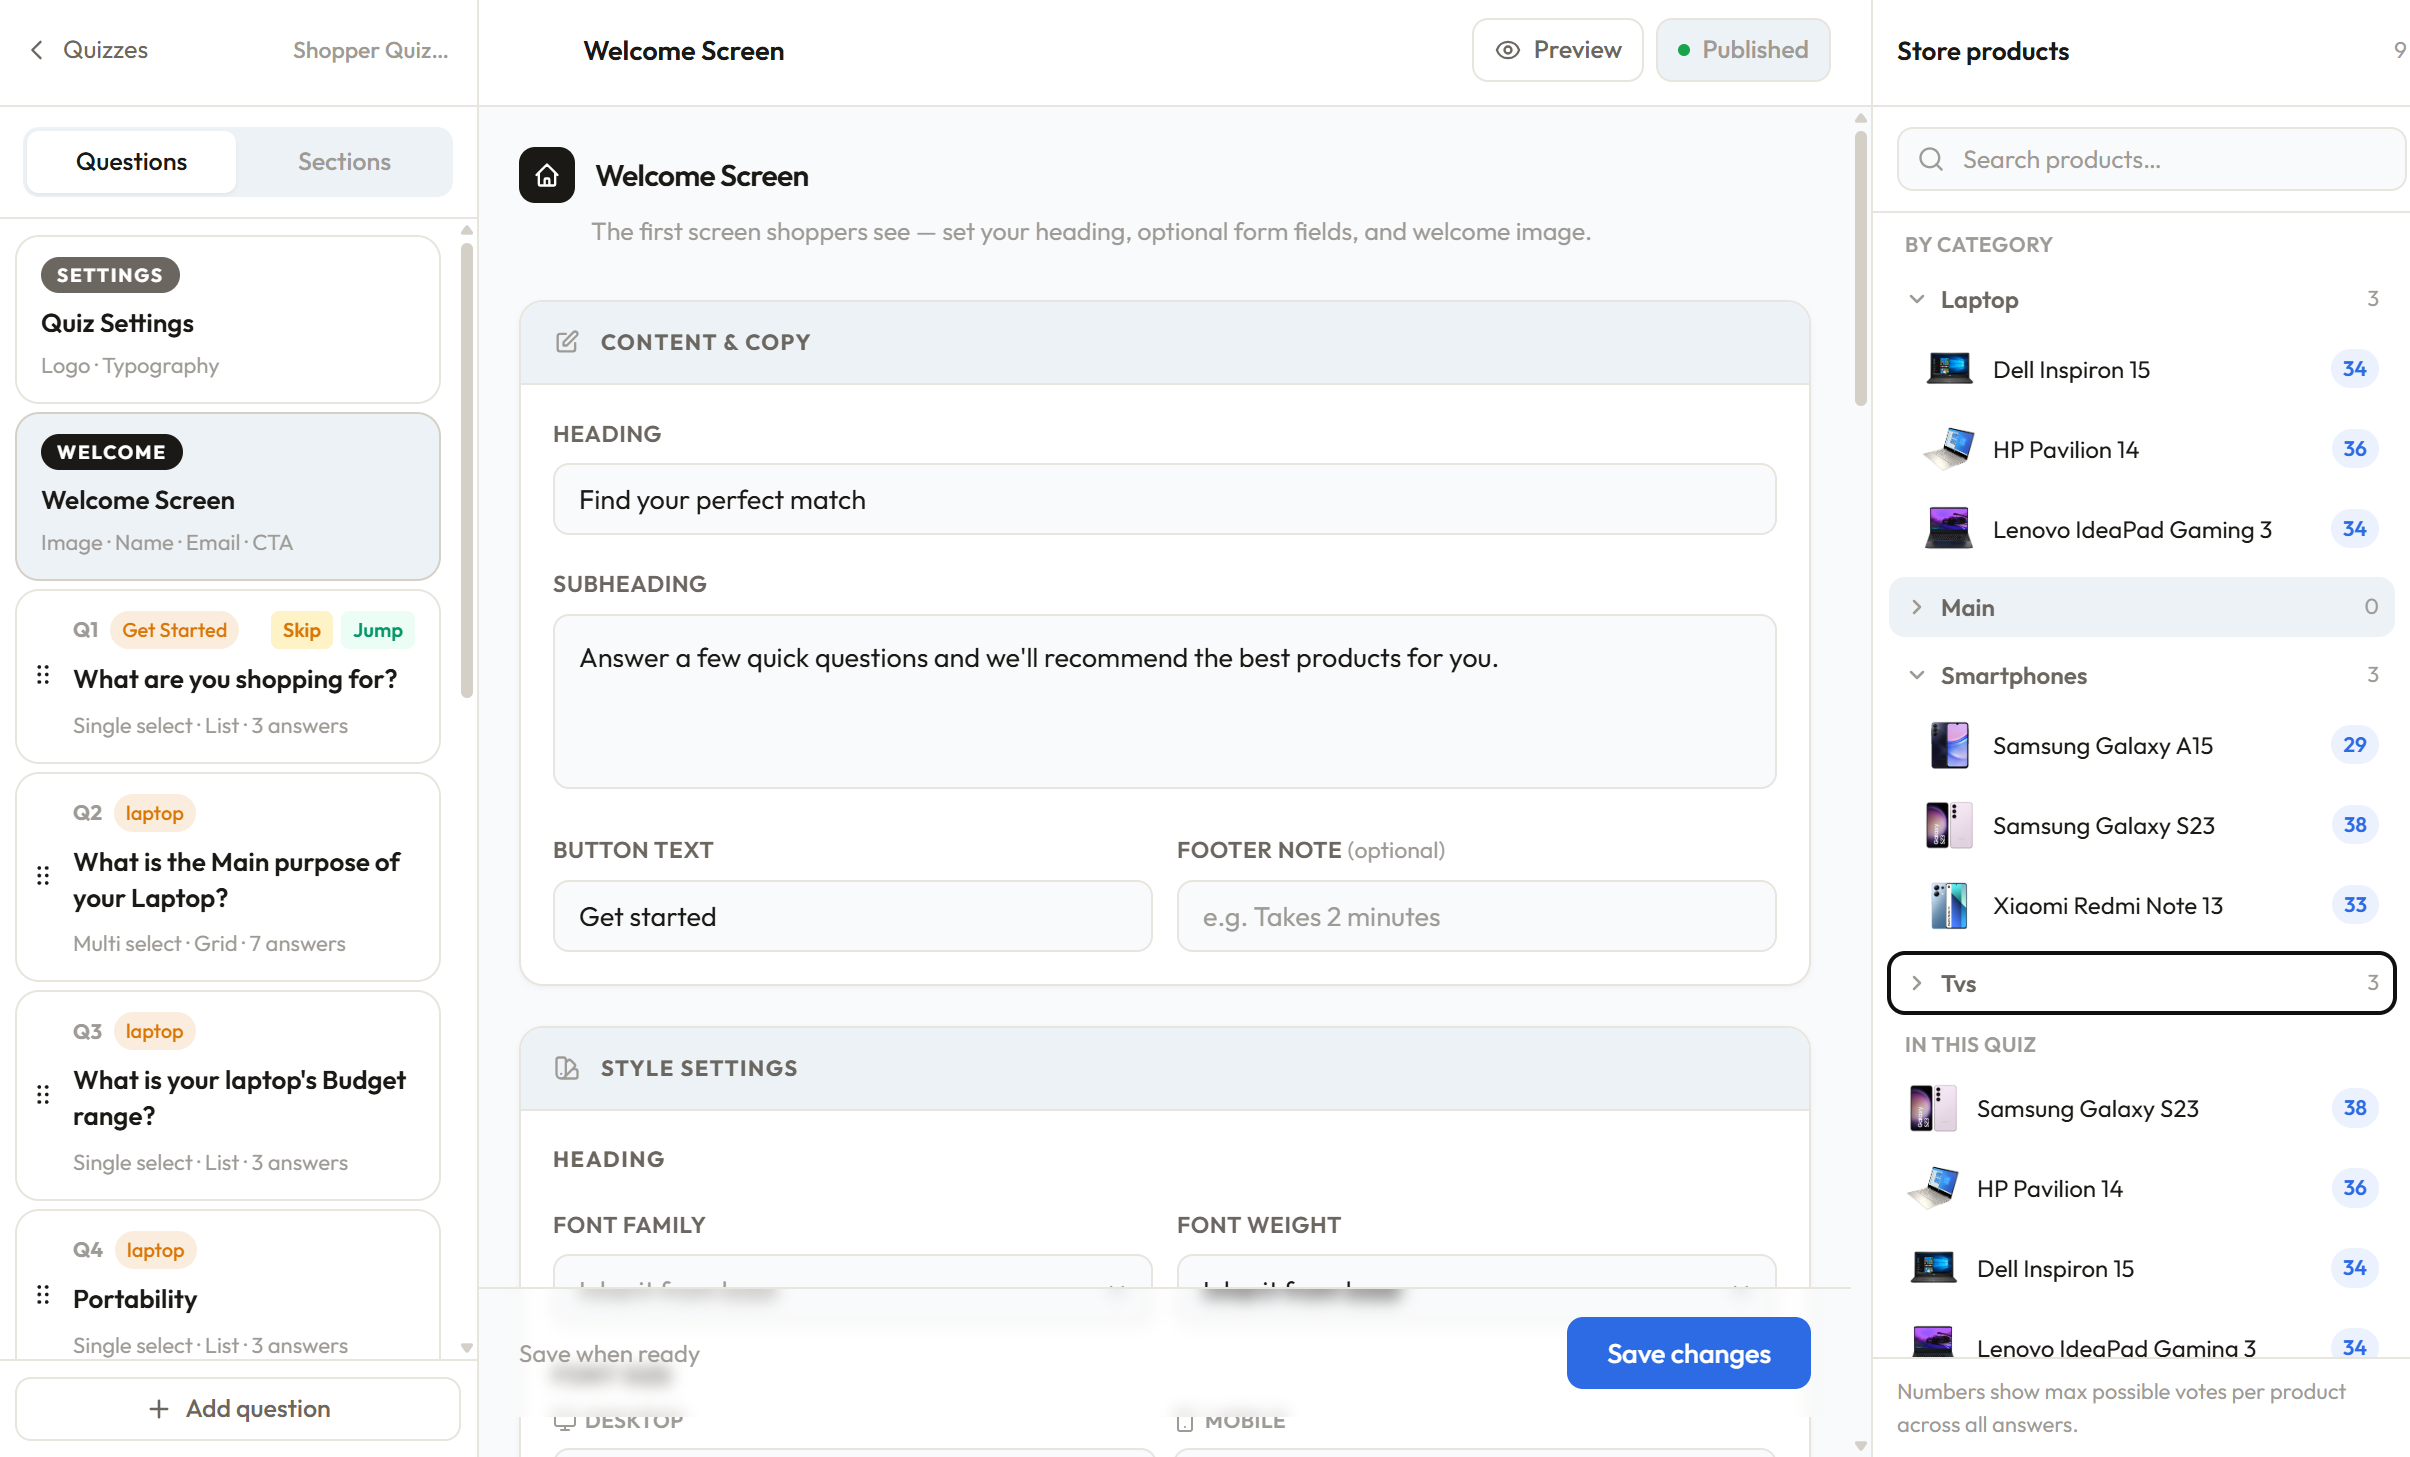
## The three-panel layout
The Quiz Builder uses a three-panel layout designed to keep everything in view while you work.
**Left panel — Question list**
A scrollable list of everything in your quiz, with two tabs: **Questions** and **Sections**. In the Questions tab, items always appear in this order: Quiz Settings at the top, then Welcome Screen, then your questions, then Results Screen at the bottom. An **Add question** button sits in the footer. Click any item to open it in the center panel. Questions can be dragged to reorder them.
**Center panel — Editor**
This is where you edit. What renders here depends on what you've selected in the left panel — the Quiz Settings editor, Welcome Screen editor, a question editor, or the Results Screen editor.
**Right panel — Store products**
Your full product catalog, organized by collections, tags, and individual products. Each product shows its current total vote count — the maximum votes it can accumulate across the entire quiz. This updates live as you assign votes, so you can see at a glance whether products are well-represented or being left out.
On smaller screens, the products panel collapses into a slide-in drawer accessible via the Products button.
## What's in the question list
**Quiz Settings** — always at the top. Controls your quiz logo and typography. Opens the settings editor in the center panel.
**Welcome Screen** — directly below Quiz Settings. This is the first screen shoppers see before the quiz starts. Opens the welcome editor.
**Your questions** — listed in order between the Welcome Screen and Results Screen. Each shows its question number, section tag if assigned, question text, and any logic badges (filter, skip, jump). Drag to reorder.
**Results Screen** — always at the bottom. Controls layout, cart buttons, and fallback behavior. Opens the results editor.
## The Sections tab
Switching to the **Sections** tab in the left panel lets you manage quiz sections — labels that group questions and appear above the progress bar as shoppers move through the quiz. You can add, rename, recolor, and delete sections here. Sections are purely visual and don't affect vote logic.
## Question types
Each question has one of two types:
**Single select** — the shopper picks one answer and moves on. Best for questions where only one answer applies, like "What is your skin type?"
**Multiple select** — the shopper can pick more than one answer before continuing. You control the minimum and maximum number of selections. Best for questions like "What are your hair concerns?" where multiple things may apply.
## Answer display styles
Answers can be displayed in four styles:
- **Default** — text-only answer buttons, clean and minimal
- **Checkmarks** — answers with a checkmark indicator, good for multiple select
- **Icons** — each answer has a small image thumbnail alongside the label
- **Images** — each answer has an uploaded image, good for visual choices like styles or shades
## Vote assignment
This is the core mechanic. Every answer you create can be assigned votes for products. When a shopper selects that answer, those votes are added to a running total. At the end of the quiz, the products with the most accumulated votes become the recommendations.
Each answer can assign votes in one of four ways:
- To **specific products** individually
- To **all products in a collection**
- To **all products with a specific tag**
- To **all products** in the store (useful for "Not sure" type answers)
The right panel shows the cumulative vote totals across the entire quiz, so you always know which products are being favored.
## Filter questions
A question can be marked as a **filter question**. When it is, the shopper's answer permanently eliminates products that don't match — regardless of how many votes those products accumulate from other questions.
For example: if you ask "Do you want a vegan product?" and the shopper selects Yes, all non-vegan products are removed from the results entirely, even if they had high votes from earlier questions. Filters run before votes are counted, and each filter question narrows the eligible product pool further.
## Skip and jump logic
Each answer can carry logic that affects the quiz flow:
**Skip** — when this answer is selected, specific future questions are hidden and skipped. Votes from skipped questions are not counted.
**Jump** — when this answer is selected, the quiz jumps directly to a specific future question, bypassing everything in between.
Skip and jump are mutually exclusive per answer. Logic only moves forward, never backward.
## Saving your quiz
Changes are saved per section — the question editor, welcome editor, results editor, and quiz settings each have their own Save button. Nothing auto-saves, so make sure to save after making changes.
## Managing your quizzes
On the **Quizzes** page, each quiz has a three-dot menu at the end of its row (it appears when you hover over the row) with:
- **Edit in Builder** — open the quiz in the Quiz Builder
- **Rename** — change the quiz's name. Your storefront embed keeps working, because it uses the Quiz ID, not the name
- **Copy styles from…** — copy the look of another quiz (widget styles, welcome and results screens, quiz settings)
- **Set Live**, **Pause** or **Move to Draft** — change the quiz's status. Only Live quizzes load on your storefront
- **Delete** — permanently delete the quiz
## Next steps
- [Welcome Screen](/quiz-builder/welcome-screen) — configure what shoppers see before the quiz starts
- [Questions and Answers](/quiz-builder/questions-and-answers) — deep dive into question settings
- [Vote Assignment](/quiz-builder/vote-assignment) — how votes work and how to assign them effectively
- [Filter Questions](/quiz-builder/filter-questions) — eliminate products based on shopper answers
- [Skip & Jump Logic](/quiz-builder/skip-jump-logic) — control the quiz flow per answer
The AI Quiz Builder writes a complete first draft of a quiz for you — questions, answers, sections, vote assignments and filters — based on a short description of your store and your real product catalog. You then review and fine-tune it in the normal Quiz Builder.
## Before you start
Your store must be connected and your products synced. The AI reads your catalog (up to 200 products, plus your collections — categories on WooCommerce — and tags) so the quiz only uses products, collections and tags that really exist. If nothing has synced yet you'll see "No products found. Make sure your store is synced."
## Generating a quiz
1. Go to **Quizzes** and click **Generate with AI**.
2. Describe your store in a sentence or two — what you sell and who your customers are. For example: *"I sell premium skincare — serums, moisturizers and sunscreens for different skin types. My customers are mostly women aged 25–45 looking for clean ingredients."*
3. Click **Generate quiz** (or press ⌘/Ctrl + Enter). Generation usually takes under a minute.
4. Review the preview: the quiz name, and every question with its type, layout, answers, filters and budget ranges.
A generated quiz typically has 6–9 questions and can include:
- Single-select and multiple-select questions, in list or grid layouts
- **Filter questions** that rule out products that would be wrong for an answer (only when your catalog has matching collections or tags)
- A **budget** question with price ranges built from your store's real prices, in your store's currency (ranges that would match no products, or almost all of them, are automatically rebalanced)
- A **None of the above** answer on multiple-select questions where it makes sense
- Vote assignments to individual products, collections or tags
- Sections to group the questions
## Refining the draft
Not quite right? Type what to change in **Not quite right? Tell Ana what to change** — for example *"Add a budget question"* or *"Use more filter questions"* — and click **Refine**. You can refine up to **5 times** per draft; after that, click **Start over** for a fresh generation.
## Saving
Click **Open in Builder**. The quiz is saved as a **Draft** with default welcome screen, results screen and widget styles, and the Quiz Builder opens so you can review it. The AI can make mistakes — check vote weights, filters and logic, and [preview](https://docs.shopper-quiz.com/quiz-builder/preview) the quiz before setting it live.
## Monthly limits
| Plan | Generations | Refines per month |
|------|-------------|-------------------|
| Free | 1 in total (one-time) | 3 |
| Starter | 5 per month | 15 |
| Growth | 20 per month | 60 |
| Pro / Custom | Unlimited | Unlimited |
Paid-plan limits reset at the start of each calendar month. On Free, once your one generation is used, upgrade to Starter for 5 a month. The modal shows how many generations and refines you have left. When you reach the limit you'll be offered an upgrade; quizzes you already generated stay in your account.
Quiz Settings controls the quiz-wide branding and typography applied across the entire widget — welcome screen, questions, and results. Open it by clicking **Quiz Settings** at the top of the question list in the left panel.
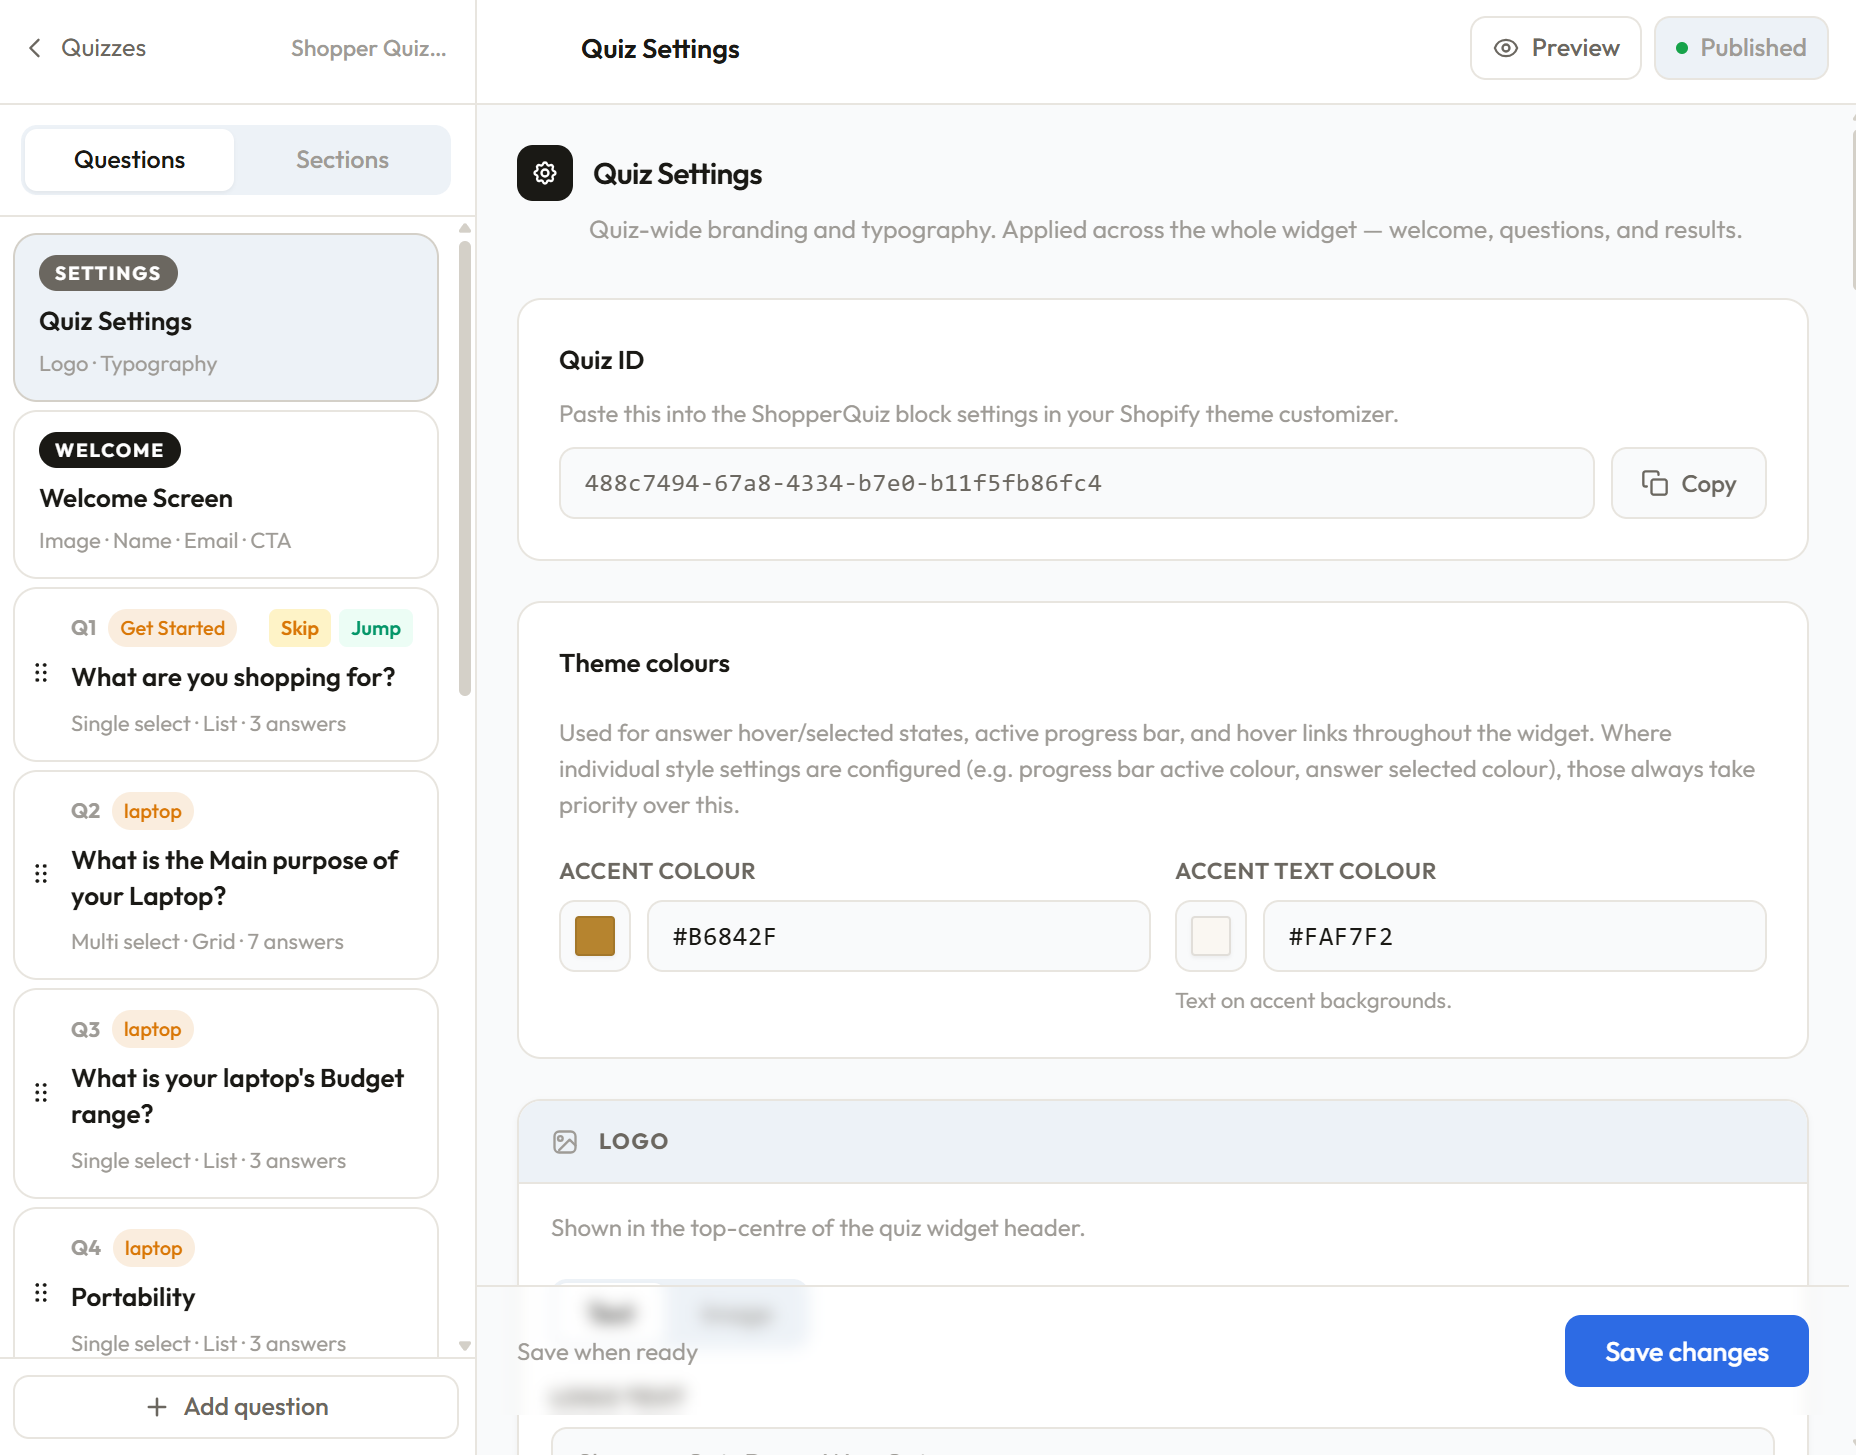
## Quiz ID
At the top of Quiz Settings you'll find your **Quiz ID** — a unique identifier for this quiz. This is what you paste into the ShopperQuiz block in your Shopify theme customizer, or into the `[shopperquiz id="..."]` shortcode on WooCommerce. Click **Copy** to copy it to your clipboard. You can also find it in the URL while you're in the Quiz Builder.
## Theme colours
Two global colour tokens used throughout the widget:
**Accent colour** — used for answer hover and selected states, the active segment of the progress bar, and interactive links throughout the widget. Where individual settings override this (for example, a custom selected background colour on answer options), those always take priority over the accent colour.
**Accent text colour** — the text colour shown on top of accent-coloured backgrounds, such as a selected answer.
## Logo
The logo appears in the top centre of the quiz widget header. You can display it as **text** or as an **image**.
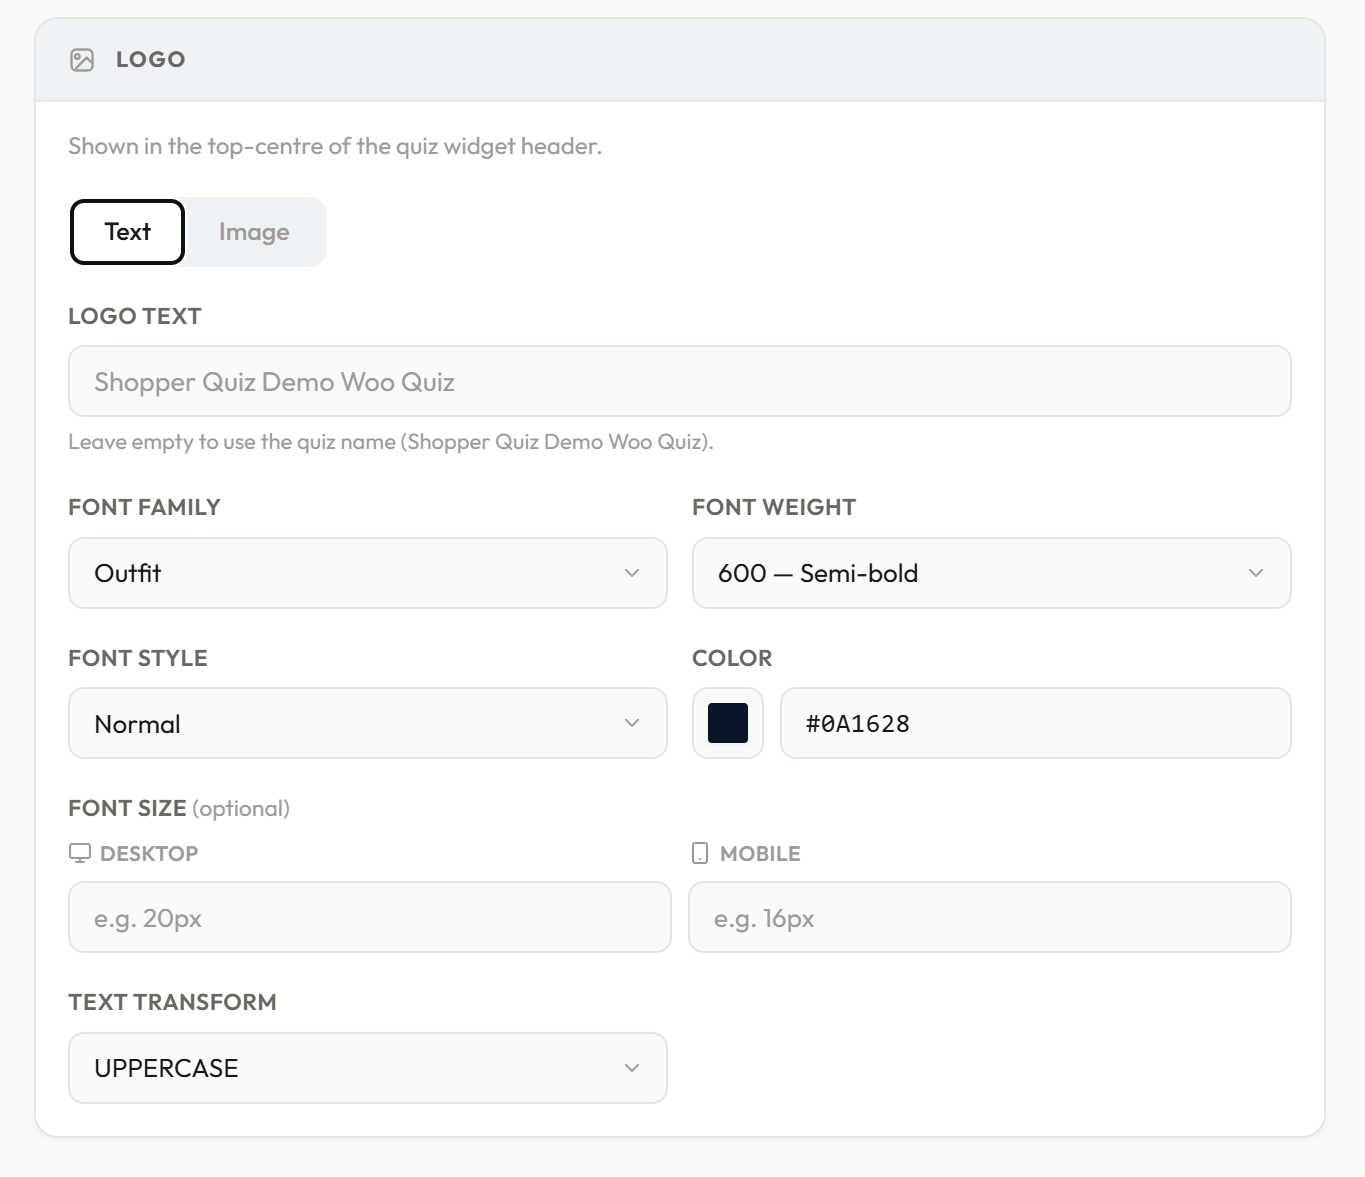
**Text logo**
- **Logo text** — the text to display. Leave it empty to use the quiz name automatically.
- **Font family** — choose from the available font options
- **Font weight** — thin through black
- **Font style** — normal or italic
- **Color** — hex colour for the logo text
- **Font size** — separate values for desktop and mobile (e.g. `20px` desktop, `16px` mobile)
- **Text transform** — none, uppercase, lowercase, or capitalize
**Image logo**
- Upload a JPG, PNG, WebP, or SVG file
- **Alt text** — accessibility description of the logo image
- **Max height** — slider from 16px to 64px controlling how tall the logo image renders
Image uploads require a paid plan. On the free plan, only the text logo option is available.
## Base typography
The foundation for all text in the widget. Every other typography section inherits from this unless explicitly overridden.
- **Font family**
- **Font weight**
- **Font size** — desktop and mobile values
- **Color**
- **Text transform**
## Question typography
Overrides applied specifically to the question heading text. Inherits from base typography by default. You can override any combination of: font family, font weight, font size (desktop + mobile), color, and text transform.
## Question subtitle typography
Overrides for the optional subtitle shown below the question heading. Same controls as Question typography.
## Answer options
Controls both the typography and box styling of every answer option in the quiz.
**Typography** — font family, font weight, font size (desktop + mobile), color, text transform. Inherits from base typography by default.
**Box styling**
- **Border radius** — controls the shape of answer boxes (e.g. `0px` for square, `8px` for rounded, `999px` for pill)
- **Padding X / Padding Y** — horizontal and vertical spacing inside each answer box
**Default state** — how an unselected answer looks:
- Background color
- Border color
- Border width
**Selected state** — how an answer looks when the shopper clicks it:
- Background color
- Text color
- Border color
- Border width (the selected border color also controls the checkmark color in checkmarks and icons display styles)
**Answer alignment** — aligns the label text within the answer box: left, center, or right. Primarily affects image-style answers where the label sits below the image.
**Answer description** — style for small description text shown below an answer label: font family, font weight, font size (desktop + mobile), color, text transform.
**Icons style** — applied when the answer display style is set to Icons:
- Icon size (e.g. `56px`)
- Icon border radius (e.g. `50%` for circle, `8px` for rounded square)
## Section labels
Typography for the small label that appears below the progress bar indicating which section of the quiz the shopper is in. Controls font family, font weight, font size, color, and text transform.
## Progress bar
Controls the progress bar that runs across the top of the quiz widget.
**Segments**
- **Active** — the color of the current segment (the one in progress)
- **Completed** — the color of segments already passed
- **Inactive** — the color of upcoming segments not yet reached
- **Height** — slider from 1px to 8px
**Section label typography** — typography for the section name shown above the progress bar, with separate desktop and mobile font sizes.
## Continue button
The continue button appears on multiple-select questions. Single-select questions advance automatically without showing it.
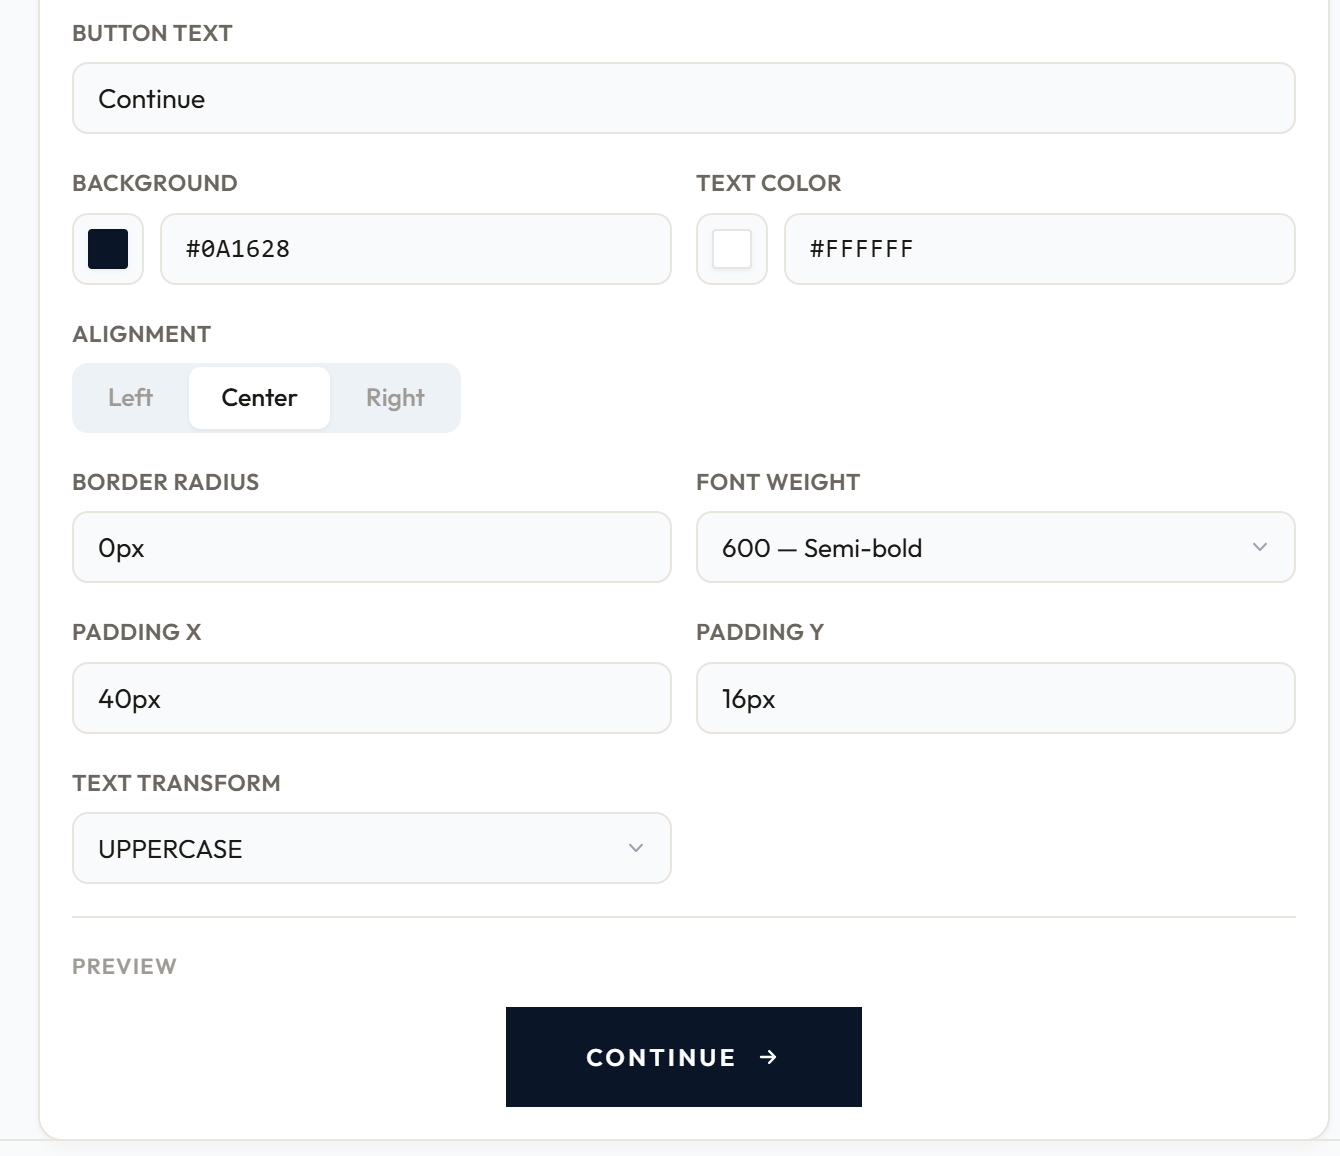
- **Button text** — default is "Continue"
- **Background color**
- **Text color**
- **Alignment** — left, center, or right
- **Border radius** — e.g. `0px` for square, `8px` for rounded
- **Font weight**
- **Padding X / Padding Y** — horizontal and vertical padding inside the button
- **Text transform**
A live preview of the button renders below the settings so you can see changes immediately.
## Saving
Click **Save changes** in the sticky bar at the bottom of the page. Changes are not saved automatically.
The Welcome Screen is the first thing shoppers see when they open your quiz — before any questions appear. It's where you introduce the quiz, collect optional contact details, and optionally display a brand image. Click **Welcome Screen** in the left panel to open it in the editor.
## Content & Copy
**Heading** — the main title displayed prominently on the welcome screen. Keep it short and inviting, e.g. "Find your perfect match" or "Take the Hair Discovery Quiz".
**Subheading** — a short paragraph below the heading describing what the quiz does or what the shopper can expect. Optional but recommended.
**Button text** — the label on the CTA button that starts the quiz. Defaults to "Get started".
**Footer note** — small text shown below the CTA button. Optional. Good for reassurance copy like "Takes 2 minutes" or "No account needed".
## Style Settings
The Style Settings card controls the visual appearance of the welcome screen text and button, independently from the rest of the quiz.
**Heading**
- Font family, font weight, font style (normal / italic)
- Font size — separate desktop and mobile values (e.g. `40px` desktop, `28px` mobile)
- Color
- Text transform
**Subheading**
- Font family, font weight, font style
- Font size — desktop and mobile
- Color
- Text transform
**Footer note**
- Font size — desktop and mobile
- Color
**CTA Button**
- Background color and text color
- Font family, font weight, font size (desktop + mobile), text transform
- Border radius — e.g. `0px` for square, `8px` for rounded
- Width — Auto (fits the button text) or Full width (stretches across the welcome form)
- Padding X / Padding Y — horizontal and vertical spacing inside the button
- Alignment — Left or Center (only shown when width is set to Auto)
## Form Fields
The welcome screen can optionally collect the shopper's name and email before they start the quiz.
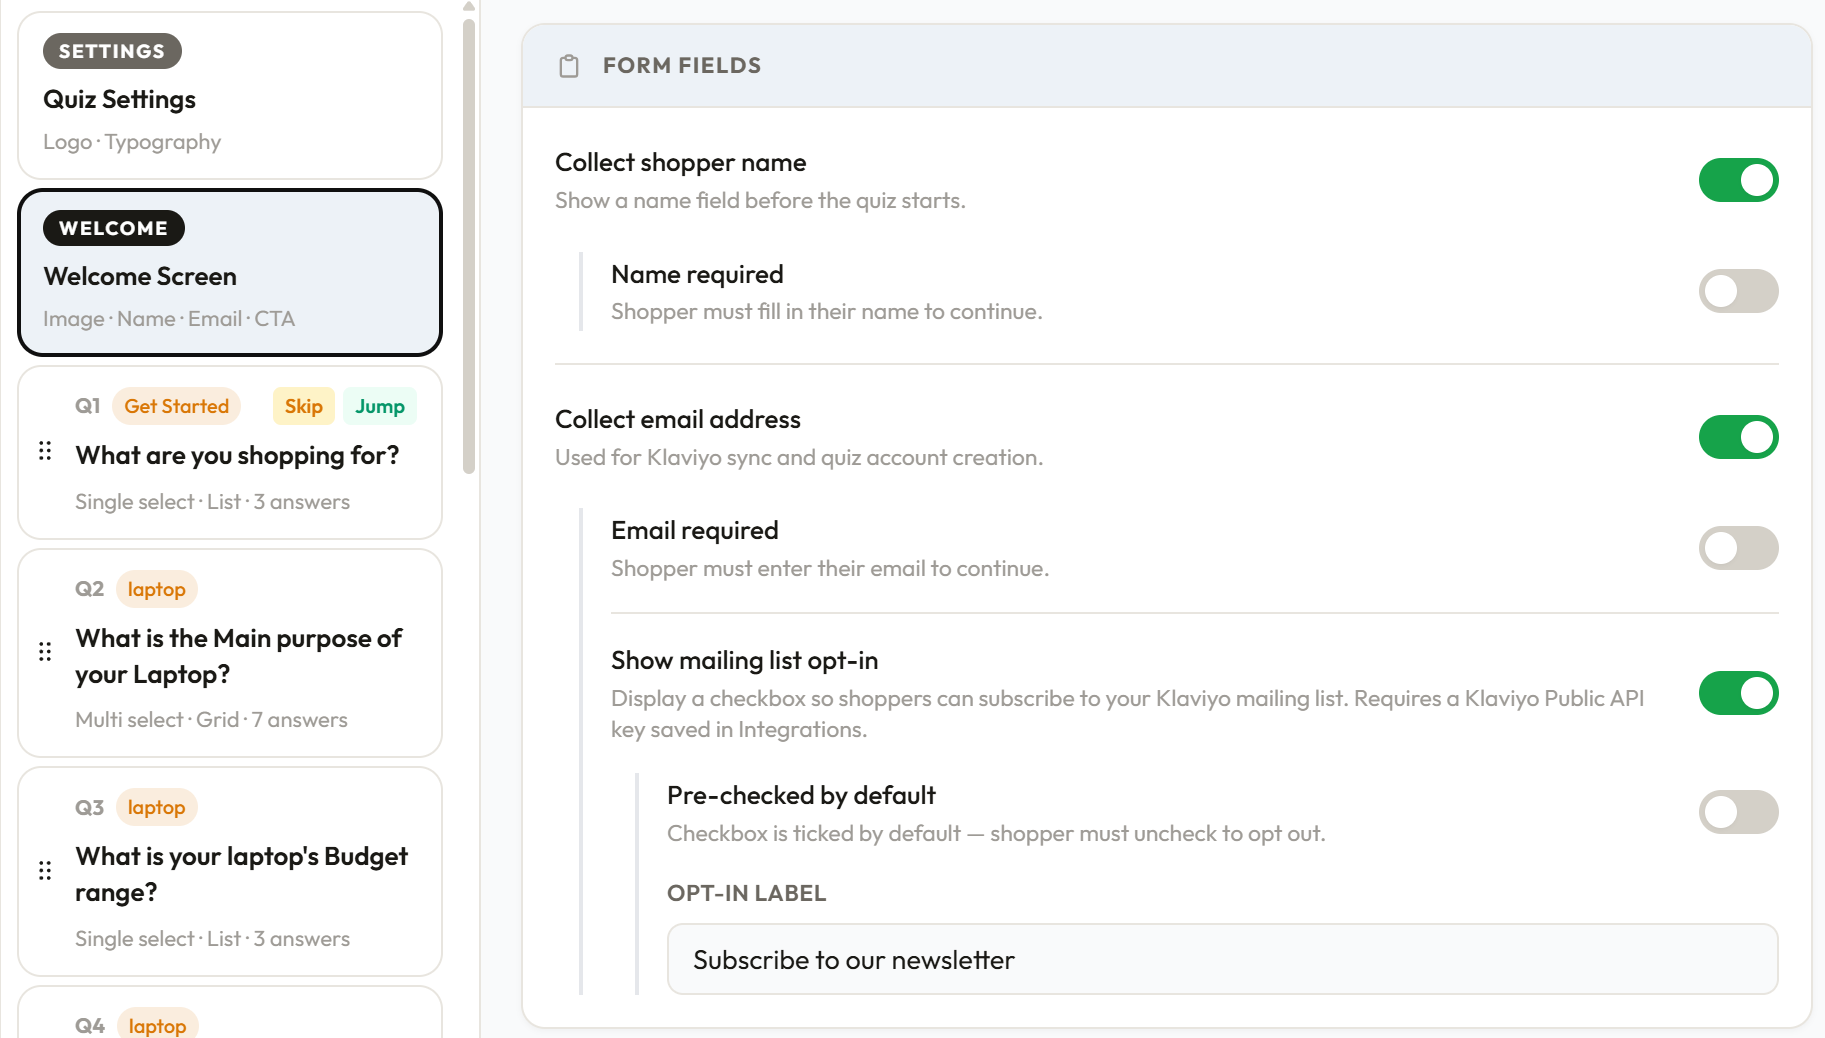
**Collect shopper name** — shows a name input field on the welcome screen.
- **Name required** — if enabled, the shopper must fill in their name before they can continue.
**Collect email address** — shows an email input field. The email is what connects a shopper to your email and CRM tools (Klaviyo, Mailchimp, HubSpot), results emails (Resend), Lead events and the Responses page.
- **Email required** — if enabled, the shopper must enter their email before they can continue. Leave it off to make the email optional — shoppers can then skip it and still take the quiz.
- **Show mailing list opt-in** — displays a newsletter checkbox. Shoppers who tick it are subscribed in every email tool you've connected (Klaviyo, Mailchimp, and HubSpot if a subscription type is set). Available on the Starter plan and above.
- **Pre-checked by default** — the checkbox is ticked automatically; the shopper must uncheck it to opt out.
- **Opt-in label** — the text next to the checkbox, e.g. "Subscribe to our newsletter".
## Welcome Image
You can optionally display a brand image alongside the welcome form.
**Show a welcome image** — toggle to enable the image. When disabled, the welcome form takes the full width of the quiz widget.
**Image position** — three layout options:
- **Left** — image on the left, form on the right
- **Right** — form on the left, image on the right
- **Background** — image fills the entire welcome screen behind the form content
**Image width** — for Left and Right positions, a slider (25%–65%) controls what proportion of the welcome screen the image occupies.
**Overlay colour and opacity** — for Background position only. An overlay is placed between the image and the form content so the text remains readable. You control the overlay colour and its opacity (0%–100%).
**Hide image on mobile** — recommended. Hides the image on small screens so the form takes full width, which is almost always better on mobile.
**Image** — provide an image URL, or upload a JPG, PNG, WebP, or GIF directly. Uploading requires a paid plan. On the free plan, you can still use an external image URL. You can replace or remove the image at any time.
**Alt text** — accessibility description of the image for screen readers.
## Content Layout
Controls the width and positioning of the welcome form content area.
**Desktop**
- **Content width** — shown when the image is set to Background or disabled. Controls what percentage of the widget the form content occupies (40%–100%).
- **Content max width** — the maximum pixel width the content area can reach, regardless of the widget's size (280px–900px).
**Mobile**
- **Content max width** — the maximum pixel width of the content area on mobile screens (280px–1000px).
## Saving
Click **Save changes** in the sticky bar at the bottom. Changes are not saved automatically.
Questions are the core building blocks of your quiz. Each question presents a set of answers the shopper can choose from, and every answer they select votes for specific products. Click any question in the left panel to open it in the editor.
## Adding a question
Click **Add question** at the bottom of the left panel. A new question is created, saved immediately, and selected in the editor ready to configure.
## Question settings
**Question text** — the main question shown to the shopper. Keep it clear and direct, e.g. "What's your hair type?" or "What's your primary hair concern?"
**Subtitle** — an optional line of smaller text shown below the question heading on the storefront. Good for adding context or guidance, e.g. "Select the pattern that best matches your natural hair".
**Section** — assign the question to a section. Sections group questions under a label that appears above the progress bar on the storefront. Manage sections from the Sections tab in the left panel. A question doesn't need a section.
**Question type** — either Single select or Multiple select. Single select advances automatically when the shopper picks one answer. Multiple select lets them pick several before clicking Continue. See [Multiple Select](/quiz-builder/multiple-select) for full details.
**Layout** — List (answers stacked vertically) or Grid (answers in a two-column grid). Grid works well for short answer labels or image-style answers.
**Filter question** — toggle to make this a filter question. When enabled, each answer defines a product scope, and products outside that scope are permanently eliminated from results at runtime — regardless of votes from other questions. See [Filter Questions](/quiz-builder/filter-questions) for full details.
## Answer options
Answers are listed in the **Answer options** card. Each answer is a row showing its number, label, and any active badges — filter scope, Skip, Jump, or None.
Click the **chevron** on any answer row to expand it and access vote assignment, description, image, logic, and the None option.
Drag the handle on the left of any answer to reorder it. Click the **×** button to delete it.
Click **Add answer** at the bottom of the card to create a new answer.
## Answer fields (expanded row)
**Label** — the text shown on the answer button on the storefront. Editable directly in the collapsed row without expanding.
**Description** — optional small text shown below the answer label on the storefront. Good for a brief explanation, e.g. "Lacks moisture, prone to breakage".
**Image / Icon** — only shown when the answer display style is Icons or Images. See [Answer Styles](/quiz-builder/answer-styles).
**Vote assignment** — which products this answer votes for when selected. See [Vote Assignment](/quiz-builder/vote-assignment).
**Skip / Jump logic** — controls what happens to the quiz flow when this answer is selected. See [Skip & Jump Logic](/quiz-builder/skip-jump-logic).
**"None" exclusive option** — only available on multiple select questions. When toggled on, selecting this answer clears all other selected answers and prevents any other answer from being combined with it. See [Multiple Select](/quiz-builder/multiple-select).
## Reordering questions and answers
Drag any question in the left panel to change its position in the quiz. Drag any answer row within a question to reorder the answer options. Reordering doesn't affect vote assignments — it only changes the order things appear.
## Saving
Click **Save changes** in the sticky bar at the bottom of the editor. Both the question settings and all its answers are saved together. Nothing auto-saves.
To delete the question entirely, click **Delete question** in the same bar.
Each question has an answer display style that controls how the answer options look on the storefront. The style is set per question and applies to every answer in that question. You can change it at any time without losing your vote assignments.
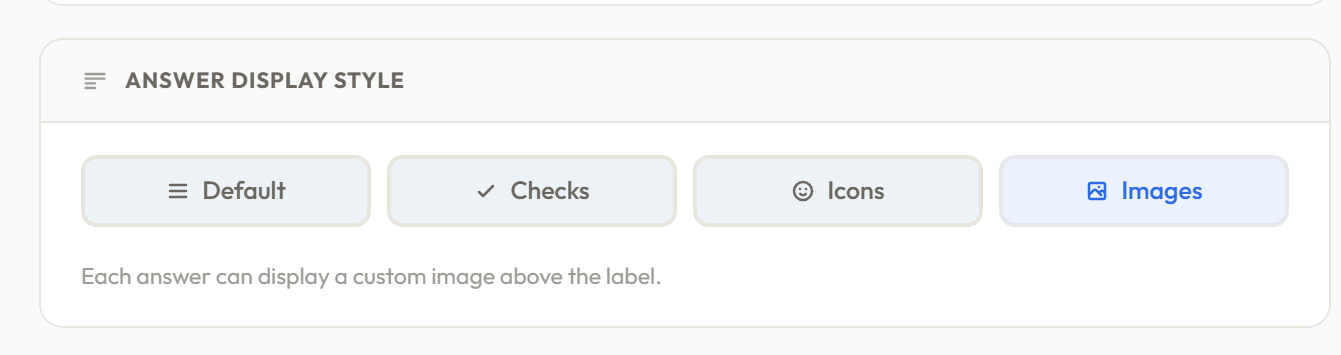
## Default
Text-only answer buttons, clean and minimal. The answer label is displayed inside a bordered box. No icons, images, or checkmark indicators. Works well for any question type but is especially clean for single-select questions where the question moves on automatically.
Use this when the answer text is self-explanatory and there's nothing visual to add.
## Checkmarks
Similar to Default but with a visible checkmark indicator on each answer. The checkmark is shown in the answer box — empty when unselected, filled when selected. The checkmark color follows the selected border color setting in Quiz Settings.
Checkmarks work particularly well for multiple select questions where shoppers need to see at a glance which answers they've already picked.
## Icons
Each answer displays an uploaded image rendered as a small circular thumbnail to the left of the answer label. You set the image on each answer individually by expanding its row in the Answer Options card and uploading or pasting a URL into the Icon image field.
Icons work well when you want a small visual cue alongside the text — think product photos, ingredient close-ups, or simple graphic symbols. Because they render as small circular thumbnails, clean square images or ones with a transparent background work best.
The icon size and border radius are controlled under **Answer options → Icons style** in Quiz Settings.
## Images
Each answer displays an uploaded image (or image URL) above the label. Images are set per answer by expanding the row in the Answer Options card and uploading or pasting a URL into the Image field.
Images work best for visual choices — hair textures, product styles, color swatches, lifestyle photos, fabric types. When answers represent something the shopper needs to see rather than read, images are almost always the right choice.
The image layout works best in Grid mode (2 columns). In List mode, images stack vertically, which can feel heavy.
## When to use each style
| Style | Best for |
|---|---|
| Default | Simple text answers, single select questions |
| Checkmarks | Multiple select questions where selections need to be visible |
| Icons | Small circular image thumbnails alongside the label |
| Images | Visual choices — styles, textures, colours, looks |
The style is a presentation choice only. It has no effect on vote assignments, filter logic, or skip/jump logic.
Vote assignment is the core mechanic of ShopperQuiz. Every answer a shopper selects casts votes for products. At the end of the quiz, the products with the highest accumulated vote totals become the recommendations.
## How voting works
When a shopper picks an answer, that answer's vote assignments run — adding votes to every product the answer is configured to target. This happens silently in the background as the shopper moves through the quiz. When the quiz ends, ShopperQuiz sorts all eligible products by their total accumulated votes and presents the top results.
This means a product rises to the top by being relevant to *multiple* answers — not just one. A product that gets a moderate vote from five different answers will outrank a product that gets a large vote from one answer but nothing else.
## Assigning votes to individual products
Open an answer row by clicking its chevron, then click the **Products** tab in the vote assignment section. Search for products by name and add them individually. You can set a custom vote weight for each product — the default is 1.
Use this method when you want precise control. For example, if one product is clearly the best match for a specific answer, give it a higher weight (e.g., 3) so it wins over products that also match but less perfectly.
## Assigning votes by collection or category
Click the **Collections** tab (or **Categories** on WooCommerce). Select a collection and set a vote weight. When this answer is selected, every product in that collection receives that many votes.
This is the most efficient method for most quizzes. Instead of picking products one by one, you define intent at the collection level — "this answer should favor the Growth collection" — and the votes flow to all products in it automatically. When you add new products to that collection in your store, they're automatically included the next time votes run.
## Assigning votes by tag
Click the **Tags** tab. Select a tag and set a vote weight. Every product carrying that tag receives votes when the answer is selected.
Tags complement collections well. A product can belong to one collection but carry multiple tags — so if a question is about a concern that cuts across collections, voting by tag is the natural fit. For example, a "moisturizing" tag might span products across different collections, so a "Dry hair" answer can vote for `moisturizing` regardless of collection.
## Assigning votes to all products
Click the **All products** tab and set a vote weight. Every product in your store receives that many votes when this answer is selected.
Use this sparingly — usually for "Not sure" or "All of the above" type answers where you don't want to penalise the shopper for not knowing. Voting for all products slightly inflates every product's total equally, so it doesn't distort the relative ranking — it just nudges everything up by the same amount.
## Vote weights
Each vote assignment has a weight — how many votes that assignment contributes. The default is 1. You can increase the weight to signal stronger relevance.
For example:
- "Dry and brittle" → Moisture collection, weight 2 — strongly favors moisturising products
- "Dry and brittle" → Growth collection, weight 1 — weakly favors growth products since dry hair is also prone to breakage
Weights are relative. There's no fixed scale — what matters is how your weights compare to each other across all the answers in the quiz. Start with 1s and only add higher weights where one option is meaningfully more relevant than others.
## Viewing vote counts in the right panel
The right panel shows every product in your store along with its **maximum possible vote total** — the sum of all votes it could accumulate if a shopper selected every answer that includes it.
This updates live as you assign votes, so you can see immediately which products are being well-represented and which are being overlooked. A product with a very low total compared to others is unlikely to appear in recommendations — it may need more vote assignments.
Products are also shown under their collections and tags, so you can see where votes are coming from at a glance. Products that aren't reachable by any current vote assignment appear in a "Not in this quiz" section at the bottom of the panel.
A filter question permanently eliminates products that don't match the shopper's answer — regardless of how many votes those products accumulate from other questions. Filters run before the vote count is evaluated, so a filtered-out product can never appear in results even if it has the highest vote total.
## What is a filter question?
Most quiz questions assign votes to products. A filter question does something different: the shopper's answer defines a scope, and any product outside that scope is removed from the eligible pool entirely.
Think of it as a hard requirement rather than a preference. Votes express "this product is a good fit." A filter expresses "this product is disqualified — don't show it, period."
## Enabling the filter
Open a question in the editor, scroll to the Question settings card, and toggle **Filter question** on.
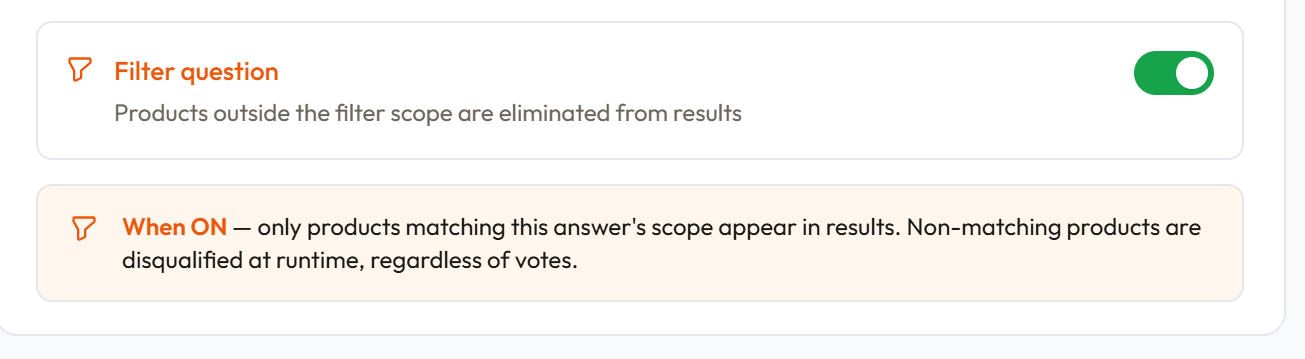
Once the toggle is on, the question is marked with an indigo **Filter** badge in the question list. Each answer on the question now has a **Filter scope** field instead of standard vote assignment.
## Setting the filter scope per answer
With the filter toggle enabled, expand any answer row. You'll see a **Filter scope** selector instead of the vote assignment tabs. This is where you define which products survive the filter when the shopper picks this answer.
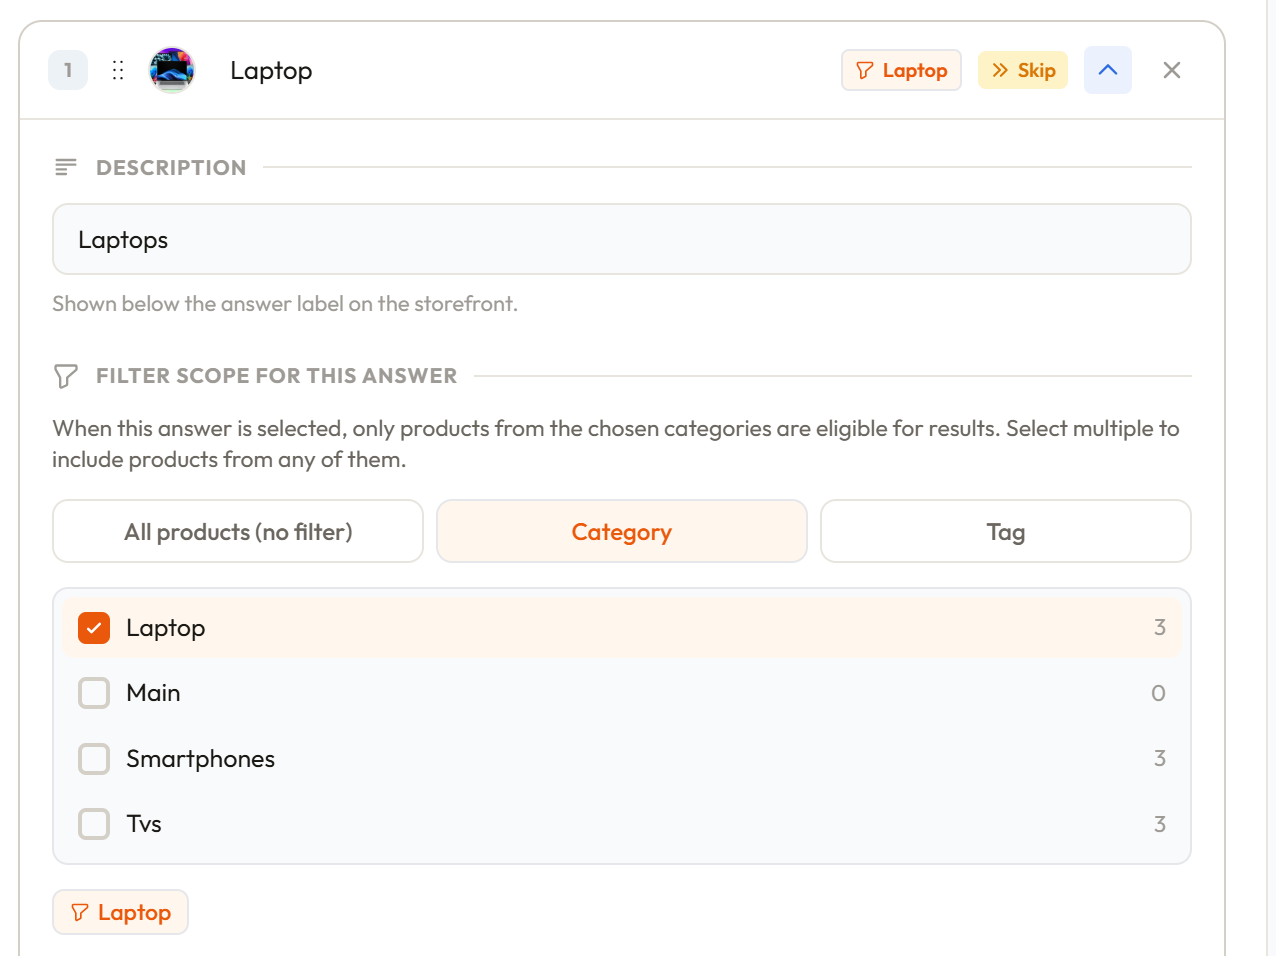
Each answer's filter scope can be set to one of three types:
**Collection / Category** — only products in this collection remain eligible. All other products are eliminated.
**Tag** — only products carrying this tag remain eligible. All other products are eliminated.
**All products** — no products are eliminated by this answer. Useful for a "No preference" or "All types" option on a filter question where you want the shopper to be able to opt out of filtering.
## How filters affect results at runtime
When the quiz runs and the shopper reaches a filter question:
1. The shopper picks an answer
2. ShopperQuiz records the filter scope for that answer
3. At the end of the quiz, before ranking by votes, every product is checked against every filter scope collected
4. Any product that falls outside a filter scope is removed from the eligible pool
5. The remaining products are ranked by vote total and displayed as recommendations
A product must pass all filter checks to be eligible. If your quiz has two filter questions, a product must be within scope for both answers the shopper selected.
## Progressive filtering with multiple filter questions
You can have more than one filter question in a quiz. Each one narrows the eligible pool further. For example:
- Filter Q1: "Do you want a vegan product?" → Shopper selects Yes → Only vegan-tagged products remain
- Filter Q2: "What result are you after?" → Shopper selects Growth → Only products in the Growth collection remain
- After both filters: only products that are *both* vegan-tagged *and* in the Growth collection are eligible
The order of filter questions doesn't matter — all filter scopes are applied together at the end before vote ranking runs.
## How filters change the vote assignment UI on other questions
When a filter question is present in the quiz, the vote assignment tabs on non-filter answers adapt to reflect the narrowed scope:
- If the filter is scoped to a **Collection**: the vote assignment UI shows "All products in filter", "Individual products (from filter)", and "Tag (within filter)". The Collection tab is hidden since it's already set by the filter.
- If the filter is scoped to a **Tag**: the UI shows "All products in filter", "Individual products (from filter)", and "Collection (within filter)". The Tag tab is hidden.
This keeps the vote assignment UI focused on products that are actually reachable given the filter — avoiding the confusion of assigning votes to products that will be filtered out anyway.
## When to use filter questions
Filter questions work best for hard requirements — attributes where showing a product that doesn't match would be a clear failure. Common examples:
- Vegan / non-vegan preference
- Product type (oil vs. powder vs. cream)
- Hair texture or skin type where only a subset of products apply
- Price range if you have distinct product tiers
For preferences that are more of a "bonus" than a requirement — where a product can still be a good recommendation even if it doesn't perfectly match — vote weight is the better tool. Reserve filters for genuine dealbreakers.
Budget Filter is a question type that filters product recommendations by price range — without any setup required in your store. Since ShopperQuiz already syncs your product prices, you simply set a min and max price per answer and the filtering happens automatically at quiz time.
## The problem it solves
Before Budget Filter existed, creating a price-based filter question required manual work in your store:
1. Go to your store and create separate collections or tags for each price tier (e.g. "Under $50", "Mid Range", "Premium")
2. Assign every product to the correct collection or tag
3. Sync those collections and tags into ShopperQuiz
4. Go back to the quiz builder and set up a filter question scoped to those collections or tags
Budget Filter removes all of that. Your product prices are already synced — you just configure the ranges directly in the quiz builder.
## Enabling Budget Filter
Open a question in the editor, scroll to the **Question settings** card, and toggle **Budget filter** on.
Once enabled:
- The question is marked with a green **Budget** badge in the question list
- Each answer on the question shows a **Price range** field
- The normal **Filter question** toggle is automatically disabled — the two are mutually exclusive
**Note:**
Budget filter and Filter question cannot be active at the same time on the same question. If Filter question is already on, turn it off first before enabling Budget filter, and vice versa.
## Setting a price range per answer
With Budget filter on, expand any answer row. You'll see a **Price range for this answer** section with two fields:
- **Min price** — the lowest price a product must have to be eligible (leave at 0 for no lower limit)
- **Max price** — the highest price a product can have to be eligible (leave blank for no upper limit)
For example, for a question "What's your budget?" with three answers:
| Answer | Min price | Max price |
|---|---|---|
| Budget | 0 | 50 |
| Mid range | 51 | 150 |
| Premium | 151 | *(blank)* |
Prices are matched against each product's synced price in the currency your store uses.
## Votes still apply within the range
Budget filter works in two steps, exactly like a standard filter question:
1. **Disqualify** — any product whose price falls outside the selected answer's range is removed from the eligible pool entirely
2. **Vote** — votes from all other questions are tallied across the remaining eligible products, and the top-voted products are recommended
This means you can still assign votes to products, collections, or tags within a budget range — so that the most relevant products within the shopper's budget always rise to the top. If you just want simple price filtering with no further ranking, leave the vote assignment on **All in range** (the default when Budget filter is enabled) and all products in the range receive equal treatment.
## How it looks in the vote assignment tabs
When Budget filter is on, the vote assignment tabs update to reflect the price-scoped product pool:
- **Individual products** — shows only products within the answer's price range, with their prices displayed so you can verify the range is working correctly
- **Collection / Tag** — assigns votes to all products in that collection or tag that also fall within the price range
- **All in range** — assigns equal votes to every product within the price range (the default)
## Progressive filtering with other questions
Budget filter participates in the same progressive elimination system as standard filter questions. If your quiz has both a Budget filter question and a regular filter question:
- A product must pass the price range check **and** fall within the collection or tag scope
- Both filters are applied together before vote ranking runs
- The order of the questions in the quiz does not affect the result
## When to use Budget Filter vs. standard Filter
Use **Budget Filter** when your filtering criterion is price — it requires no store setup and works automatically from synced prices.
Use a standard **Filter question** when your filtering criterion is a collection, category, or tag — for example product type, skin type, hair texture, or any attribute already organised in your store.
Both can coexist in the same quiz on different questions.
Negative votes let you actively suppress products from appearing in results when a shopper selects a specific answer. While regular vote assignment promotes products, negative votes penalise them — pushing their score down so they fall below the threshold required to appear as a recommendation.
## How suppression works
Every product's final score is the sum of all votes it receives across every answer the shopper selects. ShopperQuiz only shows products with a score above zero. If a product's total reaches zero or below, it is excluded from results — even if it earned positive votes from other answers in the quiz.
Negative votes exploit this directly. Assign a negative vote value to a product (or a whole collection or tag), and if the shopper selects that answer, those negative votes are subtracted from that product's running total.
## Enabling negative votes on an answer
Expand any answer row by clicking its chevron. At the top of the vote assignment area you'll see an **Allow negative votes** toggle. It is off by default.
Turn it on. The vote steppers for that answer now allow values below 1 — you can step down into negative numbers or type any value directly into the field.
The toggle is per-answer, not per-question. You can have some answers that only assign positive votes and others that also suppress — they work independently.
## Setting a negative vote value
Once the toggle is on, use the stepper or type directly into the vote field. There is no floor — you can go as low as you need.
**How low should you go?**
It depends on how many positive votes the product can realistically accumulate from other answers. If a product can earn up to 8 positive votes across the rest of the quiz, assigning −8 means selecting this answer exactly cancels those out and the product won't appear. Assigning −9 or lower guarantees suppression regardless of other votes.
When you want a product to *never* appear if this answer is selected — regardless of how many positive votes it picks up elsewhere — go large: **−50 or −100**. There is no penalty for using a high magnitude. A score of −90 and a score of −1 both result in the same outcome: the product is excluded. The higher number just gives you more certainty that no realistic combination of positive votes elsewhere can overcome it.
## Which assignment methods support negative votes
All four tabs work with negative votes once the toggle is on:
- **Individual products** — suppress specific products by name
- **Collection / Category** — suppress every product in a collection at once
- **Tag** — suppress every product carrying a tag
- **All products** — suppress the entire catalogue (useful when combined with filters to remove everything outside scope)
## Viewing suppressed products in the right panel
The Store Products panel on the right updates live. Products with a negative net vote total appear with a **red badge** showing their score. This makes it easy to see at a glance which products are being actively suppressed across the quiz.
Products that net exactly zero appear in the "Not in this quiz" section — they have no positive presence in results.
## When to use negative votes
**Use negative votes when:**
- A specific answer makes a product clearly unsuitable, but that product still receives positive votes from other answers
- You want to override the voting engine's natural ranking for a particular answer combination
- You need to exclude a product for one segment of shoppers without removing it from results for everyone
**Don't use negative votes when:**
- The product simply isn't relevant — just don't assign it any positive votes and it will stay at zero
- A filter question would be cleaner — if the product should be disqualified for an entire category of shopper (e.g. "vegan only"), a [filter question](https://docs.shopper-quiz.com/quiz-builder/filter-questions) is more appropriate
## Negative votes vs filter questions
| | Negative votes | Filter questions |
|---|---|---|
| Scope | Per-answer | Per-question |
| Mechanism | Reduces score | Eliminates before scoring |
| Overridable | Yes — enough positive votes elsewhere can overcome a small negative | No — filter elimination is absolute |
| Best for | Soft suppression, nuanced ranking | Hard requirements, dealbreakers |
Use filters for dealbreakers. Use negative votes for strong preferences where suppression should still be possible to overcome with enough positive signal from other answers — or use a very large negative value (−50, −100) when you want guaranteed suppression without the rigidity of a filter.
Include and Exclude let you pin or block specific products on a per-answer basis — without relying on vote counts. When a shopper selects an answer that has includes or excludes set, those rules are applied after all votes are counted, overriding the scoring entirely.
## Why use this instead of votes
Vote assignment is great for ranking — more relevant answers push more relevant products to the top. But sometimes you need a guarantee, not a ranking signal:
- A certain answer makes one specific product the **must-have recommendation** — you want it first, always
- A certain answer makes a product completely unsuitable — you want it gone, no matter how many votes it earned elsewhere
That's where Include and Exclude come in. They are absolute — no amount of votes from other answers can override them.
## How it works
**Include** pins a product to the top of results when the answer is selected. Included products appear above all vote-ranked products. If multiple answers each include different products (and the shopper selects all of them), all included products are pinned to the top together, sorted alphabetically by product ID.
**Exclude** removes a product from results entirely when the answer is selected. The product is gone — even if it earned votes from every other answer.
**Exclude always wins over include.** If one answer includes a product and another answer excludes the same product, and the shopper selects both answers, the product is excluded.
**Filters still take precedence.** If a [filter question](https://docs.shopper-quiz.com/quiz-builder/filter-questions) has already disqualified a product (because the shopper's answer put it out of scope), Include cannot bring it back. Eligibility is checked first; Include and Exclude apply only within the eligible pool.
## Setting up includes and excludes
Open any answer in the quiz builder by clicking its chevron to expand it. At the top of the vote assignment area you'll see **Include / Exclude products**.
1. Type a product name in the search box
2. Click **Include** to pin that product to the top when this answer is selected, or **Exclude** to block it
3. The product appears immediately in the active summary above the search box — green chip for included, struck-through grey for excluded
4. Click the × on any chip to remove the rule
Include and Exclude are mutually exclusive per product — setting one clears the other automatically.
## Seeing it on the answer row
Once an answer has includes or excludes set, the collapsed answer row shows a summary badge:
- **+2 pins** (green) — 2 products are pinned to the top for this answer
- **−1 excluded** (grey) — 1 product is blocked for this answer
This makes it easy to audit rules across all your answers at a glance without expanding each one.
## Include vs Exclude vs other tools
| Tool | Mechanism | Overridable |
|---|---|---|
| Vote assignment | Increases score | Yes — other answers can outscore it |
| [Negative votes](https://docs.shopper-quiz.com/quiz-builder/negative-votes) | Decreases score | Yes — enough positive votes elsewhere can overcome it |
| **Include** | Pins to top, ignores score | No — always first unless excluded by another answer |
| **Exclude** | Removes from eligible pool | No — always removed unless filter already removed it |
| [Filter questions](https://docs.shopper-quiz.com/quiz-builder/filter-questions) | Disqualifies before scoring | No — absolute |
Use **vote assignment** when ranking matters and the product should compete fairly.
Use **negative votes** when you want to suppress a product but allow it to potentially survive with enough positive signal.
Use **Include** when a product must appear first for a specific answer combination.
Use **Exclude** when a product must never appear for a specific answer combination.
## Common patterns
**"If you answered X, you must see Product A first"**
Open the answer for X, search for Product A, click Include. Done — Product A will be the first recommendation whenever a shopper selects that answer, regardless of votes.
**"If you have a sensitive scalp, hide our strongest formula"**
Open the "sensitive scalp" answer, search for the product, click Exclude. Any shopper who selects that answer will never see that product in their results.
**"Free gift with this selection"**
Include a free gift product on a qualifying answer so it always surfaces at the top. Pair it with vote assignment on the same answer so the rest of the results still rank naturally below it.
Skip and jump logic let you branch the quiz flow based on what a shopper selects. Instead of every shopper seeing every question in order, you can hide irrelevant questions or jump past them entirely — creating a personalised path through the quiz.
## What is conditional logic?
By default, every shopper goes through every question in sequence. Conditional logic changes this per answer: when a specific answer is selected, the quiz either skips over certain questions or jumps directly to a different one.
Logic is set per answer, not per question. Multiple answers on the same question can carry different logic — each one routing the shopper differently.
## Skip logic — hiding future questions
Skip logic hides one or more specific questions when the answer is selected. The shopper never sees those questions, and the votes from those questions are not counted in the final result.
To set skip logic on an answer, expand the answer row, go to the **Skip / Jump logic** section, select **Skip specific questions**, and pick the questions to skip. You can select multiple non-contiguous questions — there's no requirement that the skipped questions be adjacent.
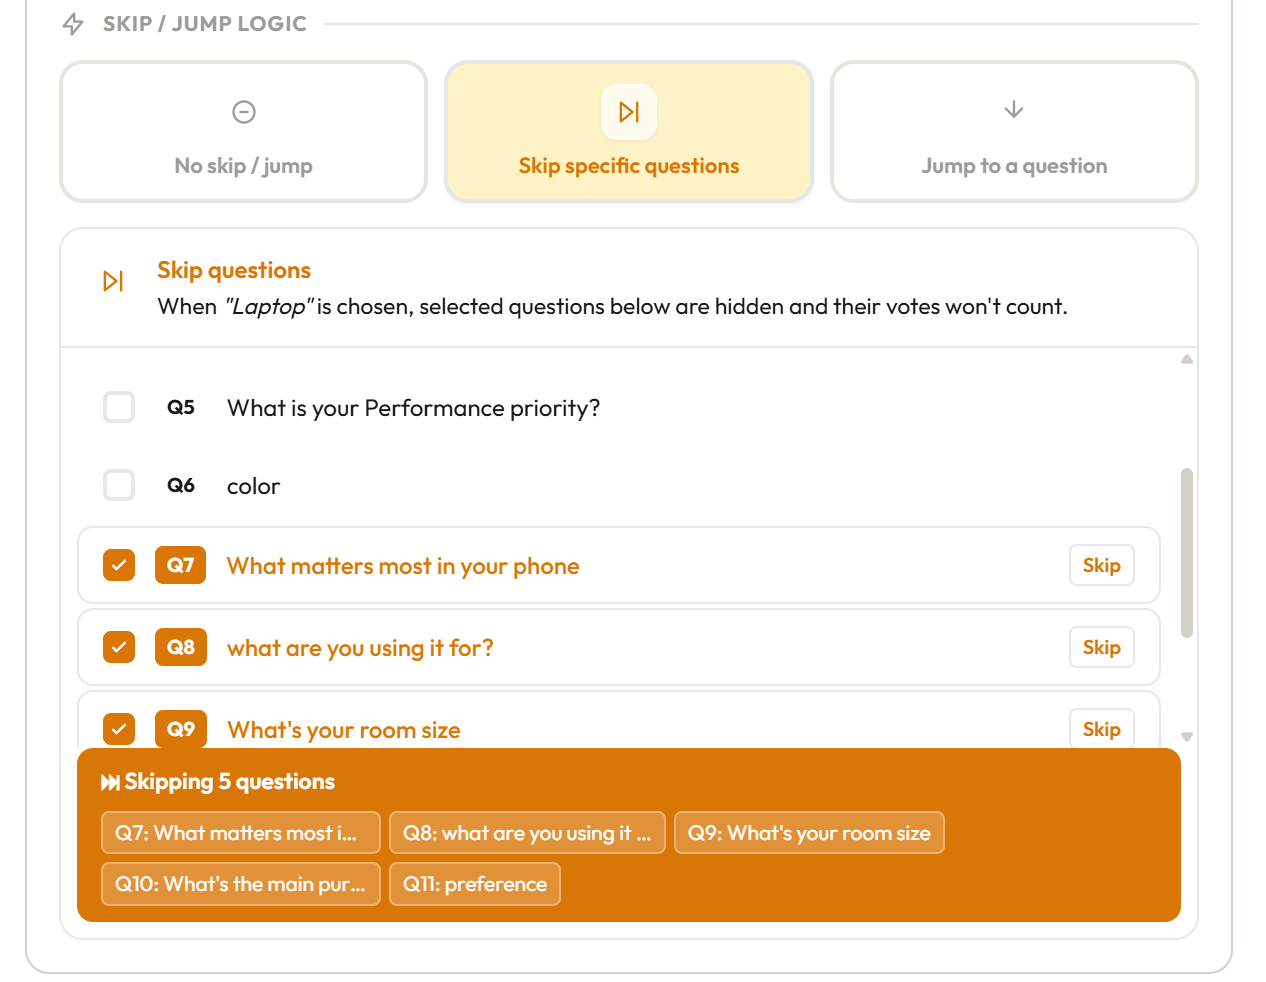
The answer will show a purple **SKIP** badge in the question list so you can see at a glance which answers carry skip logic.
**When votes from skipped questions are not counted:** this is intentional and important. If a question is skipped, it means it wasn't relevant to the shopper — counting its votes would distort the result. Skip logic is designed to work together with your vote assignments, not against them.
## Jump logic — jumping to a specific question
Jump logic sends the shopper directly to a specific question, bypassing everything in between. When the answer is selected, the quiz skips over all intervening questions and lands on the destination.
To set jump logic, expand the answer row, go to the **Skip / Jump logic** section, select **Jump to question**, and choose the destination question. You can only jump to one destination per answer.
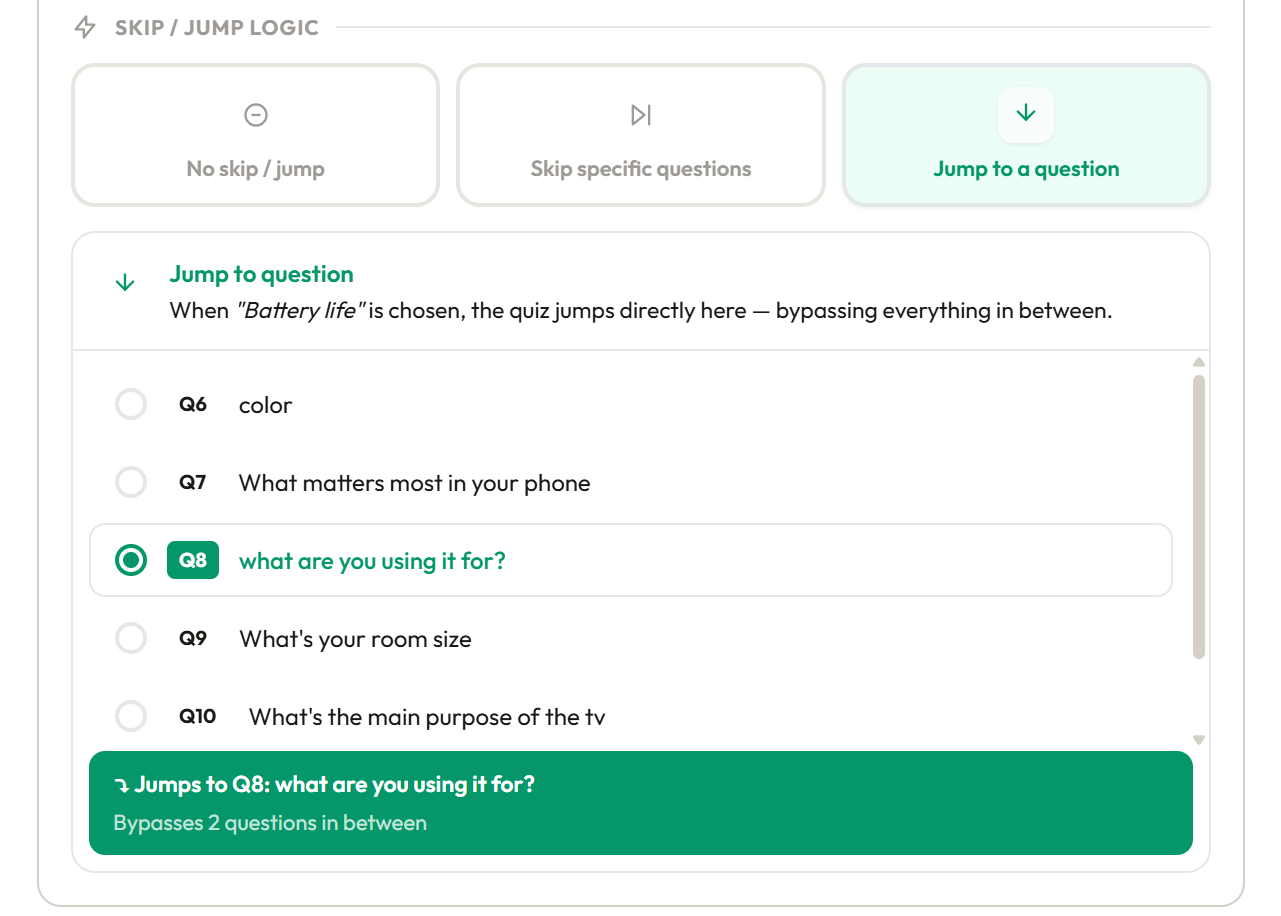
The answer will show a blue **JUMP** badge in the question list.
Unlike skip logic — which explicitly hides named questions — jump logic bypasses everything between the current question and the destination. Votes from all bypassed questions are not counted.
## Skip vs. jump — choosing the right one
**Use skip** when you want to hide specific questions but the shopper should still see the questions in between. For example: skip Q4 and Q6, but still show Q5.
**Use jump** when you want to completely bypass a section of the quiz and pick up at a specific point. For example: if the shopper selects "Very short hair" on Q5, jump straight to Q7 because length-related questions in between don't apply.
In practice, jump is simpler to set up and easier to reason about when you're routing shoppers around a whole block of questions. Skip is better when you need surgical removal of specific questions while leaving others in the path.
## Rules and limitations
- Skip and jump are **mutually exclusive** on the same answer. You cannot set both. Setting one clears the other.
- Logic can only move **forward** — you cannot skip backward to a previous question or jump to a question that appears earlier in the quiz.
- Skip can target **multiple questions** in one answer. Jump targets a **single destination**.
- A question can be the target of multiple jump or skip rules from different answers — that's fine.
- The last question in the quiz cannot carry skip or jump logic (there's nowhere to skip or jump to).
## How skipped questions affect votes
Questions that are skipped — whether by skip logic or by being bypassed through a jump — do not contribute votes to the result. Their vote assignments are simply not run for that shopper.
This means your vote assignments on non-skipped questions carry more weight for shoppers who skip others. Design your quiz so that the questions most shoppers will see have thorough vote assignments covering your full product catalog.
## Visual indicators in the question list
Answers carrying logic are marked with badges in the collapsed answer row and in the question list:
- **SKIP** (purple) — this answer skips specific questions
- **JUMP** (blue) — this answer jumps to a specific question
These badges make it easy to audit your logic at a glance without expanding every answer row.
Multiple select questions let shoppers pick more than one answer before moving on. Instead of advancing automatically on the first tap, the quiz shows a Continue button, and the shopper can select as many answers as you allow before proceeding.
## Enabling multiple select
Open a question in the editor and change the **Question type** to **Multiple select**. The Multiple Select Settings card will appear below the question settings, and a Continue button will be shown on that question in the widget.
## Minimum and maximum selections
The Multiple Select Settings card has two fields:
**Minimum** — the fewest answers the shopper must pick before the Continue button becomes active. Set to 1 if you want the shopper to select at least one answer. Set to 0 to allow them to continue without selecting anything (not recommended — it produces weak results).
**Maximum** — the most answers the shopper can select. Once this limit is reached, additional answers can't be selected until the shopper deselects one. Leave it blank or set it to the total number of answers if you want no upper limit.
A common setup is minimum 1, maximum 3 — this ensures at least one selection (so the question contributes to the result) while preventing a shopper from selecting every answer, which would dilute the recommendations.
## How votes work with multiple selections
Every answer the shopper selects on a multiple-select question has its votes counted. If a shopper picks three answers on a question and each assigns 1 vote to Product A, Product A accumulates 3 votes from that question alone.
This means multiple select questions can have a larger influence on the final result than single select questions — especially if answers overlap in which products they vote for. Keep this in mind when setting vote weights: you may want to use a lower weight on individual answers in a multiple select question compared to a single select question covering the same product territory.
## The "None of the above" exclusive option
Any answer on a multiple select question can be designated as the **None** option. When a shopper selects a None answer:
- All other currently selected answers are deselected
- No other answer can be combined with the None answer
- The shopper can only continue with just the None answer selected
This is useful for an answer like "None of the above", "Not sure", or "I don't have this concern" — where selecting it in combination with other answers wouldn't make sense.
To enable it, expand the answer row and toggle on the **"None" exclusive option** switch. The answer will show a **None** badge in the collapsed row. Only one answer per question can be the None option.
The None answer still has its own vote assignment — it's not the same as having no selection. For example, a "Not sure" answer might vote for all products with weight 1, gently including everything without strongly favoring anything.
The Results Screen is what shoppers see after completing the quiz — their personalised product recommendations, cart buttons, and an option to retake. Click **Results Screen** at the bottom of the question list to open it in the editor.
## Loading screen
Text shown to the shopper while results are being calculated.
**Heading** — the main line shown during the loading animation, e.g. "Finding your perfect match..."
**Subheading** — a secondary line below the heading, e.g. "Personalising your recommendations."
## Results header
The block of copy that appears above the product list on the results screen.
**Eyebrow label** — a small label shown above the heading, e.g. "Your personalised recommendation". Leave blank to hide it.
**Heading** — the main heading shown to the shopper after their results load, e.g. "Thank you, {name}." Use `{name}` to insert the shopper's first name if collected on the welcome screen.
**Subheading** — a line below the heading, e.g. "Here are your results."
**Product list label** — a small label shown above the product grid, e.g. "YOUR RECOMMENDATIONS". Leave blank to use the default.
**Order summary heading** — the heading shown above the order summary panel, e.g. "Order summary".
**Empty cart message** — text shown inside the order summary when no products have been added to cart yet.
## Results
**Max products shown** — how many recommended products to display. Between 1 and 20. Recommended: 3–8.
## Cart buttons
Controls which action buttons appear on each product card.
**Show Add to cart** — displays an "Add to cart" button on each product. When enabled, set the button text and the text shown after a product is added (e.g. "Added").
**Show Checkout button** — displays a checkout button. When enabled, set its label text.
**Products with options** — when a recommended product has options (Shopify variants, WooCommerce variations), the shopper picks one in the order summary. After picking, an **Add another option** link lets them buy more than one option of the same product (for example a red and a black shirt). Each option is its own line with its own quantity, and every line is added to the store cart. Choosing an option that's already in the summary adds to that line's quantity. This works on every quiz with no setup.
**Show View cart button** — displays a link to open the cart. When enabled, set its label text.
**Auto-add all to cart on load** — automatically adds every recommended product to the shopper's cart as soon as the results screen appears. Use with care — most merchants leave this off.
## No results fallback
Controls what happens when the voting engine produces no eligible products (for example, if filters eliminate everything).
**Relax last filter** — removes the most recently applied filter and shows the closest matches from the broader product pool.
**No results message** — shows a custom message only. When selected, a text field appears to set the message, e.g. "We couldn't find a perfect match. Try adjusting your answers."
**Prompt to retake** — invites the shopper to try the quiz again.
## After results
**Show retake button** — displays a "Retake quiz" link below the product list. When enabled, you can customise the button text.
**Show account prompt** — marked *Coming soon*; it can't be switched on yet.
## Email results
**Send results to shopper's email** — emails each shopper their recommended products after they complete the quiz (only shoppers who gave an email). When on, set the **Email subject line** (default: "Your personalised recommendations"). Requires the Starter plan or above and a connected [Resend](https://docs.shopper-quiz.com/integrations/resend) account — until Resend is connected, the card shows a link to the Integrations page instead. The email's design is set on the [Email Template](https://docs.shopper-quiz.com/quiz-builder/email-template) page.
## Subscriptions
**Offer subscribe & save on results** — gives each recommended product that has a subscription plan a *One-time / Subscribe & save* choice with your delivery frequencies. Works with Recharge, Shopify Subscriptions, Skio, Loop and other subscription apps on Shopify, and WooCommerce Subscriptions. Off by default; Starter plan and above. When on, choose the option selected by default, the savings badge and the labels. See [Subscriptions](https://docs.shopper-quiz.com/integrations/subscriptions) for setup.
## Product reviews
**Show star ratings on results** — shows each recommended product's star rating and review count from your reviews app (Judge.me, Yotpo, Loox, Okendo, Stamped and others) or WooCommerce reviews. Off by default; all plans. When on, choose the review count style, the position on the card, the minimum number of reviews, whether to show products without reviews, the **Top rated** badge and **Break ties by rating**. The **Reviews style** card sets star size and colours, rating text and badge colours (empty fields follow your quiz theme). See [Product reviews](https://docs.shopper-quiz.com/integrations/product-reviews) for setup.
## Style settings
The results screen has extensive typography and colour controls for every element. These are all independent — you can style each section without affecting others.
**Heading typography** — font family, weight, size (desktop + mobile), color, and text transform for the main "Thank you" heading.
**Subheading typography** — same controls for the line below the heading.
**Eyebrow label typography** — font family, weight, size (desktop + mobile), color, and text transform for the small label above the heading.
**Product list label style** — font family, weight, size (desktop + mobile), color, and text transform for the label above the product grid.
**Product card** — controls the shape and image sizes of each product card:
- Card border radius and image border radius
- Desktop image height and width
- Mobile image height and width (leave width blank to fill available space automatically)
- Card background color and border color
**Product name** — font family, weight, size (desktop + mobile), color, and text transform for the product name on each card.
**Tag / collection label** — **Show tags on product card** (on by default) plus typography for the small tag or collection label shown on each product card.
**Subscription options style** — colours and fonts for the One-time / Subscribe & save choice (shown when subscriptions are on). Empty fields follow your quiz theme.
**Reviews style** — star size and colours, rating text and badge colours (shown when star ratings are on).
**Description** — typography for the product description text on each card.
**Price style** — font family, weight, size (desktop + mobile), and color for the product price.
**Add to cart button style** — full styling for the add to cart button: background, text color, border color and width, border radius, font size, font weight, text transform, and padding X/Y. Separate controls for normal, hover, and active/added states.
**View cart button style** — background, text color, border color and width, border radius, font size, font weight, padding Y, and text transform. Normal and hover states.
**Checkout button style** — same controls as the view cart button. Normal and hover states.
**Retake button style** — color and text transform for the retake link.
**Order summary heading style** — font family, weight, size (desktop + mobile), color, and text transform.
**Empty cart message style** — font family, size (desktop + mobile), and color.
**Order summary item name style** — font family, weight, size (desktop + mobile), and color.
**Order summary item price style** — font family, weight, size (desktop + mobile), and color.
**Order summary quantity style** — font family, weight, size (desktop + mobile), and color.
**Order summary subtotal label style** — font family, weight, size (desktop + mobile), and color.
**Order summary subtotal value style** — font family, weight, size (desktop + mobile), and color.
## Saving
Click **Save changes** in the sticky bar at the bottom. Changes are not saved automatically.
The Email Template page controls the appearance and content of every results email sent from your store via Resend. Go to **Email Template** in the sidebar to configure it. You must have Resend connected before emails will be sent — see [Resend integration](https://docs.shopper-quiz.com/integrations/resend).
## Logo
Controls what appears at the top of the email in the header area.
**Logo** — paste a public URL pointing to your logo image into the field. PNG or SVG recommended, max 2 MB. The logo is displayed at up to 180px wide and 40px tall, maintaining aspect ratio.
**Upload** — click **Upload** to upload a logo file directly from your computer. Once uploaded, the logo appears in the header preview. You can click **Replace** to swap it for a different file, **Remove** to clear it, or **Use a URL instead** to switch back to entering a link manually.
If no logo is set, the store name is displayed as plain text in the header instead.
## Accent color
The primary brand color used for buttons and links inside the email. Defaults to `#6366f1`. Click the color swatch or type a hex value to change it.
## Intro message
The paragraph of copy shown below the greeting at the top of the email body. Defaults to:
> Based on your quiz answers, here are your personalised product recommendations.
Leave blank to use the default.
## Show / hide sections
These toggles control which sections appear in the email.
**Product images** — displays the product image thumbnail on each product row. On by default.
**Product prices** — displays the product price below the product name. On by default.
**View product button** — displays a button on each product row linking directly to the product page on your store. On by default. When enabled, you can customise the button text (default: "View product").
**Retake quiz link** — displays a "Retake quiz" link at the bottom of the email. On by default. When enabled, you can set a **Retake URL** — the link shoppers are taken to when they click it. If left blank, the link goes to your store's homepage. Set it to your quiz embed page URL so shoppers land directly on the quiz.
## Footer text
Small print text shown at the very bottom of the email below a divider. Use this for your store address, unsubscribe notice, or any legal text. Leave blank to hide the footer entirely.
## Preview
The right side of the page shows a live preview of the email as you edit. It uses example product data to show how product rows will appear. The preview reflects all toggle states, colors, and text changes in real time.
The preview is a close approximation — minor rendering differences may appear between email clients (Gmail, Apple Mail, Outlook, etc.) since each handles HTML email slightly differently.
## Saving
Click **Save template** in the top-right corner. The template applies to all result emails sent from your store, across all quizzes.
## Per-quiz email subject
The email subject line is set per quiz, not in the template. To change it:
1. Open the quiz in the **Quiz Builder**
2. Click **Results Screen** at the bottom of the question list
3. Scroll to the **Email results** card
4. Edit the **Email subject line** field
5. Click **Save changes**
## Product links in the email
Each product's **View product** button links to the product's page on your store. For Shopify stores the URL is `yourstore.com/products/product-handle`. For WooCommerce stores it is `yourstore.com/product/product-slug`.
Links are constructed from the product data synced from your store. If a product has no handle or slug, the button links to `#` (no destination). Make sure your products are synced and have handles/slugs set in your store.
Custom CSS lets you inject raw CSS into your quiz widget to style it exactly the way you want — beyond what the built-in style editors offer. Available on the **Starter plan and above**.
## Where to find it
There are two ways to reach the Custom CSS editor:
1. **Sidebar → Custom CSS** — shows all your quizzes. Click one to open its builder with the CSS editor pre-selected.
2. **Quiz Builder → left panel → Custom CSS** — the last item in the question list, below Results Screen.
## How it works
Your CSS is saved per quiz and injected as a `